Battlefields: Difference between revisions
Jump to navigation
Jump to search
No edit summary |
No edit summary |
||
| Line 2: | Line 2: | ||
{| class="wikitable" | {| class="wikitable" | ||
|+ Low 5 ([[Shami|Clotho Orb]]) | |+ Low 5 ([[Shami|Clotho Orb]]) | ||
! scope="row" colspan="1" | [[Legion XI]] | ! scope="row" colspan="1" | [[Legion XI]] || scope="row" colspan="1" | [[Wild Wild Whiskers]] || scope="row" colspan="1" | [[Prehistoric Pigeons]] || scope="row" colspan="1" | [[Double Draconian]] || scope="row" colspan="1" | [[Let Sleeping Dogs Lie]] | ||
|- | |- | ||
| [[File:Legion XI.jpg|frameless|center|120px|link=[[Legion XI]]]] | | [[File:Legion XI.jpg|frameless|center|120px|link=[[Legion XI]]]] || [[File:Wild Wild Whiskers.jpg|frameless|center|120px|link=[[Wild Wild Whiskers]]]] || [[File:Prehistoric Pigeons.jpg|frameless|center|120px|link=[[Prehistoric Pigeons]]]] || [[File:Double Dragonian.jpg|frameless|center|120px|link=[[Double Draconian]]]] || [[File:Hound.jpg|frameless|center|120px|link=[[Let Sleeping Dogs Lie]]]] | ||
|- | |- | ||
|} | |} | ||
| Line 10: | Line 10: | ||
{| class="wikitable" | {| class="wikitable" | ||
|+ High 5 ([[Shami|Lachesis Orb]]) | |+ High 5 ([[Shami|Lachesis Orb]]) | ||
! scope="row" colspan="1" | [[Royal Succession]] | ! scope="row" colspan="1" | [[Royal Succession]] || scope="row" colspan="1" | [[Eye of the Storm]] || scope="row" colspan="1" | [[Brothers Du'Arphe]] || scope="row" colspan="1" | [[Operation Desert Swarm]] || scope="row" colspan="1" | [[Eye of the Tiger]] | ||
|- | |- | ||
| [[File:Royal Succession.png|frameless|center|50px|link=[[Royal Succession]]]] | | [[File:Royal Succession.png|frameless|center|50px|link=[[Royal Succession]]]] || [[File:Eye of the Storm.jpg|frameless|center|120px|link=[[Eye of the Storm]]]] || [[File:Brothers D'Aurphe.jpg|frameless|center|120px|link=[[Brothers D'Aurphe]]]] || [[File:Operation Desert Swarm.jpg|frameless|center|120px|link=[[Operation Desert Swarm]]]] || [[File:Eye of the Tiger.jpg|frameless|center|120px|link=[[Eye of the Tiger]]]] | ||
|- | |- | ||
|} | |} | ||
| Line 19: | Line 19: | ||
{| class="wikitable" | {| class="wikitable" | ||
|+ Big 3 ([[Shami|Themis Orb]]) | |+ Big 3 ([[Shami|Themis Orb]]) | ||
! scope="row" colspan="1" | [[Early Bird Catches the Wyrm]] | ! scope="row" colspan="1" | [[Early Bird Catches the Wyrm]] || scope="row" colspan="1" | [[Horns of War]] || scope="row" colspan="1" | [[Hills are Alive]] | ||
|- | |- | ||
| [[File:Early Bird Catches the Wyrm.png|frameless|center|200px|link=[[Early Bird Catches the Wyrm]]]] | | [[File:Early Bird Catches the Wyrm.png|frameless|center|200px|link=[[Early Bird Catches the Wyrm]]]] || [[File:Horns of War.png|frameless|center|200px|link=[[Horns of War]]]] || [[File:Hills are Alive.png|frameless|center|200px|link=[[Hills are Alive]]]] | ||
|- | |- | ||
|} | |} | ||
| Line 28: | Line 28: | ||
{| class="wikitable" | {| class="wikitable" | ||
|+ Base Primals (Tuning Forks) | |+ Base Primals (Tuning Forks) | ||
! scope="row" colspan="1" | [[Trial by Wind]] | ! scope="row" colspan="1" | [[Trial by Wind]] || scope="row" colspan="1" | [[Trial by Lightning]] || scope="row" colspan="1" | [[Trial by Ice]] | ||
|- | |- | ||
| [[File:Trial By Wind.jpg|frameless|center|200px|link=[[Trial of Wind]]]] | | [[File:Trial By Wind.jpg|frameless|center|200px|link=[[Trial of Wind]]]] || [[File:Trial by Lightning.jpg|frameless|center|200px|link=[[Trial of Lightning]]]] || [[File:Trial by Ice.jpg|frameless|center|200px|link=[[Trial by Ice]]]] | ||
|- | |- | ||
! scope="row" colspan="1" | [[Trial by Fire]] | ! scope="row" colspan="1" | [[Trial by Fire]] || scope="row" colspan="1" | [[Trial by Earth]] || scope="row" colspan="1" | [[Trial by Water]] | ||
|- | |- | ||
| [[File:Trial by Fire.jpg|frameless|center|200px|link=[[Trial by Fire]]]] | | [[File:Trial by Fire.jpg|frameless|center|200px|link=[[Trial by Fire]]]] || [[File:Trial by Earth.jpg|frameless|center|200px|link=[[Trial by Earth]]]] || [[File:Trial by Water.jpg|frameless|center|200px|link=[[Trial by Water]]]] | ||
|- | |- | ||
|} | |} | ||
| Line 40: | Line 40: | ||
{| class="wikitable" | {| class="wikitable" | ||
|+ Advanced Primals | |+ Advanced Primals | ||
! scope="row" colspan="1" | [[The Moonlit Path]] | ! scope="row" colspan="1" | [[The Moonlit Path]] || scope="row" colspan="1" | [[Waking the Beast]] || scope="row" colspan="1" | [[Waking Dreams]] | ||
|- | |- | ||
| [[File:The Moonlit Path.jpg|frameless|center|200px|link=[[The Moonlit Path]]]] | | [[File:The Moonlit Path.jpg|frameless|center|200px|link=[[The Moonlit Path]]]] || [[File:Waking the Beast.jpg|frameless|center|120px|link=[[Waking the Beast]]]] || [[File:Waking Dreams.jpg|frameless|center|250px|link=[[Waking Dreams]]]] | ||
|- | |- | ||
|} | |} | ||
| Line 48: | Line 48: | ||
{| class="wikitable" | {| class="wikitable" | ||
|+ Avatar Kings | |+ Avatar Kings | ||
! scope="row" colspan="1" | [[Divine Interference]] | ! scope="row" colspan="1" | [[Divine Interference]] || scope="row" colspan="1" | [[A Stygian Pact]] || scope="row" colspan="1" | [[Champion of the Dawn]] | ||
|- | |- | ||
| [[File:Divine Interference.jpg|frameless|center|250px|link=[[Divine Interference]]]] | | [[File:Divine Interference.jpg|frameless|center|250px|link=[[Divine Interference]]]] || [[File:A Stygian Pact.jpg|frameless|center|250px|link=[[A Stygian Pact]]]] || [[File:Champion of the Dawn.jpg|frameless|center|250px|link=[[Champion of the Dawn]]]] | ||
|- | |- | ||
|} | |} | ||
| Line 57: | Line 57: | ||
{| class="wikitable" | {| class="wikitable" | ||
|+ Ark Angels | |+ Ark Angels | ||
! scope="row" colspan="1" | [[Ark Angel Mithra]] | ! scope="row" colspan="1" | [[Ark Angel Mithra]] || scope="row" colspan="1" | [[Ark Angel Hume]] || scope="row" colspan="1" | [[Ark Angel Elvaan]] || scope="row" colspan="1" | [[Ark Angel Taru Taru]] || scope="row" colspan="1" | [[Ark Angel Galka]] | ||
|- | |- | ||
| [[File:Ark_Angel_Mithra.png|frameless|center|120px|link=[[Ark Angel Mithra]]]] | | [[File:Ark_Angel_Mithra.png|frameless|center|120px|link=[[Ark Angel Mithra]]]] || [[File:Ark_Angel_HM.png|frameless|center|120px|link=[[Ark Angel Hume]]]] || [[File:Ark_Angel_Elvaan.png|frameless|center|120px|link=[[Ark Angel Elvaan]]]] || || [[File:Ark_Angel_Taru_Taru.png|frameless|center|120px|link=[[Ark Angel Taru Taru]]]] || [[File:Ark_Angel_Galka.png|frameless|center|120px|link=[[Ark Angel Galka]]]] | ||
|- | |- | ||
! scope="row" colspan=" | ! scope="row" colspan="5" | [[Divine Might]] | ||
|- | |- | ||
| scope="row" colspan=" | | scope="row" colspan="5" | [[File:Divine Might.jpg|frameless|center|300px|link=[[Divine Might]]]] | ||
|} | |} | ||
{| class="wikitable" | {| class="wikitable" | ||
Revision as of 20:53, 2 July 2021
KSNM
| Legion XI | Wild Wild Whiskers | Prehistoric Pigeons | Double Draconian | Let Sleeping Dogs Lie |
|---|---|---|---|---|
 |
 |
 |
 |
 |
| Royal Succession | Eye of the Storm | Brothers Du'Arphe | Operation Desert Swarm | Eye of the Tiger |
|---|---|---|---|---|
 |
 |
 |
 |
 |
| Early Bird Catches the Wyrm | Horns of War | Hills are Alive |
|---|---|---|
 |
 |
 |
Avatar Fights
| Trial by Wind | Trial by Lightning | Trial by Ice |
|---|---|---|
 |
 |
 |
| Trial by Fire | Trial by Earth | Trial by Water |
 |
 |
 |
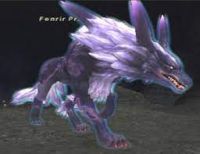
| The Moonlit Path | Waking the Beast | Waking Dreams |
|---|---|---|
 |
 |
 |
| Divine Interference | A Stygian Pact | Champion of the Dawn |
|---|---|---|
 |
 |
 |
High Tier (Phantom Gems)
| Ark Angel Mithra | Ark Angel Hume | Ark Angel Elvaan | Ark Angel Taru Taru | Ark Angel Galka | |
|---|---|---|---|---|---|
 |
 |
 |
 |
 | |
| Divine Might | |||||
 | |||||
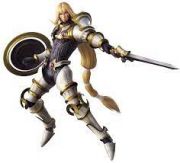
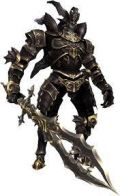
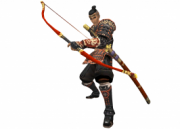
| Return to Delkfutt's Tower | Shadow Lord | One to be Feared | The Warrior's Path | |||
|---|---|---|---|---|---|---|
 |
 |
 |
 | |||
| The Celestial Nexus | The Savage | |||||
 |
 |