Trust Magic: Difference between revisions
Barthandalus (talk | contribs) |
Barthandalus (talk | contribs) No edit summary |
||
| Line 26: | Line 26: | ||
== '''Available Trusts''' == | == '''Available Trusts''' == | ||
* Below is a list of trusts that are available currently on Caldera. <br> | * Below is a list of trusts that are available currently on Caldera. <br> | ||
* '''<big><big>NOTE:</big> Tier 3 trusts have upgraded stats and abilities. These will all require you reach [[Progression Guide|Superior level 2]] in order to obtain them.</big></big>''' | |||
{| class="mw-collapsible mw-collapsed wikitable" style="text-align: center" width="1200px;" | {| class="mw-collapsible mw-collapsed wikitable" style="text-align: center" width="1200px;" | ||
Latest revision as of 11:23, 23 July 2025
Introduction
What is a trust?
- Non player characters that fight along side you and assist in filling party mechanics traditionally associated with MMORPGs.
How do I get Trusts?
- Players will unlock the base set of trusts by clicking on the Institutions book on the wall in the Library or by using the !addalltrusts command and zoning.
How are Trusts used?
- Trusts are a nice Caldera feature early on and are meant to ease the burden of your leveling climbs, farming needs, and initial ilvl gear acquisitions.
- Trusts will become increasingly less effective after reaching ilvl119 and will in many cases be useless other than supports.
- This is done intentionally to encourage teaming up with other players and challenging difficult combat for the more rewarding content later on.
Can I get more Trusts?
- These base trusts are the only available trusts on Caldera initially, and players will be unable to get more trusts through their retail acquisition path.
- When new trusts are released, this page will be updated and a notification will be sent out via the updates channel on the server discord.
- New trusts may be given freely or placed behind a content clear based on staff discretion.
Trust Slot Progression
You will start with 3 trust slots.
The 4th trust slot will be unlocked by killing all Sea/Sky lower NM's or all Abyssea T1 Zone Bosses.
Sky NM's: Olla Grande, Zipacna, Brigandish Blade, Faust, Mother Globe, Steam Cleaner, Ullikummi, Despot
Sea NM's: Jailer of Temperance, Ix'Aern MNK, Jailer of Fortitude, Ix'Aern DRK, Jailer of Faith, Ix'Aern DRG
Abyssea T1 NM's: Kukulkan, Briareus, Glavoid
The 5th trust slot will be unlocked when both the Sea/Sky lower NM's and all Abyssea T1 Zones Bosses have been defeated.
Available Trusts
- Below is a list of trusts that are available currently on Caldera.
- NOTE: Tier 3 trusts have upgraded stats and abilities. These will all require you reach Superior level 2 in order to obtain them.
| Tier 1 Tank Trusts | |||
|---|---|---|---|
| Trust | Job / Type | Acquisition Path | |
| Valaineral | PLD/WAR - Tank | Free from Institutions | |
| Rahal | PLD/WAR - Tank | Free from Institutions | |
| Trion | PLD/WAR - Tank | Free from Institutions | |
| Excenmille | PLD - Tank/DPS | Free from Institutions | |
| Gessho | NIN/WAR - Tank/DPS | Free from Institutions | |
| Amchuchu | RUN/WAR - Tank | Acquired by defeating NSANM Buarainech | |
| Halver | PLD - off TANK | Acquired by Trading a Relic Lance to His NPC in Chateau d'Oraguille | |
| Tier 2 Tank Trusts | |||
|---|---|---|---|
| Trust | Job / Type | Acquisition Path | |
| AAEV | PLD/WHM - Tank/Support | Acquired by completing Ark Angel Elvaan Battlefield Rezone after completion. | |
| AAHM | NIN/WAR - Tank/DPS | Acquired by completing Ark Angel Hume Battlefield Rezone after completion. | |
| Mnejing | PLD/WAR - Tank | Acquired by defeating Gurfurlur the Menacing. | |
| August | PLD/WAR - Tank | Acquired by defeating him in Sinister Reign: Waughroon Shrine | |
 |
** Zeid ** RUN/DRK A step above Amchuchu Prioritizes Enmity tools and runes |
Acquired after defeating Ouryu | |
| Tier 3 Tank Trusts | |||
|---|---|---|---|
| Trust | Job / Type | Acquisition Path | |
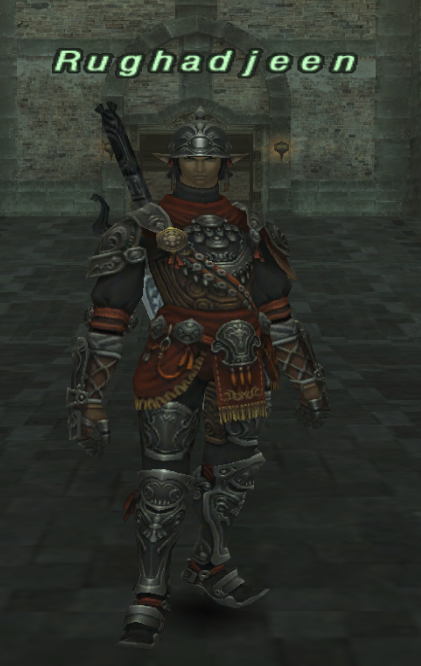 |
RUN/BLU - Tank | Acquired by completing General Rughadjeen's Beseiged Be sure to click the general again after receiving the victory message and rezone. | |
 |
** Curilla ** PLD/BLU Behaves just like a Player Tank Prioritizes Enmity and heals |
spell will unlock after defeating Proto-Omega | |
 |
** Aldo ** High Tier NIN Will replenish shadows before they expire Uses enmity spells |
This trust will be acquired by killing Proto-Ultima | |
| Tier 1 Healer Trusts | |||
|---|---|---|---|
| Trust | Job / Type | Acquisition Path | |
| Apururu (UC) | WHM/RDM - Healer | Free from Institutions | |
| Kupipi | WHM - Healer | Free from Institutions | |
| Yoran-Oran (UC) | WHM/BLM - Healer | Free from Institutions | |
| Mihli Aliapoh | WHM - Healer | Free from Institutions | |
| Cherukiki | WHM - Healer | Free from Institutions | |
| Pieuje (UC) | WHM - Healer | Free from Institutions | |
| Ferreous Coffin | WHM/WAR - Healer | Acquired by defeating Fear Gorta | |
| Karaha-Baruha | WHM/SMN - Healer | Acquired by completing The Moonlit Path | |
| Tier 2 Healer Trusts | |||
|---|---|---|---|
| Trust | Job / Type | Acquisition Path | |
 |
** Mildaurion ** Caldera's super SCH! Utilizes Regen over Cures. Uses Sublimation as needed. |
This trust will be acquired by killing Za'Dha Adamantking | |
| Tier 3 Healer Trusts | |||
|---|---|---|---|
| Trust | Job / Type | Acquisition Path | |
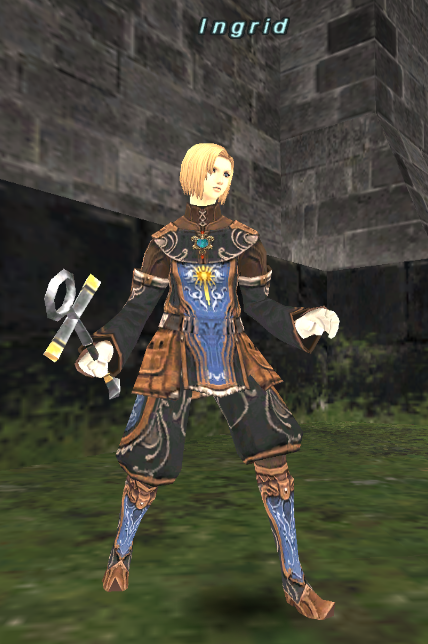 |
** Ingrid II ** Caldera's super WHM! Behaves like our existing WHM, but utilizes MP recovery tools better. Uses Martyr and Devotion as needed. |
This trust will be acquired by killing her in Sinister Reign: Waughroon Shrine | |
| Tier 1 Support Trusts | |||
|---|---|---|---|
| Trust | Job / Type | Acquisition Path | |
| Koru-Moru | RDM/WHM - Support | Free from Institutions | |
| Joachim | BRD/WHM - Support | Free from Institutions | |
| Sylvie (UC) | GEO/WHM - Support | Free from Institutions | |
| Nashmeira II | WHM - Support | Free from Institutions | |
| Nashmeira | PUP/WHM - SUPPORT | Free from Institutions | |
| Qultada | COR - SUPPORT | Free from Institutions | |
| Kupofried Kuyin Hathdenna Moogle Sakura Star Sibyl |
Special Supports | Acquired by trading the Empress Hairpin from Valkurm Emperor and 50 Merits to the Artisan Moogle in Southern Sandoria. NOTE:due to some limitations, some of their Auras only apply when engaged, but will disappear when you zone or dismiss them. NOTE2: Kupofried's dedication bonus does NOT stack with exp bonus rings; however, his dedication bonus is 150% which compensates for the difference (and a little extra) you can use !killexp to drop your ring bonus, then summon Kupofried to get his larger bonus. | |
| Fablinix | THF - Support | acquired my killing Quicktrix Hexhands NOTE: due to support job limitations he does not cast stun, but instead will alternate two weaponskill groups. Group 1: Goblin Rush / Bomb Toss (careful he has butterfingers occasionally) Group 2: Damage/Stun/Tp 0/Dispel Dice rolls | |
| Tier 2 Support Trusts | |||
|---|---|---|---|
| Trust | Job / Type | Acquisition Path | |
| Ygnas | WHM - Support | Acquired by defeating her in Sinister Reign: Balga's Dais | |
| Selh'teus | Emo Kid - DPS/Support | Acquired by defeating his DNANM | |
| King of Hearts | RDM - Support | Acquired by winning 10 games of BlackJack in the Colosseum in Aht Urhgan Enter by clicking on Giehnz | |
| Mumor Mumor II |
DNC - Support BLM - DPS |
THIS IS A SOLO FIGHT! Defeat Ullegore in the same Battlefield that rewards Ullegore while keeping Mumor alive until he dies. You will receive a System message when they are added. | |
| Lilisette Lilisette II |
DNC - Support |
Talk to Laila in upper Jeuno to receive a quest. | |
| Monberaux | Chemist | Acquired by trading 1 million gil to him upper Jeuno. Will not have all his potions initially and requires you to complete Monberaux's Requests to unlock his advanced medicines. | |
 |
★ Brygid ★ Caldera's custom Shapeshifter! Once combat begins she will change into the various Avatar Primes and buff the party and DPS ● Garuda - Blink & Haste ● Titan - Stoneskin ● Ramuh - Enthunder ● Shiva - Freeze II ● Diabolos - Phalanx ● Fenrir - Comet ● Ifrit - Flare II ● Leviathan - Flood II ● If a party member drops below 20% HP she will transform into Alexander and give Perfect Defense This will take all but 1 HP from her, and make her killable. (once per battle) ● If a party member is inflicted with doom, she will transform into Odin and use Zantetsuken. This will kill her instantly and do massive damage. |
To obtain this trust you must defeat Carbuncle Prime! Complete Waking the Beast BCNM and refresh your trust lists by rezoning and casting one. | |
| Tier 3 Support Trusts | |||
|---|---|---|---|
| Trust | Job / Type | Acquisition Path | |
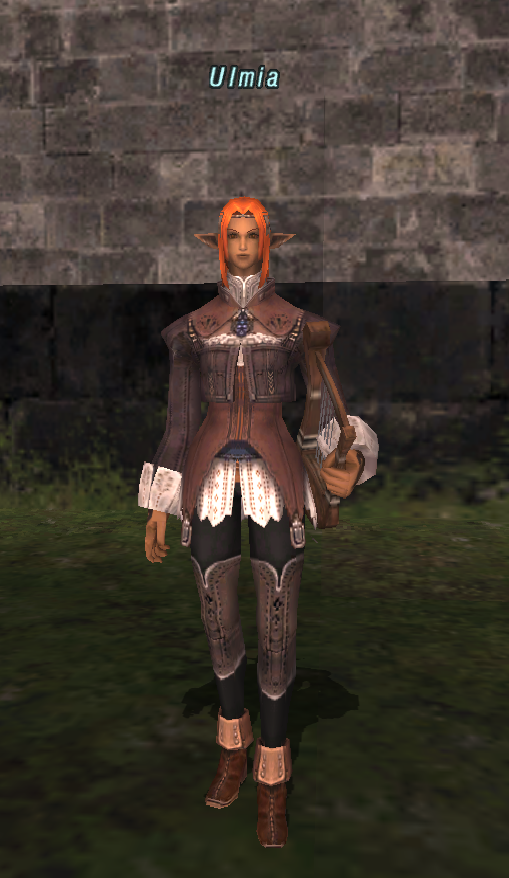 |
★ Ulmia ★ ● Ulmia has been customized to do individual songs based on party job type |
Acquired by defeating Vrtra | |
 |
★ Naja Salaheem ★ ● Naja is a Caldera custom DNC/NIN |
Acquired by defeating Tiamat | |
 |
★ Chacharoon ★ ● Chacharoon is the cutest thing on the server. |
Acquired by defeating Cheese Hoarder Gigiroon | |
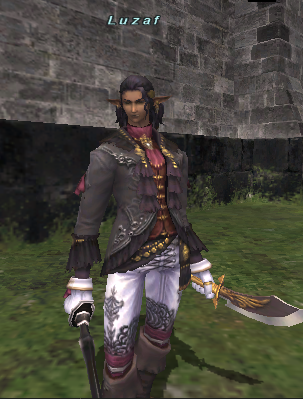 |
★ Luzaf ★ ● Luzaf is a Caldera custom COR/NIN |
Acquired by defeating Tom Tit Tat | |
| Tier 1 DPS Trusts | |||
|---|---|---|---|
| Trust | Job / Type | Acquisition Path | |
| Shantotto | BLM - DPS | Free from Institutions | |
| Ajido-Marujido | BLM/WAR - DPS | Free from Institutions | |
| Adelheid | SCH/BLM - DPS | Free from Institutions | |
| Ayame | SAM - DPS | Free from Institutions | |
| Iron Eater | WAR - DPS | Free from Institutions | |
| Volker | WAR - DPS | Free from Institutions | |
| Zeid II | DRK/WAR - DPS | Free from Institutions | |
| Nanaa Mihgo | THF - DPS - Has TH 4 | Free from Institutions | |
| Maat | MNK/THF - DPS | Free from Institutions | |
| Tenzen | SAM - DPS | Free from Institutions | |
| Semih Lafihna | RNG/WAR - DPS | Free from Institutions | |
| Shantotto II | BLM/WHM - DPS | Free from Institutions | |
| Shikaree Z | DRG/WHM - DPS | Free from Institutions | |
| Elivira | RNG/WAR- DPS ★★Customized★★ | Free from Institutions | |
| Naji | WAR - DPS | Free from Institutions | |
| Klara | WAR - DPS | Free from Institutions | |
| Prishe | MNK - DPS | Free from Institutions | |
| Prishe II | MNK - DPS | Free from Institutions | |
| Ovjang | RDM/BLM - DPS | Free from Institutions | |
| Leonoyne | BLM/PLD - DPS | Acquired by defeating Scylla | |
| Makki-Chebukki and Margret | RNG - DPS | Acquired by trading 792 Chapuli Arrows to Ranger NPC Perih Vashai | |
| Tenzen II | SAM/RNG - DPS | Acquired by clearing The Warriors Path BCNM | |
| Kukki-Chebukki | BLM - DPS | Acquired by clearing The Warriors Path BCNM | |
| Flaviria UC | DRG - DPS | Acquired by caressing Drogagora’s Tail | |
| Robel-Akbel | BLM/SMN - DPS | Acquired by Defeating Ixtab | |
| Balamor | DRK - DPS | Acquired by trading a Magicked Skull to the Infernal Transposer in Ra'Kaznar Inner Courts Be prepared to fight. | |
| Lhu Mhakaracca | BST - DPS | She's agreed to join you if you kill 100 wild rabbits.(W. Ron) | |
| Areuhat | WAR - DPS | Find her in the past and trade her a Relic Sword and she will join you. | |
| Romaa Mihgo | THF - DPS | acquired by completing Making a Mockery BCNM | |
| Lion Lion II |
THF - DPS | Acquired by completing Return to Delkfutt's Tower | |
| Aldo UC | THF - DPS | Acquired by Trading A Thief's Testimony to Aldo | |
| Jakoh UC | THF - DPS | Acquired by Trading A Thief's Knife to Aldo | |
| Noillurie | SAM - DPS | Acquired by killing Hahava | |
| Gilgamesh | SAM - DPS | Acquired by killing Hahava NOTE: Gilgamesh was missing skills so He now has ALL of the GK Weaponskills making him a great SC partner | |
| Mayakov | DNC - DPS | Acquired by talking to the bartender at Lion Springs Tavern. Dance for locals. 5% chance your moves attract a new member | |
| Uka Totlihn | DNC - DPS | Acquired by talking to the bartender at Lion Springs Tavern. Dance for locals. 5% chance your moves attract a new member | |
| Mumor Mumor II |
DNC - Support BLM - DPS |
THIS IS A SOLO FIGHT! Defeat Ullegore in the same Battlefield that rewards Ullegore while keeping Mumor alive until he dies. You will receive a System message when they are added. | |
| Ayame UC | SAM - DPS | Acquired after killing Gi’Pha Manameister in Dynamis - Bastok | |
| Cid | WAR - DPS Opens Skillchains Gives AOE Berserk Gives AOE Aggressor |
Acquired by trading him 100 trainee Hammers. | |
| Maat UC | MNK - DPS | Acquired by defeating Western Shadow | |
| Abquhbah | WAR - DPS | Acquired by trading 250 Imperial Bronze Pieces to him | |
| Tier 2 DPS Trusts | |||
|---|---|---|---|
| Trust | Job / Type | Acquisition Path | |
| Gadalar | BLM - DPS | Acquired by completing General Gadalar's Beseiged Be sure to click the general again after receiving the victory message and rezone. | |
| Zazarg | MNK - DPS | Acquired by completing General Zazarg's Beseiged Be sure to click the general again after receiving the victory message and rezone. | |
| Najelith | RNG - DPS | Acquired by completing General Najelith's Besieged Be sure to click the general again after receiving the victory message and rezone. | |
| AAGK | SAM/DRG - DPS | Acquired by completing Ark Angel Galka Battlefield Rezone after completion. | |
| AAMR | BST/THF - DPS | Acquired by completing Ark Angel Mithra Battlefield Rezone after completion. | |
| AATT | BLM/DRK - DPS | Acquired by completing Ark Angel Taru Taru Battlefield Rezone after completion. | |
| Rosulatia | BLM/DRK - DPS | Acquired by defeating her in Sinister Reign: Waughroon Shrine | |
| Darrcuiln | BEAST - DPS | Acquired by defeating him in Sinister Reign: Horlais Peak | |
| Morimar | WAR - DPS | Acquired by defeating him in Sinister Reign: Horlais Peak | |
| Teodor | BLM/DRK - DPS | Acquired by defeating him in Sinister Reign: Balga's Dais | |
| Arciela II Arciela |
RDM/BLM - DPS | Acquired by defeating her in Sinister Reign: Balga's Dais | |
| Ingrid | WHM - MELEE ONRY | Acquired by donating 100k to one of the Church goers in the Northern Sandora Cathedral. I forgot which one. ;) | |
| Babban | MNK - DPS | Acquired by Defeating Chloris | |
| Abenzio | MNK - DPS | Acquired by defeating the Ancient Goobbue In Boy Tree. Respawn has been changed to 1 hour. DPS will be required. | |
| Maximilian | THF - TH4 | Acquired by defeating Lobias | |
| Kayeel-Payeel | BLM - DPS | Acquired by defeating Luaith | |
 |
** Rainemard ** Caldera's custom spellblade! Will enspell at random, self buff, and mildly enfeeble Very good for consistent elemental damage. |
Use !addalltrusts command and rezone. OR Touch the Institutions shelf in the Library | |
 |
** Rongelouts ** Caldera's custom BLU! Will buff self and party, and drop classic BLU weaponskills and physical spells. special modifiers to weaponskills to keep MP regenerated. |
Free from Institutions | |
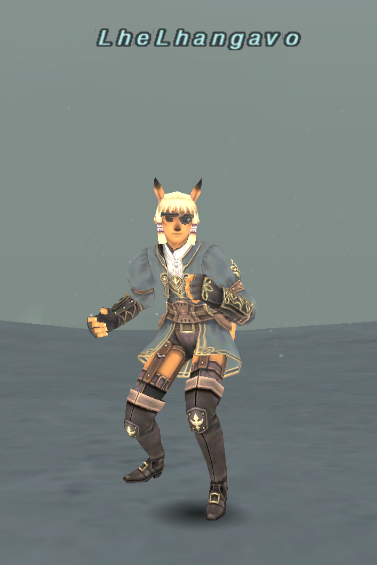 |
** Lhe Lhangavo ** Caldera's super MNK! Does all the things a player monk should do. Has full invigorate, empowered Chi-blast, high counter rate and damage, MANTRA! Very efficient physical DPS |
This trust will be acquired by killing Balor | |
 |
** Invincible Shield ** Caldera's super WAR! Hits the mobs with all 4 warrior great axe break debuffs Uses varios Sam Sub abilities, such as Hasso, and meditate, all the classic warrior abilities. If he gains hate, he will use seigan and third eye along with retaliation. |
This trust will be acquired by killing Caithlean | |
| Lehko Habhoka | THF/BLM - DPS | Acquired by defeating his DNANM This version adds TH7, uses feint, bully, Larceny, EXTREMELY HIGH ATTACK RATE. | |
| Excenmille (S) | War - DPS | Acquired by trading a Nativus Halberd to his older self. | |
| Naja UC | MNK - DPS | Acquired by trading 250Imperial Gold Pieces to her. | |
| Tier 3 DPS Trusts | |||
|---|---|---|---|
| Trust | Job / Type | Acquisition Path | |
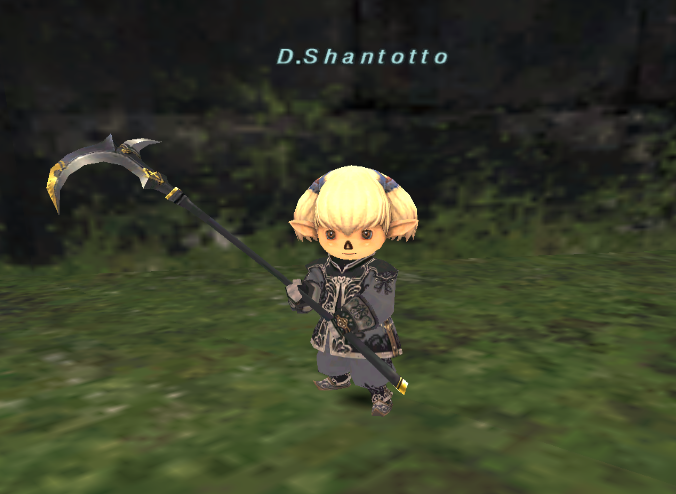 |
** Dark Shantotto ** Caldera's super DRK! Absorbs all the things! Dread Spikes, Consume Mana. |
This trust will be acquired by killing Indich | |
 |
** Matsui-P ** Caldera's super NIN! Sets up Burn on mobs to debuff, Stuns, and casts elemental / Ninjistu magic Uses Innin, Passive magic damage boosts and fast cast, as well as built in Manawall for tight situations Very efficient physical DPS, will open up and burst skill chains with powerful ease |
This trust will be acquired by killing Tikbalang | |
 |
BLM - DPS | THIS IS A SOLO FIGHT! Acquired by completion of a mini-quest, Speak to Fariska Lokhmi in East Adoulin to get started. (Go fight, win, statue is put directly in your inventory, trade it back to NPC). MASSIVE MP pool, ★Fully Customized★ acts similar to other BLM early levels At 99 will prioritize Comet, BLM Debuffs, and ancient Magic. | |
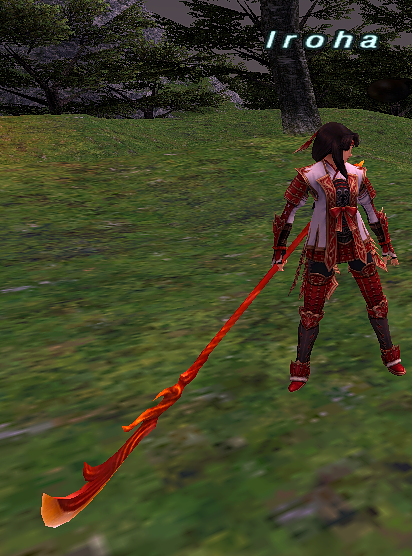 |
** Iroha ** WHM stance Will cast potent heals burst on members below 50% HP Instant casting. Will cast haste and dispel your debuffs Efficient physical DPS, will self skill chains with powerful ease will self revive 1 time per battle upon reaching 1 HP. |
This trust will be acquired by touching Sobek ??? with pop key items in possession | |
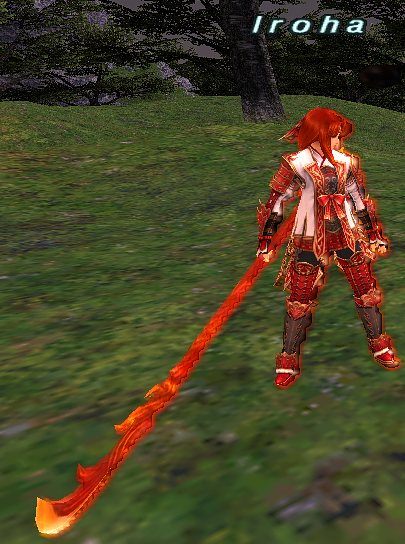 |
** Iroha II ** BLM Stance Focuses on DPS. if 3 or more members drop below 75% will use Rise from Ashes, which applies a Stoneskin, and restore some HP and MP (2 min cooldown) Efficient physical DPS, will self skill chains with powerful ease, and burst everything with flare II! will self revive 1 time per battle upon reaching 1 HP. |
This trust will be acquired by touching Karkadann ??? with pop key items in possession. | |
Combat Strategies and Application Tips
New players
- Since you will be limited to 3 trusts initially it is generally recommended to maximize DPS early on. Depending on your starting class you may choose from a few combinations.
Strategies
- I chose a Tank/Melee class.
- If this is you, you should consider using the “triplets” Shantotto/Adelheid/Aijido.
- Once you tag the mob all three will unleash a torrent of elemental spells delivering most mobs a rapid demise.
- When they get low on mp, release them and resummon for a fast early level gain.
- I chose a Caster/Support class.
- If this is you, you will use a similar tactic only swapping Ajido out for a Tank of choice to take enmity off of you initially while the mages send the mob to its grave.
- If this is you, you will use a similar tactic only swapping Ajido out for a Tank of choice to take enmity off of you initially while the mages send the mob to its grave.
I’m working on Ilvl gear.
- Once you get to 99 and begin your climb into Ilvl ranges you will notice the mobs getting much stronger with much more health.
- From this point you should be considering longevity in a fight.
- Mages will not rest when MP is depleted, so in this case you should be considering a full tank, a good healer, and a support to keep refresh up.
- Yoran, Sylvie, and Apururu will all self restore MP. Koru and Joachim will both apply refreshes and regen. This is the direction you should begin mixing and matching to maximize longevity and survivability.
I’m level 119, now what?
- First off, Congratulations. We’re in the endgame now.
- Secondly, you’re at the breaking point where trusts no longer hold their value as they did previously.
- At this point you will start challenging the more difficult Progression Guide fights such as HNM, VWNM, Battlefields, Dynamis, Besieged, Wildskeepers, Escha, etc.
- Be aware that restrictions in certain combat will disqualify Trust magic all together.
- By now you should be building up Alternative characters and multi boxing or establishing a help network with other in game players to clear content.
- Even though things are difficult you can still use trusts for support functions such as:
- Trio Tank
- This method involves a traditional tribox of a DPS/Heal/Support from the player, and 3 tanking trusts.
- The tank trusts will take turns trading enmity and healing each other while you work on killing the mob.
- This method is especially effective for mains that require heavy skill rotations and buffing.
- Typically used are Valaineral, Trion, and Rahal.
- This method involves a traditional tribox of a DPS/Heal/Support from the player, and 3 tanking trusts.
- Traditional Support
- This method involves building a full party around the player character being the main tank.
- Typically you would have your main as a Tank, an Alt as your healer, an Alt as a DPS or Treasure hunter applier.
- Beyond those you would want to call Sylvie/Joachim/Koru to keep your party buffed, enemy debuffed, and filler in between.
- More Specific Uses:
- Zeid II will stun quite a lot and can save you at random points, stopping spells and some TP moves.
- While not the greatest it can be helpful. Also consistent in holding TP and using only the Great Sword WS Ground Strike.
- Shantotto II will only cast tier 1 nukes but at a higher damage than their base spell. She is good for longer sustained fights albeit with lower dmg output.
- Learn to think outside the box:
- If you tri-box, you tend to summon trusts on your main character and use the other 2 as supporting characters for healing and buffing (or healing and TH/DPS).
- Think about summoning the trusts on a supporting character, that way if you die on your main character, you have a chance to recover. This mainly applies to harder NMs.
- Trusts can't be charmed. So when you fight NMs that like charming, JoL, Poroggos, etc., you can summon your trusts, take a swing on the mob to engage your trusts, and hang back. Works well on ranged DPS or support jobs, but can be used to slowly kill more annoying NMs on a melee class.
- This method involves building a full party around the player character being the main tank.
Final Thoughts
- If you’ve made it this far you’ve likely gotten a full taste of the content Caldera offers and understand the balance necessary to maintain these varying degrees of difficulties.
- We understand a time investment vs reward system and do our very best to provide challenging content that is fruitfully rewarding as well as matched with difficulty appropriate to the reward.
- We hope that you can fully grasp and appreciate the tireless work that goes into making all this possible.
- Happy Hunting!