HNM: Difference between revisions
Jump to navigation
Jump to search
| (4 intermediate revisions by 3 users not shown) | |||
| Line 1: | Line 1: | ||
== City Beast Tribe Leaders (119 Content)== | == City Beast Tribe Leaders (119 Content) == | ||
'''CAUTION:''' All City Beast Tribe Leaders are in areas with higher level, linking monsters. A team/alliance of 6+ player characters is recommended to fight them. | |||
{| class="wikitable" | {| class="wikitable" | ||
! scope="row" colspan="1" | [[Overlord Bakgodek]] || scope="row" colspan="1" | [[Za'Dha Adamantking]] || scope="row" colspan="1" | [[Tzee Xicu the Manifest]] | ! scope="row" colspan="1" | [[Overlord Bakgodek]] || scope="row" colspan="1" | [[Za'Dha Adamantking]] || scope="row" colspan="1" | [[Tzee Xicu the Manifest]] | ||
| Line 8: | Line 10: | ||
|} | |} | ||
== ToAU Beast Tribe Leaders (119 Content)== | == ToAU Beast Tribe Leaders (119 Content) == | ||
'''CAUTION:''' All ToAU Beast Tribe Leaders spawn with at least 2 additional monsters. A team/alliance of 6+ player characters is recommended to fight them. | |||
{| class="wikitable" | {| class="wikitable" | ||
! scope="row" colspan="1" | [[Medusa]] || scope="row" colspan="1" | [[Gulool Ja Ja]] || scope="row" colspan="1" | [[Gurfurlur the Menacing]] | ! scope="row" colspan="1" | [[Medusa]] || scope="row" colspan="1" | [[Gulool Ja Ja]] || scope="row" colspan="1" | [[Gurfurlur the Menacing]] | ||
| Line 16: | Line 21: | ||
|} | |} | ||
== | == Wildskeeper Naakual (119+ Content)== | ||
{| class="wikitable" | {| class="wikitable" | ||
! scope="row" colspan="1" | [[Colkhab]] || scope="row" colspan="1" | [[Tchakka]]|| scope="row" colspan="1" | [[Achuka]] | ! scope="row" colspan="1" | [[Colkhab]] || scope="row" colspan="1" | [[Tchakka]]|| scope="row" colspan="1" | [[Achuka]] | ||
| Line 35: | Line 40: | ||
| [[File:King_Behemoth.jpg|frameless]] || [[File:Nidhogg.jpg|frameless]] || [[File:Aspidochelone.jpg|frameless]] | | [[File:King_Behemoth.jpg|frameless]] || [[File:Nidhogg.jpg|frameless]] || [[File:Aspidochelone.jpg|frameless]] | ||
|- | |- | ||
! scope="row" colspan="1" | [[Tiamat]] || scope="row" colspan="1" | | ! scope="row" colspan="1" | [[Tiamat]] || scope="row" colspan="1" | [[Vrtra]] || scope="row" colspan="1" | [[Jormungand]] | ||
|- | |- | ||
| [[File:Tiamat.JPG|frameless]] || [[File:Vrtra.JPG|frameless]] || [[File:Jormungand.jpg|frameless]] | | [[File:Tiamat.JPG|frameless]] || [[File:Vrtra.JPG|frameless]] || [[File:Jormungand.jpg|frameless]] | ||
|- | |||
! scope="row" colspan="1" | [[Cerberus]] || scope="row" colspan="1" | [[Hydra]] || scope="row" colspan="1" | [[Khimaira]] | |||
|- | |||
| [[File:Cerberus.jpg|frameless]] || [[File:Hydra.jpg|frameless]] || [[File:Khimaira.jpg|frameless]] | |||
|- | |- | ||
! scope="row" colspan="1" | [[Zirnitra]] || scope="row" colspan="1" | || scope="row" colspan="1" | | ! scope="row" colspan="1" | [[Zirnitra]] || scope="row" colspan="1" | || scope="row" colspan="1" | | ||
Latest revision as of 15:30, 26 November 2023
City Beast Tribe Leaders (119 Content)
CAUTION: All City Beast Tribe Leaders are in areas with higher level, linking monsters. A team/alliance of 6+ player characters is recommended to fight them.
| Overlord Bakgodek | Za'Dha Adamantking | Tzee Xicu the Manifest |
|---|---|---|
 |
 |
 |
ToAU Beast Tribe Leaders (119 Content)
CAUTION: All ToAU Beast Tribe Leaders spawn with at least 2 additional monsters. A team/alliance of 6+ player characters is recommended to fight them.
| Medusa | Gulool Ja Ja | Gurfurlur the Menacing |
|---|---|---|
 |
 |
 |
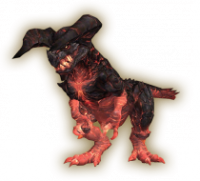
Wildskeeper Naakual (119+ Content)
| Colkhab | Tchakka | Achuka |
|---|---|---|
 |
 |
 |
| Yumcax | Hurkan | Kumhau |
 |
 |
 |
Oboro Weapon HNM (119++ Content)
| King Behemoth | Nidhogg | Aspidochelone |
|---|---|---|
 |
 |

|
| Tiamat | Vrtra | Jormungand |
 |
 |

|
| Cerberus | Hydra | Khimaira |
 |
 |

|
| Zirnitra | ||

|
Volte NMs (119+++ Content)
| Bres | Rugaroo | Vee Ladu the Titterer |
|---|---|---|
 |
 |

|
| Tikbalang | ||

| ||