Stone: Difference between revisions
Jump to navigation
Jump to search
mNo edit summary |
|||
| (13 intermediate revisions by 4 users not shown) | |||
| Line 1: | Line 1: | ||
Each stone will drop from the specified zone | Each stone will drop from the specified zone. Each monster has a 25% and 5% chance (2 slots possible) to drop a stone when killed. Most enemies in each zone should drop the stones.<br> | ||
The stones are used to augment [[Corpo-Vorpo | Skirmish +1 Armor]], [[Gaddiux | Alluvion Skirmish Weapons]], and [[Detrovio | Alluvion Skirmish Armor]].<br> | |||
The stones can also be purchased from [[Pohka Chichiyowahl]]. <br> | |||
{| class="wikitable" | {| class="wikitable" | ||
! scope="row" colspan="1" | Zone || scope="row" colspan="1" | Stone | ! scope="row" colspan="1" | Zone || scope="row" colspan="1" | Stone || scope="row" colspan="1" | Location Notes | ||
|- | |- | ||
| | | Upper Delkfutt's Tower (Top 2 floors) || Wailing Stone || HP Crystal Page #1, Qufim, Qufim Island, #1 | ||
|- | |- | ||
| | | Ceizak Battlegrounds || Leafslit Stone || Zone in from W. Adoulin | ||
|- | |- | ||
| | | Yahse Hunting Grounds || Leaftip Stone || Zone in from Ceizak Battlegrounds at J-6 | ||
|- | |- | ||
| | | Foret de Hennetiel || Leafdim Stone || HP Crystal Page #2, East. Ulbuka., Foret de Hennetiel | ||
|- | |- | ||
| | | Yorcia Weald || Leaforb Stone || HP Crystal Page #2, East. Ulbuka., Yorcia Weald | ||
|- | |- | ||
| | | Sih Gates || Duskslit Stone || Zone into Ceizak Battlegrounds and follow the eastern path South. Zone at G/H-11 | ||
|- | |- | ||
| | | Moh Gates || Dusktip Stone || From Yahse Hunting Grounds, from the above Ceizak Battlegrounds. Follow the eastern path north, making your way to zone at H-5 | ||
|- | |- | ||
| | | Dho Gates || Duskdim Stone || HP Crystal Page #2, East. Ulbuka., Foret de Hennetiel. Go north then west to zone at E-10 | ||
|- | |- | ||
| | | Woh Gates || Duskorb Stone || HP Crystal Page #2, East. Ulbuka., Kamihr Drifts. Head south and east to zone at K-11 | ||
|- | |- | ||
| | | Morimar Basalt Fields || Snowslit Stone || HP Crystal Page #2, East. Ulbuka., Morimar Basalt Fields | ||
|- | |- | ||
| | | Kamihr Drifts || Snowtip Stone || HP Crystal Page #2, East. Ulbuka., Kamihr Drifts | ||
|- | |- | ||
| Cirdas Caverns || Snoworb Stone | | Marjami Ravine || Snowdim Stone || HP Crystal Page #2, East. Ulbuka., Marjami Ravine | ||
|- | |||
| Cirdas Caverns || Snoworb Stone || From Dho Gates, head northeast to the Cirdas Caverns entrance at K-4 | |||
|- | |||
|} | |||
== Stone NMs == | |||
=== Wailing Stones === | |||
{| class="wikitable" | |||
! scope="row" colspan="1" | [[Mimas]] || scope="row" colspan="1" | [[Porphyrion]] || scope="row" colspan="1" | [[Enkelados]] || scope="row" colspan="1" | [[Pallas]] || scope="row" colspan="1" | [[Alkyoneus]] || scope="row" colspan="1" | [[Autarch]] | |||
|- | |||
| [[File:Mimas.png|frameless|center|200px|link=[[Mimas]]]] || [[File:Porphyrion.png|frameless|center|200px|link=[[Porphyrion]]]] || [[File:Enkelados.png|frameless|center|200px|link=[[Enkelados]]]] || [[File:Pallas.png|frameless|center|200px|link=[[Pallas]]]] || [[File:Alkyoneus.png|frameless|center|200px|link=[[Alkyoneus]]]] || [[File:Autarch.png|frameless|center|200px|link=[[Autarch]]]] | |||
|- | |||
! scope="row" colspan="1" | [[Ixtab]] | |||
|- | |||
| [[File:Ixtab.png|frameless|center|200px|link=[[Ixtab]]]] | |||
|} | |||
=== Alluvion Stones === | |||
{| class="wikitable" | |||
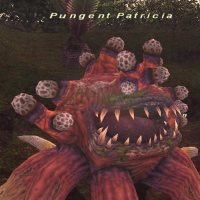
! scope="row" colspan="1" | [[Mastop]] || scope="row" colspan="1" | [[Tax'et]] || scope="row" colspan="1" | [[Startled Uragnite]] || scope="row" colspan="1" | [[Bothersome Chapuli]] || scope="row" colspan="1" | [[Nerrivik]] || scope="row" colspan="1" | [[Pungent Patricia]] | |||
|- | |||
| [[File:Mastop.png|frameless|center|200px|link=[[Mastop]]]] || [[File:Tax'et.png|frameless|center|200px|link=[[Tax'et]]]] || [[File:Startled Uragnite.png|frameless|center|200px|link=[[Startled Uragnite]]]] || [[File:Bothersome Chapuli.png|frameless|center|200px|link=[[Bothersome Chapuli]]]] || [[File:Nerrivik.png|frameless|center|200px|link=[[Nerrivik]]]] || [[File:Pungent Patricia.png|frameless|center|200px|link=[[Pungent Patricia]]]] | |||
|- | |||
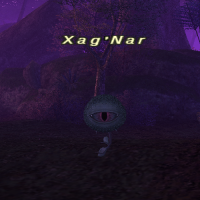
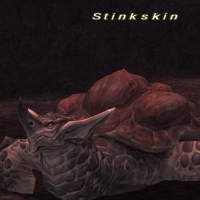
! scope="row" colspan="1" | [[Xag'Nar]] || scope="row" colspan="1" | [[Morseiu]] || scope="row" colspan="1" | [[Fomor Pioneer]] || scope="row" colspan="1" | [[Furious Arundmite]] || scope="row" colspan="1" | [[Staumarth]] || scope="row" colspan="1" | [[Stinkskin]] | |||
|- | |||
| [[File:Xag'Nar.png|frameless|center|200px|link=[[Xag'Nar]]]] || [[File:Morseiu.png|frameless|center|200px|link=[[Morseiu]]]] || [[File:Fomor Pioneer.png|frameless|center|200px|link=[[Fomor Pioneer]]]] || [[File:Furious Arundmite.png|frameless|center|200px|link=[[Furious Arundmite]]]] || [[File:Staumarth.png|frameless|center|200px|link=[[Staumarth]]]] || [[File:Stinkskin.png|frameless|center|200px|link=[[Stinkskin]]]] | |||
|- | |||
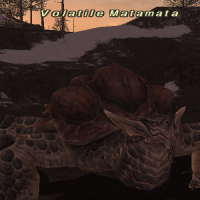
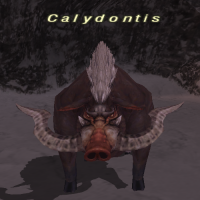
! scope="row" colspan="1" | [[Dreadpincer]] || scope="row" colspan="1" | [[Cowll Hippogryph]] || scope="row" colspan="1" | [[Volatile Matamata]] || scope="row" colspan="1" | [[Tutewehiwehi]] || scope="row" colspan="1" | [[Calydontis]] || scope="row" colspan="1" | [[Azeman]] | |||
|- | |||
| [[File:Dreadpincer.png|frameless|center|200px|link=[[Dreadpincer]]]] || [[File:Cowll Hippogryph.png|frameless|center|200px|link=[[Cowll Hippogryph]]]] || [[File:Volatile Matamata.png|frameless|center|200px|link=[[Volatile Matamata]]]] || [[File:Tutewehiwehi.png|frameless|center|200px|link=[[Tutewehiwehi]]]] || [[File:Calydontis.png|frameless|center|200px|link=[[Calydontis]]]] || [[File:Azeman.png|frameless|center|200px|link=[[Azeman]]]] | |||
|- | |||
! scope="row" colspan="1" | [[Hakawai]] || scope="row" colspan="1" | [[Ironbeak Inguza]] || scope="row" colspan="1" | [[Vemosia]] | |||
|- | |||
| [[File:Hakawai.png|frameless|center|200px|link=[[Hakawai]]]] || [[File:Ironbeak Inguza.png|frameless|center|200px|link=[[Ironbeak Inguza]]]] || [[File:Vemosia.png|frameless|center|200px|link=[[Vemosia]]]] | |||
|- | |- | ||
|} | |} | ||
Latest revision as of 21:34, 7 November 2026
Each stone will drop from the specified zone. Each monster has a 25% and 5% chance (2 slots possible) to drop a stone when killed. Most enemies in each zone should drop the stones.
The stones are used to augment Skirmish +1 Armor, Alluvion Skirmish Weapons, and Alluvion Skirmish Armor.
The stones can also be purchased from Pohka Chichiyowahl.
| Zone | Stone | Location Notes |
|---|---|---|
| Upper Delkfutt's Tower (Top 2 floors) | Wailing Stone | HP Crystal Page #1, Qufim, Qufim Island, #1 |
| Ceizak Battlegrounds | Leafslit Stone | Zone in from W. Adoulin |
| Yahse Hunting Grounds | Leaftip Stone | Zone in from Ceizak Battlegrounds at J-6 |
| Foret de Hennetiel | Leafdim Stone | HP Crystal Page #2, East. Ulbuka., Foret de Hennetiel |
| Yorcia Weald | Leaforb Stone | HP Crystal Page #2, East. Ulbuka., Yorcia Weald |
| Sih Gates | Duskslit Stone | Zone into Ceizak Battlegrounds and follow the eastern path South. Zone at G/H-11 |
| Moh Gates | Dusktip Stone | From Yahse Hunting Grounds, from the above Ceizak Battlegrounds. Follow the eastern path north, making your way to zone at H-5 |
| Dho Gates | Duskdim Stone | HP Crystal Page #2, East. Ulbuka., Foret de Hennetiel. Go north then west to zone at E-10 |
| Woh Gates | Duskorb Stone | HP Crystal Page #2, East. Ulbuka., Kamihr Drifts. Head south and east to zone at K-11 |
| Morimar Basalt Fields | Snowslit Stone | HP Crystal Page #2, East. Ulbuka., Morimar Basalt Fields |
| Kamihr Drifts | Snowtip Stone | HP Crystal Page #2, East. Ulbuka., Kamihr Drifts |
| Marjami Ravine | Snowdim Stone | HP Crystal Page #2, East. Ulbuka., Marjami Ravine |
| Cirdas Caverns | Snoworb Stone | From Dho Gates, head northeast to the Cirdas Caverns entrance at K-4 |
Stone NMs
Wailing Stones
| Mimas | Porphyrion | Enkelados | Pallas | Alkyoneus | Autarch |
|---|---|---|---|---|---|
 |
 |
 |
 |
 |
 |
| Ixtab | |||||
 |