Arbitrary NMs: Difference between revisions
Jump to navigation
Jump to search
mNo edit summary |
|||
| (132 intermediate revisions by 7 users not shown) | |||
| Line 6: | Line 6: | ||
ANM - Arbitrary Notorious Monster <br> | ANM - Arbitrary Notorious Monster <br> | ||
NSANM - Not So Arbitrary Notorious Monster <br> | NSANM - Not So Arbitrary Notorious Monster <br> | ||
DNANM - Definitely Not Arbitrary Notorious Monster <br> | |||
<!-- | |||
== FANMs == | |||
{| class="wikitable" style="text-align: center;" | |||
! scope="row" colspan="7" | Non-Item Level Gear and Accessories | |||
|- style="vertical-align: bottom;" | |||
| scope="row" colspan="1" | [[File:Lord of Onzozo.png|frameless|150px|link=[[Lord of Onzozo]]]] <br> '''[[Lord of Onzozo]]''' || ! scope="row" colspan="1" | [[File:Aiatar.png|frameless|150px|link=[[Aiatar]]]] <br> '''[[Aiatar]]''' || ! scope="row" colspan="1" | [[File:Cactrot Rapido.png|frameless|150px|link=[[Cactrot Rapido]]]] <br> '''[[Cactrot Rapido]]''' || ! scope="row" colspan="1" | [[File:Bloodsucker.png|frameless|150px|link=[[Bloodsucker]]]] <br> '''[[Bloodsucker]]''' || ! scope="row" colspan="1" | [[File:Jaggedy-Eared Jack.png|frameless|150px|link=[[Jaggedy-Eared Jack]]]] <br> '''[[Jaggedy-Eared Jack]]''' || ! scope="row" colspan="1" | [[File:Spiny Spipi.png|frameless|150px|link=[[Spiny Spipi]]]] <br> '''[[Spiny Spipi]]''' || ! scope="row" colspan="1" | [[File:Bubbly Bernie.png|frameless|150px|link=[[Bubbly Bernie]]]] <br> '''[[Bubbly Bernie]]''' | |||
|- style="vertical-align: bottom;" | |||
| scope="row" colspan="1" | [[File:Beet Leafhopper.png|frameless|150px|link=[[Beet Leafhopper]]]] <br> '''[[Beet Leafhopper]]''' || ! scope="row" colspan="1" | [[File:Garharlor the Unruly.png|frameless|150px|link=[[Garharlor the Unruly]]]] <br> '''[[Garharlor the Unruly]]''' || ! scope="row" colspan="1" | [[File:Antican Praefectus.png|frameless|150px|link=[[Antican Praefectus]]]] <br> '''[[Antican Praefectus]]''' || ! scope="row" colspan="1" | [[File:Centurio X-I.png|frameless|150px|link=[[Centurio X-I]]]] <br> '''[[Centurio X-I]]''' || ! scope="row" colspan="1" | [[File:Proconsul XII.png|frameless|150px|link=[[Proconsul XII]]]] <br> '''[[Proconsul XII]]''' || ! scope="row" colspan="1" | [[File:Fyuu the Seabellow.png|frameless|150px|link=[[Fyuu the Seabellow]]]] <br> '''[[Fyuu the Seabellow]]''' || ! scope="row" colspan="1" | [[File:Mouu the Waverider.png|frameless|150px|link=[[Mouu the Waverider]]]] <br> '''[[Mouu the Waverider]]''' | |||
|- style="vertical-align: bottom;" | |||
| scope="row" colspan="1" | [[File:Namtar.png|frameless|150px|link=[[Namtar]]]] <br> '''[[Namtar]]''' || ! scope="row" colspan="1" | [[File:Pahh the Gullcaller.png|frameless|150px|link=[[Pahh the Gullcaller]]]] <br> '''[[Pahh the Gullcaller]]''' || ! scope="row" colspan="1" | [[File:Qull the Shellbuster.png|frameless|150px|link=[[Qull the Shellbuster]]]] <br> '''[[Qull the Shellbuster]]''' || ! scope="row" colspan="1" | [[File:Seww the Squidlimbed.png|frameless|150px|link=[[Seww the Squidlimbed]]]] <br> '''[[Seww the Squidlimbed]]''' || ! scope="row" colspan="1" | [[File:Voll the Sharkfinned.png|frameless|150px|link=[[Voll the Sharkfinned]]]] <br> '''[[Voll the Sharkfinned]]''' || ! scope="row" colspan="1" | [[File:Wuur the Sandcomber.png|frameless|150px|link=[[Wuur the Sandcomber]]]] <br> '''[[Wuur the Sandcomber]]''' || ! scope="row" colspan="1" | [[File:Zuug the Shoreleaper.png|frameless|150px|link=[[Zuug the Shoreleaper]]]] <br> '''[[Zuug the Shoreleaper]]''' | |||
|- style="vertical-align: bottom;" | |||
| scope="row" colspan="1" | [[File:Gargantua.png|frameless|150px|link=[[Gargantua]]]] <br> '''[[Gargantua]]''' || ! scope="row" colspan="1" | [[File:Humbaba.png|frameless|150px|link=[[Humbaba]]]] <br> '''[[Humbaba]]''' || ! scope="row" colspan="1" | [[File:Nue.png|frameless|150px|link=[[Nue]]]] <br> '''[[Nue]]''' || ! scope="row" colspan="1" | [[File:Capricious Cassie.png|frameless|150px|link=[[Capricious Cassie]]]] <br> '''[[Capricious Cassie]]''' || ! scope="row" colspan="1" | [[File:Stray Mary.png|frameless|150px|link=[[Stray Mary]]]] <br> '''[[Stray Mary]]''' || ! scope="row" colspan="1" | [[File:Lumbering Lambert.png|frameless|150px|link=[[Lumbering Lambert]]]] <br> '''[[Lumbering Lambert]]''' || ! scope="row" colspan="1" | [[File:Rampaging Ram.JPG|frameless|150px|link=[[Rampaging Ram]]]] <br> '''[[Rampaging Ram]]''' | |||
|- style="vertical-align: bottom;" | |||
| scope="row" colspan="1" | [[File:Serpopard Ishtar.png|frameless|150px|link=[[Serpopard Ishtar]]]] <br> '''[[Serpopard Ishtar]]''' || ! scope="row" colspan="1" | [[File:Observant Zekka.png|frameless|150px|link=[[Observant Zekka]]]] <br> '''[[Observant Zekka]]''' || ! scope="row" colspan="1" | [[File:Shen.png|frameless|150px|link=[[Shen]]]] <br> '''[[Shen]]''' || ! scope="row" colspan="1" | [[File:Numbing Norman.png|frameless|150px|link=[[Numbing Norman]]]] <br> '''[[Numbing Norman]]''' || ! scope="row" colspan="1" | [[File:Habergoass.png|frameless|150px|link=[[Habergoass]]]] <br> '''[[Habergoass]]''' || ! scope="row" colspan="1" | [[File:Muq Shabeel.png|frameless|150px|link=[[Muq Shabeel]]]] <br> '''[[Muq Shabeel]]''' || ! scope="row" colspan="1" | [[File:Nunyenunc.png|frameless|150px|link=[[Nunyenunc]]]] <br> '''[[Nunyenunc]]''' | |||
|- style="vertical-align: bottom;" | |||
| scope="row" colspan="1" | [[File:Taisaijin.png|frameless|150px|link=[[Taisaijin]]]] <br> '''[[Taisaijin]]''' || ! scope="row" colspan="1" | [[File:Dread Dealing Dredodak.png|frameless|150px|link=[[Dread Dealing Dredodak]]]] <br> '''[[Dread Dealing Dredodak]]''' || ! scope="row" colspan="1" | [[File:Swashstox Beadblinker.png|frameless|150px|link=[[Swashtox Beadblinker]]]] <br> '''[[Swashstox Beadblinker]]''' || ! scope="row" colspan="1" | [[File:Skogs Fru.png|frameless|150px|link=[[Skogs Fru]]]] <br> '''[[Skogs Fru]]''' || ! scope="row" colspan="1" | [[File:Koropokkur.png|frameless|150px|link=[[Koropokkur]]]] <br> '''[[Koropokkur]]''' || ! scope="row" colspan="1" | [[File:Bune.png|frameless|150px|link=[[Bune]]]] <br> '''[[Bune]]''' || ! scope="row" colspan="1" | [[File:Suu Xicu the Cantabile.png|frameless|150px|link=[[Suu Xicu the Cantabile]]]] <br> '''[[Suu Xicu the Cantabile]]''' | |||
|} | |||
--> | |||
== Non Item Level Equipment == | == Non Item Level Equipment == | ||
=== Weapons === | === Weapons === | ||
<!-- | |||
{| class="wikitable" style="text-align: center; | |||
| scope="row" colspan="7" | '''DNANM's''' | |||
|- | |||
| scope="row" colspan="1" | [[Lehko Habhoka]] <br> [[File:Lehko Habhoka.png|frameless|120px|link=[[Lehko Habhoka]]]] || ! scope="row" colspan="1" | [[Selh'teus]] <br> [[File:selhteus.png|frameless|120px|link=[[Selh'teus]]]] || ! scope="row" colspan="1" | [[Tom Tit Tat]] <br> [[File:Tom Tit Tat.png|frameless|110px|link=[[Tom Tit Tat]]]] || ! scope="row" colspan="1" | [[Vidhula the Wrathborn]] <br> [[File:Vidhula the Wrathborn.png|frameless|120px|link=[[Vidhula the Wrathborn]]]] || ! scope="row" colspan="1" | [[Calcabrina]] <br> [[File:Calcabrina.PNG|frameless|120px|link=[[Calcabrina]]]] || ! scope="row" colspan="1" | [[Hippomaritimus]] <br> [[File:Hippomaritimus.png|frameless|120px|link=[[Hippomaritimus]]]] || ! scope="row" colspan="1" | [[Jolly Green]] <br> [[File:Jolly Green.png|frameless|120px|link=[[Jolly Green]]]] | |||
|- | |||
|} | |||
--> | |||
{| class="wikitable mw-collapsible mw-collapsed" style="text-align: center"; width="1000px;" | {| class="wikitable mw-collapsible mw-collapsed" style="text-align: center"; width="1000px;" | ||
! scope="row" colspan="7" | ANM's | ! scope="row" colspan="7" | ANM's | ||
| Line 15: | Line 44: | ||
| style="background-color:#cfcfcf;" | '''Notorious Monster''' || style="background-color:#cfcfcf;" | '''Level''' || style="background-color:#cfcfcf;" | '''Zone''' || style="background-color:#cfcfcf;" | '''Position''' || style="background-color:#cfcfcf;" | '''Respawn''' || style="background-color:#cfcfcf;" | '''Reward''' || style="background-color:#cfcfcf;" | '''Drop Chance''' | | style="background-color:#cfcfcf;" | '''Notorious Monster''' || style="background-color:#cfcfcf;" | '''Level''' || style="background-color:#cfcfcf;" | '''Zone''' || style="background-color:#cfcfcf;" | '''Position''' || style="background-color:#cfcfcf;" | '''Respawn''' || style="background-color:#cfcfcf;" | '''Reward''' || style="background-color:#cfcfcf;" | '''Drop Chance''' | ||
|- | |- | ||
| rowspan="2" | '''Lord of Onzozo''' <br> [[File:Lord of Onzozo.png|frameless|250px]] || rowspan="2" | 102 || rowspan="2" | Labyrinth of Onzozo || rowspan="2" | (H-8) || rowspan="2" | Lottery: Flying Mantas <br> | | rowspan="2" | '''Lord of Onzozo''' <br> [[File:Lord of Onzozo.png|frameless|250px]] || rowspan="2" | 102 || rowspan="2" | Labyrinth of Onzozo || rowspan="2" | (H-8) || rowspan="2" | Lottery: Flying Mantas <br> 1-2 hours || '''Kraken Club''' <br>[[File:Kraken Club.png|frameless]] || 8% | ||
|- | |- | ||
| [[File:Octave Club.png|frameless]] || 8% | | '''Octave Club''' <br> [[File:Octave Club.png|frameless]] || 8% | ||
|- | |- | ||
| colspan = "7" style="background-color:#000000;" | | | colspan = "7" style="background-color:#000000;" | | ||
|- | |- | ||
| rowspan=" | | rowspan="3" | '''Aiatar''' <br> [[File:Aiatar.png|frameless|250px]] || rowspan="3" | 120 || rowspan="3" | Riverne - Site A01 || rowspan="3" | (G-7) || rowspan="3" | 2 hours ||'''Apollo's Flute''' <br> [[File:Apollo's Flute.png|frameless]] || 15% | ||
|- | |||
| '''Cantabanks Horn''' <br>[[File:Cantabanks Horn.png|frameless]] || 15% | |||
|- | |||
| '''Pan's Horn''' <br>[[File:Pan's Horn.png|frameless]] || 15% | |||
|- | |- | ||
|} | |} | ||
| Line 32: | Line 64: | ||
| style="background-color:#cfcfcf;" | '''Notorious Monster''' || style="background-color:#cfcfcf;" | '''Level''' || style="background-color:#cfcfcf;" | '''Zone''' || style="background-color:#cfcfcf;" | '''Position''' || style="background-color:#cfcfcf;" | '''Respawn''' || style="background-color:#cfcfcf;" | '''Reward''' || style="background-color:#cfcfcf;" | '''Drop Chance''' | | style="background-color:#cfcfcf;" | '''Notorious Monster''' || style="background-color:#cfcfcf;" | '''Level''' || style="background-color:#cfcfcf;" | '''Zone''' || style="background-color:#cfcfcf;" | '''Position''' || style="background-color:#cfcfcf;" | '''Respawn''' || style="background-color:#cfcfcf;" | '''Reward''' || style="background-color:#cfcfcf;" | '''Drop Chance''' | ||
|- | |- | ||
| rowspan=" | | rowspan="5" | '''Cactrot Rapido''' <br> [[File:Cactrot Rapido.png|frameless|250px]] || rowspan="5" | 102 || rowspan="5" | Eastern Altepa Desert || rowspan="5" | Roaming || rowspan="5" | 6 hours || '''Herald's Gaiters''' <br> [[File:Herald's Gaiters.png|frameless]] || 7.5% | ||
|- | |||
|'''Hermes' Sandals''' <br> [[File:Hermes' Sandals.png|frameless]] || 7.5% | |||
|- | |||
| '''Strider Boots''' <br>[[File:Strider Boots.png|frameless]] || 7.5% | |||
|- | |- | ||
| [[File: | | '''Tandava Crackows''' <br>[[File:Tandava Crackows.png|frameless]] || 7.5% | ||
|- | |- | ||
| [[File: | |'''Danzo Sune-Ate''' <br> [[File:Danzo Sune-Ate.png|frameless]] || 7.5% | ||
|} | |} | ||
=== Accessories (Neck/Earrings/Rings/Back/Waist) === | === Accessories (Neck/Earrings/Rings/Back/Waist/instruments) === | ||
{| class="wikitable mw-collapsible mw-collapsed" style="text-align: center"; width="1000px;" | {| class="wikitable mw-collapsible mw-collapsed" style="text-align: center"; width="1000px;" | ||
! scope="row" colspan="7" | ANM's | ! scope="row" colspan="7" | ANM's | ||
| Line 45: | Line 81: | ||
| style="background-color:#cfcfcf;" | '''Notorious Monster''' || style="background-color:#cfcfcf;" | '''Level''' || style="background-color:#cfcfcf;" | '''Zone''' || style="background-color:#cfcfcf;" | '''Position''' || style="background-color:#cfcfcf;" | '''Respawn''' || style="background-color:#cfcfcf;" | '''Reward''' || style="background-color:#cfcfcf;" | '''Drop Chance''' | | style="background-color:#cfcfcf;" | '''Notorious Monster''' || style="background-color:#cfcfcf;" | '''Level''' || style="background-color:#cfcfcf;" | '''Zone''' || style="background-color:#cfcfcf;" | '''Position''' || style="background-color:#cfcfcf;" | '''Respawn''' || style="background-color:#cfcfcf;" | '''Reward''' || style="background-color:#cfcfcf;" | '''Drop Chance''' | ||
|- | |- | ||
| rowspan="1" | '''Bloodsucker''' <br> [[File:Bloodsucker.png|frameless|250px]] || rowspan="1" | 105 || rowspan="1" | Bostaunieux Oubliette || rowspan="1" | (H-8) <br> Map 2 || rowspan="1" | 1 hour || [[File:Jelly Ring.png|frameless]] || 20% | | rowspan="1" | '''Bloodsucker''' <br> [[File:Bloodsucker.png|frameless|250px]] || rowspan="1" | 105 || rowspan="1" | Bostaunieux Oubliette || rowspan="1" | (H-8) <br> Map 2 || rowspan="1" | 1 hour ||'''Jelly Ring''' <br> [[File:Jelly Ring.png|frameless]] || 20% | ||
|- | |||
| colspan = "7" style="background-color:#000000;" | | |||
|- | |||
| rowspan="2" | '''Jaggedy-Eared Jack''' <br> [[File:Jaggedy-Eared Jack.png|frameless|250px]] || rowspan="2" | 108 || rowspan="2" | West Ronfaure || rowspan="2" | (G/H-9) || rowspan="2" | 30 minutes || '''Fortune Egg''' <br>[[File:Fortune Egg.png|frameless]] || 15% | |||
|- | |||
| '''Happy Egg''' <br> [[File:Happy Egg.png|frameless]] || 15% | |||
|- | |||
| colspan = "7" style="background-color:#000000;" | | |||
|- | |||
| rowspan="2" | '''Spiny Spipi''' <br> [[File:Spiny Spipi.png|frameless|250px]] || rowspan="2" | 108 || rowspan="2" | East Sarutabaruta || rowspan="2" | (I/J-7) || rowspan="2" | 30 minutes || '''Dasra's Ring''' <br>[[File:Dasra's Ring.png|frameless]] || 15% | |||
|- | |||
|'''Nasatya's Ring''' <br> [[File:Nasatya's Ring.png|frameless]] || 15% | |||
|- | |||
| colspan = "7" style="background-color:#000000;" | | |||
|- | |||
| rowspan="2" | '''Bubbly Bernie''' <br> [[File:Bubbly Bernie.png|frameless|250px]] || rowspan="2" | 108 || rowspan="2" | South Gustaberg || rowspan="2" | (M-10) || rowspan="2" | 30 minutes || '''Repelling Collar''' <br>[[File:Repelling Collar.png|frameless]] || 25% | |||
|- | |||
|'''Impatiens''' <br> [[File:Impatiens.png|frameless]] || 15% | |||
|- | |- | ||
| colspan = "7" style="background-color:#000000;" | | | colspan = "7" style="background-color:#000000;" | | ||
|- | |- | ||
| rowspan="2" | ''' | | rowspan="2" | '''Beet Leafhopper''' <br> [[File:Beet Leafhopper.png|frameless|250px]] || rowspan="2" | 110 || rowspan="2" | The Boyahda Tree || rowspan="2" | (J-8) <br> Map 3 || rowspan="2" | 1 hour || '''Siegel Sash''' <br>[[File:Siegel Sash.png|frameless]] || 15% | ||
|- | |- | ||
| [[File: | |'''Myrddin Pearl''' <br> [[File:Myrddin Pearl.png|frameless]] || 15% | ||
|- | |- | ||
| colspan = "7" style="background-color:#000000;" | | | colspan = "7" style="background-color:#000000;" | | ||
|- | |- | ||
| rowspan="2" | ''' | | rowspan="2" | '''Garharlor the Unruly''' <br> [[File:Garharlor the Unruly.png|frameless|250px]] || rowspan="2" | 110 || rowspan="2" | Mount Zhayolm || rowspan="2" | (H-8) || rowspan="2" | 1 hour || '''Genie Gages''' <br>[[File:Genie Gages.png|frameless]] || 15% | ||
|- | |- | ||
| [[File: | |'''Trance Belt''' <br> [[File:Trance Belt.png|frameless]] || 15% | ||
|- | |- | ||
| colspan = "7" style="background-color:#000000;" | | | colspan = "7" style="background-color:#000000;" | | ||
|- | |- | ||
| rowspan=" | | rowspan="2" | '''Antican Praefectus''' <br> [[File:Antican Praefectus.png|frameless|250px]] || rowspan="2" | 115 || rowspan="2" | Quicksand Caves || rowspan="2" | (J-12) <br> Map 1 || rowspan="2" | 1 hour || '''Repulse Mantle''' <br>[[File:Repulse Mantle.png|frameless]] || 25% | ||
|- | |||
| '''Chuparrosa Mantle''' <br> [[File:Chuparrosa Mantle.png|frameless]] || 20% | |||
|- | |- | ||
| colspan = "7" style="background-color:#000000;" | | | colspan = "7" style="background-color:#000000;" | | ||
|- | |- | ||
| rowspan="2" | '''Centurio X-I''' <br> [[File:Centurio X-I.png|frameless|250px]] || rowspan="2" | 115 || rowspan="2" | Quicksand Caves || rowspan="2" | (G/H/I-9/10) <br> Map 1 || rowspan="2" | 1 hour || [[File:Omphalos Bullet.png|frameless]] || 15% | | rowspan="2" | '''Centurio X-I''' <br> [[File:Centurio X-I.png|frameless|250px]] || rowspan="2" | 115 || rowspan="2" | Quicksand Caves || rowspan="2" | (G/H/I-9/10) <br> Map 1 || rowspan="2" | 1 hour ||'''Omphalos Bullet''' <br> [[File:Omphalos Bullet.png|frameless]] || 15% | ||
|- | |- | ||
| [[File:Windbuffet Belt.png|frameless]] || 25% | | '''Windbuffet Belt''' <br> [[File: Windbuffet Belt.png|frameless]] || 25% | ||
|- | |- | ||
| colspan = "7" style="background-color:#000000;" | | | colspan = "7" style="background-color:#000000;" | | ||
|- | |- | ||
| rowspan="2" | '''Proconsul XII''' <br> [[File:Proconsul XII.png|frameless|250px]] || rowspan="2" | 115 || rowspan="2" | Quicksand Caves || rowspan="2" | (H/I-6/7) <br> '''or''' <br> (K/L-6/7) <br> '''or''' <br> (H/I-9/10) <br> '''or''' <br> (K/L-9/10) <br> Map 7 || rowspan="2" | 1 hour || [[File:Vertex Bolt.png|frameless]] || 15% | | rowspan="2" | '''Proconsul XII''' <br> [[File:Proconsul XII.png|frameless|250px]] || rowspan="2" | 115 || rowspan="2" | Quicksand Caves || rowspan="2" | (H/I-6/7) <br> '''or''' <br> (K/L-6/7) <br> '''or''' <br> (H/I-9/10) <br> '''or''' <br> (K/L-9/10) <br> Map 7 || rowspan="2" | 1 hour || '''Vertex Bolt''' <br>[[File:Vertex Bolt.png|frameless]] || 15% | ||
|- | |- | ||
| [[File:Medala Cape.png|frameless]] || 25% | | '''Medala Cape''' <br>[[File:Medala Cape.png|frameless]] || 25% | ||
|- | |- | ||
| colspan = "7" style="background-color:#000000;" | | | colspan = "7" style="background-color:#000000;" | | ||
|- | |- | ||
| rowspan="2" | '''Fyuu the Seabellow''' <br> [[File:Fyuu the Seabellow.png|frameless|250px]] || rowspan="2" | 115 || rowspan="2" | Sea Serpent Grotto || rowspan="2" | (L/M-11) <br> Map 1 || rowspan="2" | 2 hours || [[File:Hirudinea Earring.png|frameless]] || 20% | | rowspan="2" | '''Fyuu the Seabellow''' <br> [[File:Fyuu the Seabellow.png|frameless|250px]] || rowspan="2" | 115 || rowspan="2" | Sea Serpent Grotto || rowspan="2" | (L/M-11) <br> Map 1 || rowspan="2" | 2 hours || '''Hirudinea Earring''' <br>[[File:Hirudinea Earring.png|frameless]] || 20% | ||
|- | |- | ||
| [[File:Roundel Earring.png|frameless]] || 20% | | '''Roundel Earring''' <br>[[File:Roundel Earring.png|frameless]] || 20% | ||
|- | |- | ||
| colspan = "7" style="background-color:#000000;" | | | colspan = "7" style="background-color:#000000;" | | ||
|- | |- | ||
| rowspan="2" | '''Mouu the Waverider''' <br> [[File:Mouu the Waverider.png|frameless|250px]] || rowspan="2" | 115 || rowspan="2" | Sea Serpent Grotto || rowspan="2" | (J-6) <br> Map 3 || rowspan="2" | 2 hours || [[File:Invidia Torque.png|frameless]] || 20% | | rowspan="2" | '''Mouu the Waverider''' <br> [[File:Mouu the Waverider.png|frameless|250px]] || rowspan="2" | 115 || rowspan="2" | Sea Serpent Grotto || rowspan="2" | (J-6) <br> Map 3 || rowspan="2" | 2 hours || '''Invidia Torque''' <br> [[File:Invidia Torque.png|frameless]] || 20% | ||
|- | |- | ||
| [[File:Praecis Gorget.png|frameless]] || 20% | |'''Praecis Gorget''' <br> [[File:Praecis Gorget.png|frameless]] || 20% | ||
|- | |- | ||
| colspan = "7" style="background-color:#000000;" | | | colspan = "7" style="background-color:#000000;" | | ||
|- | |- | ||
| rowspan="2" | '''Namtar''' <br> [[File:Namtar.png|frameless|250px]] || rowspan="2" | 115 || rowspan="2" | Sea Serpent Grotto || rowspan="2" | (D-8) <br> Map 1 || rowspan="2" | 2 hours || [[File:Justiciar's Torque.png|frameless]] || 20% | | rowspan="2" | '''Namtar''' <br> [[File:Namtar.png|frameless|250px]] || rowspan="2" | 115 || rowspan="2" | Sea Serpent Grotto || rowspan="2" | (D-8) <br> Map 1 || rowspan="2" | 2 hours || '''Justiciar's Torque''' <br>[[File:Justiciar's Torque.png|frameless]] || 20% | ||
|- | |- | ||
| [[File:Torero Torque.png|frameless]] || 20% | |'''Torero Torque''' <br> [[File:Torero Torque.png|frameless]] || 20% | ||
|- | |- | ||
| colspan = "7" style="background-color:#000000;" | | | colspan = "7" style="background-color:#000000;" | | ||
|- | |- | ||
| rowspan="2" | '''Pahh the Gullcaller''' <br> [[File:Pahh the Gullcaller.png|frameless|250px]] || rowspan="2" | 115 || rowspan="2" | Sea Serpent Grotto || rowspan="2" | (K/L-8) <br> Map 3 || rowspan="2" | 2 hours || [[File:Blood Ring.png|frameless]] || 20% | | rowspan="2" | '''Pahh the Gullcaller''' <br> [[File:Pahh the Gullcaller.png|frameless|250px]] || rowspan="2" | 115 || rowspan="2" | Sea Serpent Grotto || rowspan="2" | (K/L-8) <br> Map 3 || rowspan="2" | 2 hours ||'''Blood Ring''' <br> [[File:Blood Ring.png|frameless]] || 20% | ||
|- | |- | ||
| [[File:Insect Ring.png|frameless]] || 20% | | '''Insect Ring''' <br>[[File:Insect Ring.png|frameless]] || 20% | ||
|- | |- | ||
| colspan = "7" style="background-color:#000000;" | | | colspan = "7" style="background-color:#000000;" | | ||
|- | |- | ||
| rowspan="2" | '''Qull the Shellbuster''' <br> [[File:Qull the Shellbuster.png|frameless|250px]] || rowspan="2" | 115 || rowspan="2" | Sea Serpent Grotto || rowspan="2" | (J-10) <br> Map 2 || rowspan="2" | 2 hours || [[File:Excelsis Ring.png|frameless]] || 20% | | rowspan="2" | '''Qull the Shellbuster''' <br> [[File:Qull the Shellbuster.png|frameless|250px]] || rowspan="2" | 115 || rowspan="2" | Sea Serpent Grotto || rowspan="2" | (J-10) <br> Map 2 || rowspan="2" | 2 hours || '''Excelsis Ring''' <br>[[File:Excelsis Ring.png|frameless]] || 20% | ||
|- | |- | ||
| [[File:Griffon Ring.png|frameless]] || 20% | | '''Griffon Ring''' <br>[[File:Griffon Ring.png|frameless]] || 20% | ||
|- | |- | ||
| colspan = "7" style="background-color:#000000;" | | | colspan = "7" style="background-color:#000000;" | | ||
|- | |- | ||
| rowspan="2" | '''Seww the Squidlimbed''' <br> [[File:Seww the Squidlimbed.png|frameless|250px]] || rowspan="2" | 115 || rowspan="2" | Sea Serpent Grotto || rowspan="2" | (J-10) <br> Map 2 || rowspan="2" | 2 hours || [[File:Roller's Ring.png|frameless]] || 20% | | rowspan="2" | '''Seww the Squidlimbed''' <br> [[File:Seww the Squidlimbed.png|frameless|250px]] || rowspan="2" | 115 || rowspan="2" | Sea Serpent Grotto || rowspan="2" | (J-10) <br> Map 2 || rowspan="2" | 2 hours || '''Roller's Ring''' <br>[[File:Roller's Ring.png|frameless]] || 20% | ||
|- | |- | ||
| [[File:Mujin Mantle.png|frameless]] || 20% | | '''Mujin Mantle''' <br>[[File:Mujin Mantle.png|frameless]] || 20% | ||
|- | |- | ||
| colspan = "7" style="background-color:#000000;" | | | colspan = "7" style="background-color:#000000;" | | ||
|- | |- | ||
| rowspan="2" | '''Voll the Sharkfinned''' <br> [[File:Voll the Sharkfinned.png|frameless|250px]] || rowspan="2" | 115 || rowspan="2" | Sea Serpent Grotto || rowspan="2" | (J-10) <br> Map 2 || rowspan="2" | 2 hours || [[File:Mujin Necklace.png|frameless]] || 20% | | rowspan="2" | '''Voll the Sharkfinned''' <br> [[File:Voll the Sharkfinned.png|frameless|250px]] || rowspan="2" | 115 || rowspan="2" | Sea Serpent Grotto || rowspan="2" | (J-10) <br> Map 2 || rowspan="2" | 2 hours || '''Mujin Necklace''' <br>[[File:Mujin Necklace.png|frameless]] || 20% | ||
|- | |- | ||
| [[File:Mujin Stud.png|frameless]] || 20% | |'''Mujin Stud''' <br> [[File:Mujin Stud.png|frameless]] || 20% | ||
|- | |- | ||
| colspan = "7" style="background-color:#000000;" | | | colspan = "7" style="background-color:#000000;" | | ||
|- | |- | ||
| rowspan="2" | '''Wuur the Sandcomber''' <br> [[File:Wuur the Sandcomber.png|frameless|250px]] || rowspan="2" | 115 || rowspan="2" | Sea Serpent Grotto || rowspan="2" | ( | | rowspan="2" | '''Wuur the Sandcomber''' <br> [[File:Wuur the Sandcomber.png|frameless|250px]] || rowspan="2" | 115 || rowspan="2" | Sea Serpent Grotto || rowspan="2" | (H-9) <br> Map 1 || rowspan="2" | 2 hours || '''Archon Ring''' <br>[[File:Archon Ring.png|frameless]] || 20% | ||
|- | |- | ||
| [[File:Oneiros Annulet.png|frameless]] || 20% | |'''Oneiros Annulet''' <br> [[File:Oneiros Annulet.png|frameless]] || 20% | ||
|- | |- | ||
| colspan = "7" style="background-color:#000000;" | | | colspan = "7" style="background-color:#000000;" | | ||
|- | |- | ||
| rowspan="3" | '''Zuug the Shoreleaper''' <br> [[File:Zuug the Shoreleaper.png|frameless|250px]] || rowspan="3" | 115 || rowspan="3" | Sea Serpent Grotto || rowspan="3" | (F-10) <br> Map 4 || rowspan="3" | 2 hours || [[File:Lycopodium Earring.png|frameless]] || 20% | | rowspan="3" | '''Zuug the Shoreleaper''' <br> [[File:Zuug the Shoreleaper.png|frameless|250px]] || rowspan="3" | 115 || rowspan="3" | Sea Serpent Grotto || rowspan="3" | (F-10) <br> Map 4 || rowspan="3" | 2 hours || '''Lycopodium Earring''' <br>[[File:Lycopodium Earring.png|frameless]] || 20% | ||
|- | |- | ||
| [[File:Succor Ring.png|frameless]] || 20% | | '''Succor Ring''' <br>[[File:Succor Ring.png|frameless]] || 20% | ||
|- | |- | ||
| [[File:Archon Cape.png|frameless]] || 20% | | '''Archon Cape''' <br>[[File:Archon Cape.png|frameless]] || 20% | ||
|- | |- | ||
| colspan = "7" style="background-color:#000000;" | | | colspan = "7" style="background-color:#000000;" | | ||
|- | |- | ||
| rowspan="2" | '''Gargantua''' <br> [[File:Gargantua.png|frameless|250px]] || rowspan="2" | 120 || rowspan="2" | Beaucedine Glacier || rowspan="2" | ( | | rowspan="2" | '''Gargantua''' <br> [[File:Gargantua.png|frameless|250px]] || rowspan="2" | 120 || rowspan="2" | Beaucedine Glacier || rowspan="2" | (J-8) || rowspan="2" | 1.5 hours || '''Phalaina Locket''' <br>[[File:Phalaina Locket.png|frameless]] || 10% | ||
|- | |- | ||
| [[File:Rioter's Collar.png|frameless]] || 10% | | '''Rioter's Collar''' <br>[[File:Rioter's Collar.png|frameless]] || 10% | ||
|- | |- | ||
| colspan = "7" style="background-color:#000000;" | | | colspan = "7" style="background-color:#000000;" | | ||
|- | |- | ||
| rowspan="2" | '''Humbaba''' <br> [[File:Humbaba.png|frameless|250px]] || rowspan="2" | 120 || rowspan="2" | Beaucedine Glacier || rowspan="2" | (I-7) <br> '''or''' <br> (I/J-9) <br> '''or''' <br> (G-9/10) <br> '''or''' <br> (H/I-8) || rowspan="2" | 1.5 hours || [[File:Solemnity Cape.png|frameless]] || 10% | | rowspan="2" | '''Humbaba''' <br> [[File:Humbaba.png|frameless|250px]] || rowspan="2" | 120 || rowspan="2" | Beaucedine Glacier || rowspan="2" | (I-7) <br> '''or''' <br> (I/J-9) <br> '''or''' <br> (G-9/10) <br> '''or''' <br> (H/I-8) || rowspan="2" | 1.5 hours || '''Solemnity Cape''' <br>[[File:Solemnity Cape.png|frameless]] || 10% | ||
|- | |- | ||
| [[File:Audumbla Sash.png|frameless]] || 10% | | '''Audumbla Sash''' <br>[[File:Audumbla Sash.png|frameless]] || 10% | ||
|- | |- | ||
| colspan = "7" style="background-color:#000000;" | | | colspan = "7" style="background-color:#000000;" | | ||
|- | |- | ||
| rowspan="2" | '''Nue''' <br> [[File:Nue.png|frameless|250px]] || rowspan="2" | 120 || rowspan="2" | Beaucedine Glacier || rowspan="2" | (F-7) || rowspan="2" | 1.5 hours || [[File:Erlene's Notebook.png|frameless]] || 10% | | rowspan="2" | '''Nue''' <br> [[File:Nue.png|frameless|250px]] || rowspan="2" | 120 || rowspan="2" | Beaucedine Glacier || rowspan="2" | (F-7) || rowspan="2" | 1.5 hours || '''Erlene's Notebook''' <br>[[File:Erlene's Notebook.png|frameless]] || 10% | ||
|- | |- | ||
| [[File:Ritter Gorget.png|frameless]] || 10% | | '''Ritter Gorget''' <br>[[File:Ritter Gorget.png|frameless]] || 10% | ||
|- | |- | ||
| colspan = "7" style="background-color:#000000;" | | | colspan = "7" style="background-color:#000000;" | | ||
|- | |- | ||
| rowspan="2" | '''Capricious Cassie''' <br> [[File:Capricious Cassie.png|frameless|250px]] || rowspan="2" | 120 || rowspan="2" | Fei'yin || rowspan="2" | (G/H-6) Map 2 || rowspan="2" | 1.5 hours || [[File:Orunmila's Torque.png|frameless]] || 10% | | rowspan="2" | '''Capricious Cassie''' <br> [[File:Capricious Cassie.png|frameless|250px]] || rowspan="2" | 120 || rowspan="2" | Fei'yin || rowspan="2" | (G/H-6) Map 2 || rowspan="2" | 1.5 hours ||'''Orunmila's Torque''' <br> [[File:Orunmila's Torque.png|frameless]] || 10% | ||
|- | |- | ||
| [[File:Fenian Ring.png|frameless]] || 10% | |'''Fenian Ring''' <br> [[File:Fenian Ring.png|frameless]] || 10% | ||
|- | |- | ||
| colspan = "7" style="background-color:#000000;" | | | colspan = "7" style="background-color:#000000;" | | ||
|- | |- | ||
| rowspan="4" | '''Stray Mary''' <br> [[File:Stray Mary.png|frameless|250px]] || rowspan="4" | 125 || rowspan="4" | Konschtat Highlands || rowspan="4" | (F-6/8)-(G-6/8) || rowspan="4" | 1 hour || [[File:Damani Horn.png|frameless]] || 25% | | rowspan="4" | '''Stray Mary''' <br> [[File:Stray Mary.png|frameless|250px]] || rowspan="4" | 125 || rowspan="4" | Konschtat Highlands || rowspan="4" | (F-6/8)-(G-6/8) || rowspan="4" | 1 hour ||'''Damani Horn''' <br> [[File:Damani Horn.png|frameless]] || 25% | ||
|- | |- | ||
| [[File:Mass Chalemie.png|frameless]] || 25% | |'''Mass Chalemie''' <br> [[File:Mass Chalemie.png|frameless]] || 25% | ||
|- | |- | ||
| [[File:Mouflon Ring.png|frameless]] || 25% | | '''Mouflon Ring''' <br>[[File:Mouflon Ring.png|frameless]] || 25% | ||
|- | |- | ||
| [[File:Acipayam Belt.png|frameless]] || 25% | | '''Acipayam Belt''' <br>[[File:Acipayam Belt.png|frameless]] || 25% | ||
|- | |- | ||
| colspan = "7" style="background-color:#000000;" | | | colspan = "7" style="background-color:#000000;" | | ||
|- | |- | ||
| rowspan="3" | '''Lumbering Lambert''' <br> [[File:Lumbering Lambert.png|frameless|250px]] || rowspan="3" | 125 || rowspan="3" | La Theine Plateau || rowspan="3" | (G-9)-(I-9) || rowspan="3" | 1 hour || [[File:Baldurno's Horn.png|frameless]] || 100% | | rowspan="3" | '''Lumbering Lambert''' <br> [[File:Lumbering Lambert.png|frameless|250px]] || rowspan="3" | 125 || rowspan="3" | La Theine Plateau || rowspan="3" | (G-9)-(I-9) || rowspan="3" | 1 hour || '''Baldurno's Horn''' <br>[[File:Baldurno's Horn.png|frameless]] || 100% | ||
|- | |- | ||
| [[File:Grit Earring.png|frameless]] || 25% | | '''Grit Earring''' <br>[[File:Grit Earring.png|frameless]] || 25% | ||
|- | |- | ||
| [[File:Bleating Mantle.png|frameless]] || 25% | | '''Bleating Mantle''' <br>[[File:Bleating Mantle.png|frameless]] || 25% | ||
|- | |- | ||
| colspan = "7" style="background-color:#000000;" | | | colspan = "7" style="background-color:#000000;" | | ||
|- | |- | ||
| rowspan="2" | '''Rampaging Ram''' <br> [[File:Rampaging Ram.JPG|frameless|250px]] || rowspan="2" | 110 || rowspan="2" | Konschtat Highlands || rowspan="2" | (H-6)-(H-8) || rowspan="2" | 1 hour || [[File:Hearty.JPG|frameless]] || 10% | | rowspan="2" | '''Rampaging Ram''' <br> [[File:Rampaging Ram.JPG|frameless|250px]] || rowspan="2" | 110 || rowspan="2" | Konschtat Highlands || rowspan="2" | (H-6)-(H-8) || rowspan="2" | 1 hour || '''Hearty Earring'''[[File:Hearty.JPG|frameless]] || 10% | ||
|- | |- | ||
| [[File:Prolix.JPG|frameless]] || 10% | | '''Prolix Ring'''[[File:Prolix.JPG|frameless]] || 10% | ||
|- | |- | ||
| colspan = "7" style="background-color:#000000;" | | | colspan = "7" style="background-color:#000000;" | | ||
|- | |- | ||
| rowspan="4" | '''Serpopard Ishtar''' <br> [[File:Serpopard Ishtar.png|frameless|250px]] || rowspan="4" | 125 || rowspan="4" | Tahrongi Canyon || rowspan="4" | (H-5)-(H-6) <br> '''or''' <br> (H-8)-(I-8) || rowspan="4" | 1 hour || [[File:Serpopard Ninlil's Bone.png|frameless]] || 100% | | rowspan="4" | '''Serpopard Ishtar''' <br> [[File:Serpopard Ishtar.png|frameless|250px]] || rowspan="4" | 125 || rowspan="4" | Tahrongi Canyon || rowspan="4" | (H-5)-(H-6) <br> '''or''' <br> (H-8)-(I-8) || rowspan="4" | 1 hour ||'''Serpopard Ninlil's Bone''' [[File:Serpopard Ninlil's Bone.png|frameless]] || 100% | ||
|- | |||
| '''Narmar Boomerang'''[[File:Narmar Boomerang.png|frameless]] || 25% | |||
|- | |||
| '''Cloud Hairpin'''[[File:Cloud Hairpin.png|frameless]] || 25% | |||
|- | |||
| '''Nekhen Ring'''[[File:Nekhen Ring.png|frameless]] || 25% | |||
|- | |||
| rowspan="4" | '''Observant Zekka''' <br> [[File:Observant Zekka.png|frameless|250px]] || rowspan="4" | 125 || rowspan="4" | Beadeaux (S) || rowspan="4" |(J-6)|| rowspan="4" | 2 hours || | |||
|- | |||
| '''Eidolon Pendant +1'''[[File:Eidolon Pendant +1.png|frameless]] || 33% | |||
|- | |||
| '''Felictas Cape +1'''[[File:Felictas Cape +1.png|frameless]] || 33% | |||
|- | |||
|'''Austerity Belt +1''' [[File:Austerity Belt +1.png|frameless]] || 33% | |||
|- | |||
| rowspan="2" | '''Shen''' <br> [[File:Shen.png|frameless|250px]] || rowspan="2" | 125 || rowspan="2" | Bibiki Bay || rowspan="2" | (J-9) || rowspan="2" | 1 hour || '''Tempered Cape'''[[File:Tempered Cape.png|frameless]] || 10% | |||
|- | |||
| '''Tempered Cape +1'''[[File:Tempered Cape +1.png|frameless]] || 1% | |||
|- | |||
| rowspan="2" | '''Numbing Norman''' <br> [[File:Numbing Norman.png|frameless|250px]] || rowspan="2" | 115 || rowspan="2" | West Sarutabaruta || rowspan="2" | (F-5) || rowspan="2" | 2 hour || '''Dilletante Grip +1'''[[File:Dilletante Grip +1.png|frameless]] || 10% | |||
|- | |||
| '''Erudition Necklace''' <br>[[File:Erudition Necklace.png|frameless]] || 15% | |||
|- | |||
| colspan = "7" style="background-color:#000000;" | | |||
|- | |||
| rowspan="2" | '''Habergoass''' <br> [[File:Habergoass.png|frameless|250px]] || rowspan="2" | 125 || rowspan="2" | Batallia Downs (S)|| rowspan="2" | (I-10) || rowspan="2" | 2 hours || '''Oneiros Rope''' <br>[[File:Oneiros Rope.png|frameless]] || 8% | |||
|- | |- | ||
| [[File: | | ''' Gaudryi Necklace''' <br>[[File: Gaudryi Necklace.png|frameless]] || 15% | ||
|- | |- | ||
| [[File: | | rowspan="2" | '''Muq Shabeel''' <br> [[File:Muq Shabeel.png|frameless|250px]] || rowspan="2" | 130 || rowspan="2" | Meriphataud Mountains (S)|| rowspan="2" | (K-4) || rowspan="2" | 90 minutes || '''Salire Belt''' <br>[[File:Salire Belt.png|frameless]] || 10% | ||
|- | |||
| '''Genesis Locket''' <br>[[File:Genesis Locket.png|frameless]] || 15% | |||
|- | |||
| rowspan="2" | '''Nunyenunc''' <br> [[File:Nunyenunc.png|frameless|250px]] || rowspan="2" | 120 || rowspan="2" | West Sarutabaruta || rowspan="2" | (H-5) || rowspan="2" | 2 Hours || '''Duplus Grip''' <br>[[File:DuplusGrip.png|frameless]] || 10% | |||
|- | |||
| '''Iron Gobbet''' <br>[[File:Iron Gobbet.png|frameless]] || 17% | |||
|- | |||
| rowspan="2" | '''Taisaijin''' <br> [[File:Taisaijin.png|frameless|250px]] || rowspan="2" | 125 || rowspan="2" | Ranguemont Pass || rowspan="2" | (G-9) || rowspan="2" | 4 Hours || '''Maquette Ring''' <br>[[File:Maquette Ring.png|frameless]] || 20% | |||
|- | |||
| '''Chuparrosa Mantle''' <br>[[File:Chuparrosa Mantle.png|frameless]] || 37% | |||
|- | |||
| rowspan="2" | '''Dread Dealing Dredodak''' <br> [[File:Dread Dealing Dredodak.png|frameless|250px]] || rowspan="2" | 125 || rowspan="2" | Oldtown Movalpolos || rowspan="2" | (G-8) || rowspan="2" | 4 Hours || '''Grapevine Cape''' <br>[[File:Grapevine Cape.png|frameless]] || 7% | |||
|- | |||
| '''Moondoe Mantle''' <br>[[File:Moondoe Mantle.png|frameless]] || 15% | |||
|- | |||
| rowspan="2" | '''Swashstox Beadblinker''' <br> [[File:Swashstox Beadblinker.png|frameless|250px]] || rowspan="2" | 125 || rowspan="2" | Newtown Movalpolos|| rowspan="2" | (I-9) || rowspan="2" | 4 Hours || '''Volunteer's Earring''' <br>[[File:Volunteer's Earring.png|frameless]] || 22% | |||
|- | |||
| '''Matanki Earring''' <br>[[File:Matanki Earring.png|frameless]] || 14% | |||
|- | |||
| rowspan="3" | '''Skogs Fru''' <br> [[File:Skogs Fru.png|frameless|250px]] || rowspan="3" | 120 || rowspan="3" | East Ronfaure (S) || rowspan="3" | (H-10) || rowspan="3" | 2 Hours || '''Oneiros Knife''' <br>[[File:Oneiros Knife.png|frameless]] || 10% | |||
|- | |||
| '''Carrier's Sash''' <br>[[File:Carrier's Sash.png|frameless]] || 26% | |||
|- | |||
| '''Coalition Shield''' <br>[[File:Coalition Shield.png|frameless]] || 20% | |||
|- | |||
| rowspan="3" | '''Koropokkur''' <br> [[File:Koropokkur.png|frameless|250px]] || rowspan="3" | 125 || rowspan="3" | Yuhtunga Jungle || rowspan="3" | (G7) || rowspan="3" | 2 Hours || '''Atalanta''' <br>[[File:Atalanta.png|frameless]] || 5% | |||
|- | |||
| '''Zennaroi Earring''' <br>[[File:Zennaroi Earring.png|frameless]] || 10% | |||
|- | |||
| '''Sortiarius Earring''' <br>[[File:Sortiarius Earring.png|frameless]] || 7% | |||
|- | |||
| rowspan="3" | '''Bune''' <br> [[File:Bune.png|frameless|250px]] || rowspan="3" | 130 || rowspan="3" | Gustav Tunnel || rowspan="3" | (G-10) || rowspan="3" | 2 Hours || '''Esper Earring''' <br>[[File:Esper Earring.png|frameless]] || 12% | |||
|- | |||
| '''Beneficus''' <br>[[File:Beneficus.png|frameless]] || 50% | |||
|- | |||
| '''Hermetic Earring''' <br>[[File:Hermetic Earring.png|frameless]] || 25% | |||
|- | |||
| rowspan="3" | '''Suu Xicu the Cantabile''' <br> [[File:Suu Xicu the Cantabile.png|frameless|250px]] || rowspan="3" | 130 || rowspan="3" | Castle Oztroja (S) || rowspan="3" | (H-8) || rowspan="3" | 4 Hours || '''Requiem Flute''' <br>[[File:Requiem_flute.png|frameless]] || 20% | |||
|- | |- | ||
| [[File: | |} | ||
=== Quest Items === | |||
{| class="wikitable mw-collapsible mw-collapsed" style="text-align: center"; width="1000px;" | |||
! scope="row" colspan="7" | ANM's | |||
|- | |||
| style="background-color:#cfcfcf;" | '''Notorious Monster''' || style="background-color:#cfcfcf;" | '''Level''' || style="background-color:#cfcfcf;" | '''Zone''' || style="background-color:#cfcfcf;" | '''Position''' || style="background-color:#cfcfcf;" | '''Respawn''' || style="background-color:#cfcfcf;" | '''Reward''' || style="background-color:#cfcfcf;" | '''Drop Chance''' | |||
|- | |||
| rowspan="2" | '''Ziphius''' <br> [[File:ziphius.png|frameless|250px]] || rowspan="2" | 120 - 155 <br> (Scaled based on fishing level) || rowspan="2" | Misareaux Coast || rowspan="2" | (H-5) || rowspan="2" | Trade a Slice of Carp to the six ??? at (H-5) between 22:00-0:00, then check them at 4:00-7:00 || '''Sand Charm'''[[File:sand_charm.png|frameless]] || 100% | |||
|- | |||
| '''Ebisu Fishing Rod'''[[File:ebisu_rod.png|frameless]] || 10% - 100% <br> (Scaled based on fishing level) | |||
|} | |} | ||
| Line 197: | Line 327: | ||
| style="background-color:#cfcfcf;" | '''Notorious Monster''' || style="background-color:#cfcfcf;" | '''Level''' || style="background-color:#cfcfcf;" | '''Zone''' || style="background-color:#cfcfcf;" | '''Position''' || style="background-color:#cfcfcf;" | '''Respawn''' || style="background-color:#cfcfcf;" | '''Reward''' || style="background-color:#cfcfcf;" | '''Drop Chance''' | | style="background-color:#cfcfcf;" | '''Notorious Monster''' || style="background-color:#cfcfcf;" | '''Level''' || style="background-color:#cfcfcf;" | '''Zone''' || style="background-color:#cfcfcf;" | '''Position''' || style="background-color:#cfcfcf;" | '''Respawn''' || style="background-color:#cfcfcf;" | '''Reward''' || style="background-color:#cfcfcf;" | '''Drop Chance''' | ||
|- | |- | ||
| rowspan="5" | '''Bloody Bones''' <br> [[File:Bloody_Bones.png|frameless|250px]] || rowspan="5" | 105 || rowspan="5" | Arrapago Reef || rowspan="5" | (I-6) <br> Map 2 || rowspan="5" | 1 hour || [[File:Morrigan's Coronal +1.png|frameless]] || 20% | | rowspan="5" | '''Bloody Bones''' <br> [[File:Bloody_Bones.png|frameless|250px]] || rowspan="5" | 105 || rowspan="5" | Arrapago Reef || rowspan="5" | (I-6) <br> Map 2 || rowspan="5" | 1 hour || '''Morrigan's Coronal +1'''[[File:Morrigan's Coronal +1.png|frameless]] || 20% | ||
|- | |- | ||
| [[File:Ares' Cuirass +1.png|frameless]] || 20% | | '''Ares' Cuirass +1'''[[File:Ares' Cuirass +1.png|frameless]] || 20% | ||
|- | |- | ||
| [[File:Skadi's Bazubands +1.png|frameless]] || 20% | | '''Skadi's Bazubands +1'''[[File:Skadi's Bazubands +1.png|frameless]] || 20% | ||
|- | |- | ||
| [[File:Usukane Hizayoroi +1.png|frameless]] || 20% | | '''Usukane Hizayoroi +1'''[[File:Usukane Hizayoroi +1.png|frameless]] || 20% | ||
|- | |- | ||
| [[File:Marduk's Crackows +1.png|frameless]] || 20% | | '''Marduk's Crackows +1'''[[File:Marduk's Crackows +1.png|frameless]] || 20% | ||
|- | |- | ||
| colspan = "7" style="background-color:#000000;" | | | colspan = "7" style="background-color:#000000;" | | ||
|- | |- | ||
| rowspan="5" | '''Lamie No. 7''' <br> [[File:Lamie_No_7.png|frameless|250px]] || rowspan="5" | 105 || rowspan="5" | Arrapago Reef || rowspan="5" | (E-10) <br> Map 2 || rowspan="5" | 1 hour || | | rowspan="5" | '''Lamie No. 7''' <br> [[File:Lamie_No_7.png|frameless|250px]] || rowspan="5" | 105 || rowspan="5" | Arrapago Reef || rowspan="5" | (E-10) <br> Map 2 || rowspan="5" | 1 hour || '''Ares' Mask +1'''[[File:Ares' Mask +1.png|frameless]] || 20% | ||
|- | |- | ||
| [[File: | | '''Skadi's Cuirie +1'''[[File:Skadi's Cuirie +1.png|frameless]] || 20% | ||
|- | |- | ||
| [[File: | | '''Usukane Gote +1'''[[File:Usukane Gote +1.png|frameless]] || 20% | ||
|- | |- | ||
| [[File: | |'''Marduk's Shalwar +1''' [[File:Marduk's Shalwar +1.png|frameless]] || 20% | ||
|- | |- | ||
| | |'''Morrigan's Pigaches +1''' [[File:Morrigan's Pigaches +1.png|frameless]] || 20% | ||
|- | |- | ||
| rowspan="5" | ''' | | rowspan="5" | '''Energetic Eruca''' <br> [[File:Energetic_Eruca.png|frameless|250px]] || rowspan="5" | 105 || rowspan="5" | Mount Zhayolm || rowspan="5" | (H-9) || rowspan="5" | 1 hour || '''Marduk's Tiara +1'''[[File:Marduk's Tiara +1.png|frameless]] || 20% | ||
|- | |- | ||
| [[File: | |'''Morrigan's Robe +1''' [[File:Morrigan's Robe +1.png|frameless]] || 20% | ||
|- | |- | ||
| [[File: | |'''Usukane Sune-Ate +1''' [[File:Usukane Sune-Ate +1.png|frameless]] || 20% | ||
|- | |- | ||
| [[File: | | '''Ares' Gauntlets +1'''[[File:Ares' Gauntlets +1.png|frameless]] || 20% | ||
|- | |- | ||
| [[File: | | '''Skadi's Chausses +1'''[[File:Skadi's Chausses +1.png|frameless]] || 20% | ||
|- | |- | ||
| colspan = "7" style="background-color:#000000;" | | | colspan = "7" style="background-color:#000000;" | | ||
|- | |- | ||
| rowspan="5" | ''' | | rowspan="5" | '''Garfurlar the Rabid''' <br> [[File:Garfurlar_the_Rabid.png|frameless|250px]] || rowspan="5" | 105 || rowspan="5" | Mount Zhayolm || rowspan="5" | (H-8) || rowspan="5" | 1 hour || '''Usukane Somen +1'''[[File:Usukane Somen +1.png|frameless]] || 20% | ||
|- | |- | ||
| [[File: | | '''Marduk's Jubbah +1'''[[File:Marduk's Jubbah +1.png|frameless]] || 20% | ||
|- | |- | ||
| [[File: | | '''Morrigan's Cuffs +1'''[[File:Morrigan's Cuffs +1.png|frameless]] || 20% | ||
|- | |- | ||
| [[File: | | '''Ares' Flanchard +1'''[[File:Ares' Flanchard +1.png|frameless]] || 20% | ||
|- | |- | ||
| [[File: | |'''Skadi's Jambeaux +1''' [[File:Skadi's Jambeaux +1.png|frameless]] || 20% | ||
|- | |- | ||
| colspan = "7" style="background-color:#000000;" | | | colspan = "7" style="background-color:#000000;" | | ||
|- | |- | ||
| rowspan="5" | ''' | | rowspan="5" | '''Jaded Jody''' <br> [[File:Jaded_Jody.png|frameless|250px]] || rowspan="5" | 105 || rowspan="5" | Wajaom Woodlands || rowspan="5" | (E-11) || rowspan="5" | 1 hour || '''Skadi's Visor +1'''[[File:Skadi's Visor +1.png|frameless]] || 20% | ||
|- | |- | ||
| [[File: | |'''Usukane Haramaki +1''' [[File:Usukane Haramaki +1.png|frameless]] || 20% | ||
|- | |- | ||
| [[File: | | '''Marduk's Dastanas +1'''[[File:Marduk's Dastanas +1.png|frameless]] || 20% | ||
|- | |- | ||
| [[File: | | '''Morrigan's Slops +1'''[[File:Morrigan's Slops +1.png|frameless]] || 20% | ||
|- | |- | ||
| [[File: | | '''Ares' Sollerets +1'''[[File:Ares' Sollerets +1.png|frameless]] || 20% | ||
|- | |- | ||
| colspan = "7" style="background-color:#000000;" | | | colspan = "7" style="background-color:#000000;" | | ||
|- | |- | ||
| rowspan="5" | ''' | | rowspan="5" | '''Lamie No. 8''' <br> [[File:Lamie_No_8.png|frameless|250px]] || rowspan="5" | 105 || rowspan="5" | Arrapago Reef || rowspan="5" | (I-10) <br> Map 2 || rowspan="5" | 1 hour || '''Phorcys Salade'''[[File:Phorcys Salade.png|frameless]] || 20% | ||
|- | |- | ||
| [[File: | | '''Nares Saio'''[[File:Nares Saio.png|frameless]] || 20% | ||
|- | |- | ||
| [[File: | | '''Omodaka Haramaki'''[[File:Omodaka Haramaki.png|frameless]] || 20% | ||
|- | |- | ||
| [[File: | |'''Nabu's Dastanas''' [[File:Nabu's Dastanas.png|frameless]] || 20% | ||
|- | |- | ||
| [[File: | | '''Fea's Slops'''[[File:Fea's Slops.png|frameless]] || 20% | ||
|- | |- | ||
| colspan = "7" style="background-color:#000000;" | | | colspan = "7" style="background-color:#000000;" | | ||
|- | |- | ||
| rowspan="5" | ''' | | rowspan="5" | '''Bluestreak Gyugyuroon''' <br> [[File:Bluestreak_Gyugyuroon.png|frameless|250px]] || rowspan="5" | 105 || rowspan="5" | Aydeewa Subterrane || rowspan="5" | (I-9) <br> Map 3 || rowspan="5" | 1 hour || '''Ker's Mask'''[[File:Ker's Mask.png|frameless]] || 20% | ||
|- | |- | ||
| [[File: | | '''Sigyn's Cuirie'''[[File:Sigyn's Cuirie.png|frameless]] || 20% | ||
|- | |- | ||
| [[File: | | '''Omadaka Gote'''[[File:Omodaka Gote.png|frameless]] || 20% | ||
|- | |- | ||
| [[File: | | '''Nabu's Shalwar'''[[File:Nabu's Shalwar.png|frameless]] || 20% | ||
|- | |- | ||
| [[File: | |'''Fea's Pigaches''' [[File:Fea's Pigaches.png|frameless]] || 20% | ||
|- | |- | ||
| colspan = "7" style="background-color:#000000;" | | | colspan = "7" style="background-color:#000000;" | | ||
|- | |- | ||
| rowspan="5" | ''' | | rowspan="5" | '''Peallaidh''' <br> [[File:Peallaidh.png|frameless|250px]] || rowspan="5" | 105 || rowspan="5" | Caedarva Mire || rowspan="5" | (J-8) <br> Map 1 || rowspan="5" | 1 hour || '''Nares Cap'''[[File:Nares Cap.png|frameless]] || 20% | ||
|- | |- | ||
| [[File: | | '''Fea's Robe'''[[File:Fea's Robe.png|frameless]] || 20% | ||
|- | |- | ||
| [[File: | | '''Thaumas Kecks'''[[File:Thaumas Kecks.png|frameless]] || 20% | ||
|- | |- | ||
| [[File: | | '''Ker's Sollerets'''[[File:Ker's Sollerets.png|frameless]] || 20% | ||
|- | |- | ||
| [[File: | | '''Phorcys Schuhs'''[[File:Phorcys Schuhs.png|frameless]] || 20% | ||
|- | |- | ||
| colspan = "7" style="background-color:#000000;" | | | colspan = "7" style="background-color:#000000;" | | ||
|- | |- | ||
| rowspan="5" | ''' | | rowspan="5" | '''Zikko''' <br> [[File:Zikko.png|frameless|250px]] || rowspan="5" | 105 || rowspan="5" | Caedarva Mire || rowspan="5" | (G-10) <br> Map 2 || rowspan="5" | 1 hour || '''Omadaka Somen'''[[File:Omodaka Somen.png|frameless]] || 20% | ||
|- | |- | ||
| [[File: | | '''Sigyn's Visor'''[[File:Sigyn's Visor.png|frameless]] || 20% | ||
|- | |- | ||
| [[File: | | '''Nabu's Jubbah'''[[File:Nabu's Jubbah.png|frameless]] || 20% | ||
|- | |- | ||
| [[File: | | '''Fea's Cuffs'''[[File:Fea's Cuffs.png|frameless]] || 20% | ||
|- | |- | ||
| [[File: | | '''Thaumas Nails'''[[File:Thaumas Nails.png|frameless]] || 20% | ||
|- | |- | ||
| colspan = "7" style="background-color:#000000;" | | | colspan = "7" style="background-color:#000000;" | | ||
|- | |- | ||
| rowspan="5" | ''' | | rowspan="5" | '''Kirlirger the Abhorrent''' <br> [[File:Kirlirger_the_Abhorrent.png|frameless|250px]] || rowspan="5" | 105 || rowspan="5" | Halvung || rowspan="5" | (H-8) <br> Map 2 || rowspan="5" | 1 hour || '''Fea's Coronal'''[[File:Fea's Coronal.png|frameless]] || 20% | ||
|- | |- | ||
| [[File: | |'''Ker's Gauntlets''' [[File:Ker's Gauntlets.png|frameless]] || 20% | ||
|- | |- | ||
| [[File: | | '''Thaumas Gloves'''[[File:Thaumas Gloves.png|frameless]] || 20% | ||
|- | |- | ||
| [[File: | | '''Sigyn's Chausses'''[[File:Sigyn's Chausses.png|frameless]] || 20% | ||
|- | |- | ||
| [[File: | | '''Omadaka Sune-Ate'''[[File:Omodaka Sune-Ate.png|frameless]] || 20% | ||
|- | |- | ||
| colspan = "7" style="background-color:#000000;" | | | colspan = "7" style="background-color:#000000;" | | ||
|- | |- | ||
| rowspan="5" | ''' | | rowspan="5" | '''Mythril Mouth Monamaq''' <br> [[File:Mythril_Mouth_Monamaq.png|frameless|250px]] || rowspan="5" | 105 || rowspan="5" | Halvung || rowspan="5" | (H-9) <br> Map 2 || rowspan="5" | 1 hour || '''Nabu's Tiara'''[[File:Nabu's Tiara.png|frameless]] || 20% | ||
|- | |- | ||
| [[File: | | '''Ker's Flanchard'''[[File:Ker's Flanchard.png|frameless]] || 20% | ||
|- | |- | ||
| [[File: | |'''Phorcys Dirs''' [[File:Phorcys Dirs.png|frameless]] || 20% | ||
|- | |- | ||
| [[File: | | '''Nares Clogs'''[[File:Nares Clogs.png|frameless]] || 20% | ||
|- | |- | ||
| [[File: | | '''Sigyn's Jambeux'''[[File:Sigyn's Jambeaux.png|frameless]] || 20% | ||
|- | |- | ||
| colspan = "7" style="background-color:#000000;" | | | colspan = "7" style="background-color:#000000;" | | ||
|- | |- | ||
| rowspan="5" | ''' | | rowspan="5" | '''Dragonscaled Bugaal Ja''' <br> [[File:Dragonscaled_Bugaal_Ja.png|frameless|250px]] || rowspan="5" | 105 || rowspan="5" | Mamook || rowspan="5" | (D-7) <br> Map 1 || rowspan="5" | 1 hour || '''Thaumas Hat'''[[File:Thaumas Hat.png|frameless]] || 20% | ||
|- | |- | ||
| [[File: | | '''Ker's Cuirass'''[[File:Ker's Cuirass.png|frameless]] || 20% | ||
|- | |- | ||
| [[File: | | '''Phorcys Korazin'''[[File:Phorcys Korazin.png|frameless]] || 20% | ||
|- | |- | ||
| [[File: | | '''Nares Cuffs'''[[File:Nares Cuffs.png|frameless]] || 20% | ||
|- | |- | ||
| [[File: | | '''Sigyn's Bazubands'''[[File:Sigyn's Bazubands.png|frameless]] || 20% | ||
|- | |- | ||
| colspan = "7" style="background-color:#000000;" | | | colspan = "7" style="background-color:#000000;" | | ||
|- | |- | ||
| rowspan="5" | ''' | | rowspan="5" | '''Zizzy Zillah''' <br> [[File:Zizzy_Zillah.png|frameless|250px]] || rowspan="5" | 105 || rowspan="5" | Mamook || rowspan="5" | (I-9) <br> Map 1 || rowspan="5" | 1 hour || '''Thaumas Coat'''[[File:Thaumas Coat.png|frameless]] || 20% | ||
|- | |- | ||
| [[File: | |'''Phorcys Mitts''' [[File:Phorcys Mitts.png|frameless]] || 20% | ||
|- | |- | ||
| [[File: | | '''Nares Trews'''[[File:Nares Trews.png|frameless]] || 20% | ||
|- | |- | ||
| [[File: | | '''Omodaka Hizayoroi'''[[File:Omodaka Hizayoroi.png|frameless]] || 20% | ||
|- | |||
| '''Nabu's Crackows'''[[File:Nabu's Crackows.png|frameless]] || 20% | |||
|- | |||
| colspan = "7" style="background-color:#000000;" | | |||
|- | |- | ||
|} | |} | ||
| Line 359: | Line 490: | ||
| style="background-color:#cfcfcf;" | '''Notorious Monster''' || style="background-color:#cfcfcf;" | '''Level''' || style="background-color:#cfcfcf;" | '''Zone''' || style="background-color:#cfcfcf;" | '''Position''' || style="background-color:#cfcfcf;" | '''Respawn''' || style="background-color:#cfcfcf;" | '''Reward''' || style="background-color:#cfcfcf;" | '''Drop Chance''' | | style="background-color:#cfcfcf;" | '''Notorious Monster''' || style="background-color:#cfcfcf;" | '''Level''' || style="background-color:#cfcfcf;" | '''Zone''' || style="background-color:#cfcfcf;" | '''Position''' || style="background-color:#cfcfcf;" | '''Respawn''' || style="background-color:#cfcfcf;" | '''Reward''' || style="background-color:#cfcfcf;" | '''Drop Chance''' | ||
|- | |- | ||
| rowspan="5" | '''Citipati''' <br> [[File:Citipati.png|frameless|250px]] || rowspan="5" | 105 || rowspan="5" | Attohwa Chasm || rowspan="5" | (F-8) || rowspan="5" | 1 hour || [[File:Murzim_Zucchetto.png|frameless]] || 20% | | rowspan="5" | '''Citipati''' <br> [[File:Citipati.png|frameless|250px]] || rowspan="5" | 105 || rowspan="5" | Attohwa Chasm || rowspan="5" | (F-8) || rowspan="5" | 1 hour || '''Murzim Zucchetto'''[[File:Murzim_Zucchetto.png|frameless]] || 20% | ||
|- | |- | ||
| [[File:Shedir_Manteel.png|frameless]] || 20% | |'''Shedir Manteel''' [[File:Shedir_Manteel.png|frameless]] || 20% | ||
|- | |- | ||
| [[File:Enif_Manopolas.png|frameless]] || 20% | | '''Enif Manopolas'''[[File:Enif_Manopolas.png|frameless]] || 20% | ||
|- | |- | ||
| [[File:Adhara_Seraweels.png|frameless]] || 20% | | '''Adhara Seraweels'''[[File:Adhara_Seraweels.png|frameless]] || 20% | ||
|- | |- | ||
| [[File:Murzim_Gambieras.png|frameless]] || 20% | | '''Murzim Gambieras'''[[File:Murzim_Gambieras.png|frameless]] || 20% | ||
|- | |- | ||
| colspan = "7" style="background-color:#000000;" | | | colspan = "7" style="background-color:#000000;" | | ||
|- | |- | ||
| rowspan="5" | '''Goaftrap''' <br> [[File:Goaftrap.png|frameless|250px]] || rowspan="5" | 105 || rowspan="5" | Misareaux Coast || rowspan="5" | (L-11) || rowspan="5" | 1 hour || [[File:Enif_Zucchetto.png|frameless]] || 20% | | rowspan="5" | '''Goaftrap''' <br> [[File:Goaftrap.png|frameless|250px]] || rowspan="5" | 105 || rowspan="5" | Misareaux Coast || rowspan="5" | (L-11) || rowspan="5" | 1 hour || '''Enif Zucchetto'''[[File:Enif_Zucchetto.png|frameless]] || 20% | ||
|- | |- | ||
| [[File:Shedir_Turban.png|frameless]] || 20% | | '''Shedir Turban'''[[File:Shedir_Turban.png|frameless]] || 20% | ||
|- | |- | ||
| [[File:Adhara_Manteel.png|frameless]] || 20% | | '''Adhara Manteel'''[[File:Adhara_Manteel.png|frameless]] || 20% | ||
|- | |- | ||
| [[File:Murzim_Cosciales.png|frameless]] || 20% | | '''Murzim Cosciales'''[[File:Murzim_Cosciales.png|frameless]] || 20% | ||
|- | |- | ||
| [[File:Shedir_Crackows.png|frameless]] || 20% | | '''Shedir Crackows'''[[File:Shedir_Crackows.png|frameless]] || 20% | ||
|- | |- | ||
| colspan = "7" style="background-color:#000000;" | | | colspan = "7" style="background-color:#000000;" | | ||
|- | |- | ||
| rowspan="5" | '''Intulo''' <br> [[File:Intulo.png|frameless|250px]] || rowspan="5" | 105 || rowspan="5" | Bibiki Bay || rowspan="5" | (I-7) <br> Map 1 || rowspan="5" | 1 hour || [[File:Enif_Corazza.png|frameless]] || 20% | | rowspan="5" | '''Intulo''' <br> [[File:Intulo.png|frameless|250px]] || rowspan="5" | 105 || rowspan="5" | Bibiki Bay || rowspan="5" | (I-7) <br> Map 1 || rowspan="5" | 1 hour || '''Enif Corazza'''[[File:Enif_Corazza.png|frameless]] || 20% | ||
|- | |- | ||
| [[File:Murzim_Corazza.png|frameless]] || 20% | | '''Murzim Corazza'''[[File:Murzim_Corazza.png|frameless]] || 20% | ||
|- | |- | ||
| [[File:Shedir_Gages.png|frameless]] || 20% | |'''Shedir Gages''' [[File:Shedir_Gages.png|frameless]] || 20% | ||
|- | |- | ||
| [[File:Enif_Cosciales.png|frameless]] || 20% | |'''Enif Cosciales''' [[File:Enif_Cosciales.png|frameless]] || 20% | ||
|- | |- | ||
| [[File:Adhara_Crackows.png|frameless]] || 20% | | '''Adhara Crackows'''[[File:Adhara_Crackows.png|frameless]] || 20% | ||
|- | |- | ||
| colspan = "7" style="background-color:#000000;" | | | colspan = "7" style="background-color:#000000;" | | ||
|- | |- | ||
| rowspan="5" | '''Tempest Tigon''' <br> [[File:Tempest Tigon.png|frameless|250px]] || rowspan="5" | 105 || rowspan="5" | Carpenter's Landing || rowspan="5" | (G-9) <br> Map 1 || rowspan="5" | 1 hour || [[File:Adhara_Turban.png|frameless]] || 20% | | rowspan="5" | '''Tempest Tigon''' <br> [[File:Tempest Tigon.png|frameless|250px]] || rowspan="5" | 105 || rowspan="5" | Carpenter's Landing || rowspan="5" | (G-9) <br> Map 1 || rowspan="5" | 1 hour || '''Adhara Turban'''[[File:Adhara_Turban.png|frameless]] || 20% | ||
|- | |- | ||
| [[File:Adhara_Gages.png|frameless]] || 20% | | '''Adhara Gages'''[[File:Adhara_Gages.png|frameless]] || 20% | ||
|- | |- | ||
| [[File:Murzim_Manopolas.png|frameless]] || 20% | |'''Murzim Manopolas''' [[File:Murzim_Manopolas.png|frameless]] || 20% | ||
|- | |- | ||
| [[File:Shedir_Seraweels.png|frameless]] || 20% | | '''Shedir Seraweels'''[[File:Shedir_Seraweels.png|frameless]] || 20% | ||
|- | |- | ||
| [[File:Enif_Gambieras.png|frameless]] || 20% | | '''Enif Gambieras'''[[File:Enif_Gambieras.png|frameless]] || 20% | ||
|} | |} | ||
| Line 413: | Line 544: | ||
| style="background-color:#cfcfcf;" | '''Notorious Monster''' || style="background-color:#cfcfcf;" | '''Level''' || style="background-color:#cfcfcf;" | '''Zone''' || style="background-color:#cfcfcf;" | '''Position''' || style="background-color:#cfcfcf;" | '''Respawn''' || style="background-color:#cfcfcf;" | '''Reward''' || style="background-color:#cfcfcf;" | '''Drop Chance''' | | style="background-color:#cfcfcf;" | '''Notorious Monster''' || style="background-color:#cfcfcf;" | '''Level''' || style="background-color:#cfcfcf;" | '''Zone''' || style="background-color:#cfcfcf;" | '''Position''' || style="background-color:#cfcfcf;" | '''Respawn''' || style="background-color:#cfcfcf;" | '''Reward''' || style="background-color:#cfcfcf;" | '''Drop Chance''' | ||
|- | |- | ||
| rowspan="3" | '''Chocoboleech''' <br> [[File:Chocoboleech.png|frameless|250px]] || rowspan="3" | 105 || rowspan="3" | Dangruf Wadi || rowspan="3" | (F-9) || rowspan="3" | 1 hour || [[File:Lehbrailg.png|frameless]] || 33% | | rowspan="3" | '''Chocoboleech''' <br> [[File:Chocoboleech.png|frameless|250px]] || rowspan="3" | 105 || rowspan="3" | Dangruf Wadi || rowspan="3" | (F-9) || rowspan="3" | 1 hour || '''Lehbrailg'''[[File:Lehbrailg.png|frameless]] || 33% | ||
|- | |- | ||
| [[File:Uffrat.png|frameless]] || 33% | | '''Uffrat'''[[File:Uffrat.png|frameless]] || 33% | ||
|- | |- | ||
| [[File:Gorney Brayettes.png|frameless]] || 33% | |'''Gorney Brayettes''' [[File:Gorney Brayettes.png|frameless]] || 33% | ||
|- | |- | ||
| colspan = "7" style="background-color:#000000;" | | | colspan = "7" style="background-color:#000000;" | | ||
|- | |- | ||
| rowspan="3" | '''Teporingo''' <br> [[File:Teporingo.png|frameless|250px]] || rowspan="3" | 105 || rowspan="3" | Dangruf Wadi || rowspan="3" | (I-9) || rowspan="3" | 1 hour || [[File:Bocluamni.png|frameless]] || 33% | | rowspan="3" | '''Teporingo''' <br> [[File:Teporingo.png|frameless|250px]] || rowspan="3" | 105 || rowspan="3" | Dangruf Wadi || rowspan="3" | (I-9) || rowspan="3" | 1 hour || '''Bocluamni'''[[File:Bocluamni.png|frameless]] || 33% | ||
|- | |- | ||
| [[File:Hgafircian.png|frameless]] || 33% | | '''Hgafircian'''[[File:Hgafircian.png|frameless]] || 33% | ||
|- | |- | ||
| [[File:Shneddick Tights.png|frameless]] || 33% | |'''Shneddick Tights''' [[File:Shneddick Tights.png|frameless]] || 33% | ||
|- | |- | ||
| colspan = "7" style="background-color:#000000;" | | | colspan = "7" style="background-color:#000000;" | | ||
|- | |- | ||
| rowspan="3" | '''Hundredscar Hajwaj''' <br> [[File:Hundredscar_Hajwaj.png|frameless|250px]] || rowspan="3" | 105 || rowspan="3" | Fort Ghelsba || rowspan="3" | (H-9) || rowspan="3" | 1 hour || [[File:Iztaasu.png|frameless]] || 33% | | rowspan="3" | '''Hundredscar Hajwaj''' <br> [[File:Hundredscar_Hajwaj.png|frameless|250px]] || rowspan="3" | 105 || rowspan="3" | Fort Ghelsba || rowspan="3" | (H-9) || rowspan="3" | 1 hour || '''Iztaasu'''[[File:Iztaasu.png|frameless]] || 33% | ||
|- | |- | ||
| [[File:Weatherspoon Corona.png|frameless]] || 33% | | '''Weatherspoon Corona'''[[File:Weatherspoon Corona.png|frameless]] || 33% | ||
|- | |- | ||
| [[File:Gorney Haubert.png|frameless]] || 33% | | '''Gorney Haubert'''[[File:Gorney Haubert.png|frameless]] || 33% | ||
|- | |- | ||
| colspan = "7" style="background-color:#000000;" | | | colspan = "7" style="background-color:#000000;" | | ||
|- | |- | ||
| rowspan="3" | '''Thousandarm Deshglesh''' <br> [[File:Thousandarm_Deshglesh.png|frameless|250px]] || rowspan="3" | 105 || rowspan="3" | Ghelsba Outpost || rowspan="3" | (J-6) || rowspan="3" | 1 hour || [[File:Shichishito.png|frameless]] || 33% | | rowspan="3" | '''Thousandarm Deshglesh''' <br> [[File:Thousandarm_Deshglesh.png|frameless|250px]] || rowspan="3" | 105 || rowspan="3" | Ghelsba Outpost || rowspan="3" | (J-6) || rowspan="3" | 1 hour || '''Schichishito'''[[File:Shichishito.png|frameless]] || 33% | ||
|- | |- | ||
| [[File:Weatherspoon Pants.png|frameless]] || 33% | | '''Weatherspoon Pants'''[[File:Weatherspoon Pants.png|frameless]] || 33% | ||
|- | |- | ||
| [[File:Shneddick Boots.png|frameless]] || 33% | | '''Shneddick Boots'''[[File:Shneddick Boots.png|frameless]] || 33% | ||
|- | |- | ||
| colspan = "7" style="background-color:#000000;" | | | colspan = "7" style="background-color:#000000;" | | ||
|- | |- | ||
| rowspan="3" | '''Hoo Mjuu the Torrent''' <br> [[File:Hoo_Mjuu_the_Torrent.png|frameless|250px]] || rowspan="3" | 105 || rowspan="3" | Giddeus || rowspan="3" | (H-9) || rowspan="3" | 1 hour || [[File:Leisilonu.png|frameless]] || 33% | | rowspan="3" | '''Hoo Mjuu the Torrent''' <br> [[File:Hoo_Mjuu_the_Torrent.png|frameless|250px]] || rowspan="3" | 105 || rowspan="3" | Giddeus || rowspan="3" | (H-9) || rowspan="3" | 1 hour || '''Leisilonu'''[[File:Leisilonu.png|frameless]] || 33% | ||
|- | |- | ||
| [[File:Shneddick Tabard.png|frameless]] || 33% | | '''Shneddick Tabard'''[[File:Shneddick Tabard.png|frameless]] || 33% | ||
|- | |- | ||
| [[File:Weatherspoon Cuffs.png|frameless]] || 33% | | '''Weatherspoon Cuffs'''[[File:Weatherspoon Cuffs.png|frameless]] || 33% | ||
|- | |- | ||
| colspan = "7" style="background-color:#000000;" | | | colspan = "7" style="background-color:#000000;" | | ||
|- | |- | ||
| rowspan="3" | '''Juu Duzu the Whirlwind''' <br> [[File:Juu_Duzu_the_Whirlwind.png|frameless|250px]] || rowspan="3" | 105 || rowspan="3" | Giddeus || rowspan="3" | (J-11) || rowspan="3" | 1 hour || [[File:Qatsunoci.png|frameless]] || 33% | | rowspan="3" | '''Juu Duzu the Whirlwind''' <br> [[File:Juu_Duzu_the_Whirlwind.png|frameless|250px]] || rowspan="3" | 105 || rowspan="3" | Giddeus || rowspan="3" | (J-11) || rowspan="3" | 1 hour || '''Qatsunoci'''[[File:Qatsunoci.png|frameless]] || 33% | ||
|- | |- | ||
| [[File:Shneddick Gloves.png|frameless]] || 33% | | '''Shneddick Gloves'''[[File:Shneddick Gloves.png|frameless]] || 33% | ||
|- | |- | ||
| [[File:Gorney Sollerets.png|frameless]] || 33% | |'''Gorney Sollerets''' [[File:Gorney Sollerets.png|frameless]] || 33% | ||
|- | |- | ||
| colspan = "7" style="background-color:#000000;" | | | colspan = "7" style="background-color:#000000;" | | ||
|- | |- | ||
| rowspan="3" | '''Vuu Puqu the Beguiler''' <br> [[File:Vuu_Puqu_the_Beguiler.png|frameless|250px]] || rowspan="3" | 105 || rowspan="3" | Giddeus || rowspan="3" | (H-14) || rowspan="3" | 1 hour || [[File:Aedold.png|frameless]] || 33% | | rowspan="3" | '''Vuu Puqu the Beguiler''' <br> [[File:Vuu_Puqu_the_Beguiler.png|frameless|250px]] || rowspan="3" | 105 || rowspan="3" | Giddeus || rowspan="3" | (H-14) || rowspan="3" | 1 hour ||'''Aedold''' [[File:Aedold.png|frameless]] || 33% | ||
|- | |- | ||
| [[File:Crobaci.png|frameless]] || 33% | | '''Crobaci'''[[File:Crobaci.png|frameless]] || 33% | ||
|- | |- | ||
| [[File:Weatherspoon Souliers.png|frameless]] || 33% | |'''Weatherspoon Souliers''' [[File:Weatherspoon Souliers.png|frameless]] || 33% | ||
|- | |- | ||
| colspan = "7" style="background-color:#000000;" | | | colspan = "7" style="background-color:#000000;" | | ||
|- | |- | ||
| rowspan="3" | '''Bu'Ghi Howlblade''' <br> [[File:BuGhi_Howlblade.png|frameless|250px]] || rowspan="3" | 105 || rowspan="3" | Palborough Mines || rowspan="3" | (I-7) || rowspan="3" | 1 hour || [[File:Ninzas.png|frameless]] || 33% | | rowspan="3" | '''Bu'Ghi Howlblade''' <br> [[File:BuGhi_Howlblade.png|frameless|250px]] || rowspan="3" | 105 || rowspan="3" | Palborough Mines || rowspan="3" | (I-7) || rowspan="3" | 1 hour || '''Ninzas'''[[File:Ninzas.png|frameless]] || 33% | ||
|- | |- | ||
| [[File:Gorney Morion.png|frameless]] || 33% | |'''Gorney Morion''' [[File:Gorney Morion.png|frameless]] || 33% | ||
|- | |- | ||
| [[File:Shneddick Chapeau.png|frameless]] || 33% | | '''Shneddick Chapeau'''[[File:Shneddick Chapeau.png|frameless]] || 33% | ||
|- | |- | ||
| colspan = "7" style="background-color:#000000;" | | | colspan = "7" style="background-color:#000000;" | | ||
|- | |- | ||
| rowspan="3" | '''No'Mho Crimsonarmor''' <br> [[File:NoMho_Crimsonarmor.png|frameless|250px]] || rowspan="3" | 105 || rowspan="3" | Palborough Mines || rowspan="3" | (G-10) || rowspan="3" | 1 hour || [[File:Iizamal.png|frameless]] || 33% | | rowspan="3" | '''No'Mho Crimsonarmor''' <br> [[File:NoMho_Crimsonarmor.png|frameless|250px]] || rowspan="3" | 105 || rowspan="3" | Palborough Mines || rowspan="3" | (G-10) || rowspan="3" | 1 hour || '''Iizamal'''[[File:Iizamal.png|frameless]] || 33% | ||
|- | |- | ||
| [[File:Weatherspoon Robe.png|frameless]] || 33% | | '''Weatherspoon Robe'''[[File:Weatherspoon Robe.png|frameless]] || 33% | ||
|- | |- | ||
| [[File:Gorney Moufles.png|frameless]] || 33% | |'''Gorney Moufles''' [[File:Gorney Moufles.png|frameless]] || 33% | ||
|- | |- | ||
| colspan = "7" style="background-color:#000000;" | | | colspan = "7" style="background-color:#000000;" | | ||
|- | |- | ||
| rowspan="3" | '''Zi'Ghi Boneater''' <br> [[File:ZiGhi_Boneater.png|frameless|250px]] || rowspan="3" | 105 || rowspan="3" | Palborough Mines || rowspan="3" | (H-8) || rowspan="3" | 1 hour || [[File:Faizzeer.png|frameless]] || 33% | | rowspan="3" | '''Zi'Ghi Boneater''' <br> [[File:ZiGhi_Boneater.png|frameless|250px]] || rowspan="3" | 105 || rowspan="3" | Palborough Mines || rowspan="3" | (H-8) || rowspan="3" | 1 hour || '''Faizzeer'''[[File:Faizzeer.png|frameless]] || 33% | ||
|- | |- | ||
| [[File:Iclamar.png|frameless]] || 33% | |'''Iclamar''' [[File:Iclamar.png|frameless]] || 33% | ||
|- | |- | ||
| [[File:Kannakiri.png|frameless]] || 33% | | '''Kannakiri'''[[File:Kannakiri.png|frameless]] || 33% | ||
|- | |- | ||
| colspan = "7" style="background-color:#000000;" | | | colspan = "7" style="background-color:#000000;" | | ||
| Line 503: | Line 634: | ||
| style="background-color:#cfcfcf;" | '''Notorious Monster''' || style="background-color:#cfcfcf;" | '''Level''' || style="background-color:#cfcfcf;" | '''Zone''' || style="background-color:#cfcfcf;" | '''Position''' || style="background-color:#cfcfcf;" | '''Respawn''' || style="background-color:#cfcfcf;" | '''Reward''' || style="background-color:#cfcfcf;" | '''Drop Chance''' | | style="background-color:#cfcfcf;" | '''Notorious Monster''' || style="background-color:#cfcfcf;" | '''Level''' || style="background-color:#cfcfcf;" | '''Zone''' || style="background-color:#cfcfcf;" | '''Position''' || style="background-color:#cfcfcf;" | '''Respawn''' || style="background-color:#cfcfcf;" | '''Reward''' || style="background-color:#cfcfcf;" | '''Drop Chance''' | ||
|- | |- | ||
| rowspan="1" | '''Bi'Gho Headtaker''' <br> [[File:Bi'Gho Headtaker.png|frameless|250px]] || rowspan="1" | 115 || rowspan="1" | Beadeaux || rowspan="1" | (G-7) <br> Map 1 || rowspan="1" | 1 hour || [[File:Otronif Harness.png|frameless]] || 25% | | rowspan="1" | '''Bi'Gho Headtaker''' <br> [[File:Bi'Gho Headtaker.png|frameless|250px]] || rowspan="1" | 115 || rowspan="1" | Beadeaux || rowspan="1" | (G-7) <br> Map 1 || rowspan="1" | 1 hour || '''Otronif Harness'''[[File:Otronif Harness.png|frameless]] || 25% | ||
|- | |- | ||
| colspan = "7" style="background-color:#000000;" | | | colspan = "7" style="background-color:#000000;" | | ||
|- | |- | ||
| rowspan="1" | '''Da'Dha Hundredmask''' <br> [[File:Da'Dha Hundredmask.png|frameless|250px]] || rowspan="1" | 115 || rowspan="1" | Beadeaux || rowspan="1" | (G-9) <br> Map 1 || rowspan="1" | 1 hour || [[File:Otronif Gloves.png|frameless]] || 25% | | rowspan="1" | '''Da'Dha Hundredmask''' <br> [[File:Da'Dha Hundredmask.png|frameless|250px]] || rowspan="1" | 115 || rowspan="1" | Beadeaux || rowspan="1" | (G-9) <br> Map 1 || rowspan="1" | 1 hour || '''Otronif Gloves'''[[File:Otronif Gloves.png|frameless]] || 25% | ||
|- | |- | ||
| colspan = "7" style="background-color:#000000;" | | | colspan = "7" style="background-color:#000000;" | | ||
|- | |- | ||
| rowspan="1" | '''Ga'Bhu Unvanquished''' <br> [[File:Ga'Bhu Unvanquished.png|frameless|250px]] || rowspan="1" | 115 || rowspan="1" | Beadeaux|| rowspan="1" | (J-5) <br> Map 1 || rowspan="1" | 1 hour || [[File:Iuitl Tights.png|frameless]] || 25% | | rowspan="1" | '''Ga'Bhu Unvanquished''' <br> [[File:Ga'Bhu Unvanquished.png|frameless|250px]] || rowspan="1" | 115 || rowspan="1" | Beadeaux|| rowspan="1" | (J-5) <br> Map 1 || rowspan="1" | 1 hour || '''Iuitl Tights'''[[File:Iuitl Tights.png|frameless]] || 25% | ||
|- | |- | ||
| colspan = "7" style="background-color:#000000;" | | | colspan = "7" style="background-color:#000000;" | | ||
|- | |- | ||
| rowspan="1" | '''Ge'Dha Evileye''' <br> [[File:Ge'Dha Evileye.png|frameless|250px]] || rowspan="1" | 115 || rowspan="1" | Beadeaux || rowspan="1" | (E/F-10/11) <br> Map 1 || rowspan="1" | 1 hour || [[File:Otronif Brais.png|frameless]] || 25% | | rowspan="1" | '''Ge'Dha Evileye''' <br> [[File:Ge'Dha Evileye.png|frameless|250px]] || rowspan="1" | 115 || rowspan="1" | Beadeaux || rowspan="1" | (E/F-10/11) <br> Map 1 || rowspan="1" | 1 hour || '''Otronif Brais'''[[File:Otronif Brais.png|frameless]] || 25% | ||
|- | |- | ||
| colspan = "7" style="background-color:#000000;" | | | colspan = "7" style="background-color:#000000;" | | ||
|- | |- | ||
| rowspan="1" | '''Zo'Khu Blackcloud''' <br> [[File:Zo'Khu Blackcloud.png|frameless|250px]] || rowspan="1" | 115 || rowspan="1" | Beadeaux|| rowspan="1" | (E-11) <br> Map 1 || rowspan="1" | 1 hour || [[File:Iuitl Wristbands.png|frameless]] || 25% | | rowspan="1" | '''Zo'Khu Blackcloud''' <br> [[File:Zo'Khu Blackcloud.png|frameless|250px]] || rowspan="1" | 115 || rowspan="1" | Beadeaux|| rowspan="1" | (E-11) <br> Map 1 || rowspan="1" | 1 hour || '''Iuitl Wristbands''' [[File:Iuitl Wristbands.png|frameless]] || 25% | ||
|- | |- | ||
| colspan = "7" style="background-color:#000000;" | | | colspan = "7" style="background-color:#000000;" | | ||
|- | |- | ||
| rowspan="1" | '''Mee Deggi the Punisher''' <br> [[File:Mee Deggi the Punisher.png|frameless|250px]] || rowspan="1" | 115 || rowspan="1" | Castle Oztroja || rowspan="1" | (H-8) <br> Map 7 || rowspan="1" | 1 hour || [[File:Gendewitha Galoshes.png|frameless]] || 25% | | rowspan="1" | '''Mee Deggi the Punisher''' <br> [[File:Mee Deggi the Punisher.png|frameless|250px]] || rowspan="1" | 115 || rowspan="1" | Castle Oztroja || rowspan="1" | (H-8) <br> Map 7 || rowspan="1" | 1 hour || '''Gendewitha Galoshes'''[[File:Gendewitha Galoshes.png|frameless]] || 25% | ||
|- | |- | ||
| colspan = "7" style="background-color:#000000;" | | | colspan = "7" style="background-color:#000000;" | | ||
|- | |- | ||
| rowspan="1" | '''Moo Ouzi the Swiftblade''' <br> [[File:Moo Ouzi the Swiftblade.png|frameless|250px]] || rowspan="1" | 115 || rowspan="1" | Castle Oztroja || rowspan="1" | (G-7) <br> Map 1 || rowspan="1" | 1 hour || [[File:Gendewitha Spats.png|frameless]] || 25% | | rowspan="1" | '''Moo Ouzi the Swiftblade''' <br> [[File:Moo Ouzi the Swiftblade.png|frameless|250px]] || rowspan="1" | 115 || rowspan="1" | Castle Oztroja || rowspan="1" | (G-7) <br> Map 1 || rowspan="1" | 1 hour || '''Gendewitha Spats'''[[File:Gendewitha Spats.png|frameless]] || 25% | ||
|- | |- | ||
| colspan = "7" style="background-color:#000000;" | | | colspan = "7" style="background-color:#000000;" | | ||
|- | |- | ||
| rowspan="1" | '''Quu Domi the Gallant''' <br> [[File:Quu Domi the Gallant.png|frameless|250px]] || rowspan="1" | 115 || rowspan="1" | Castle Oztroja || rowspan="1" | (H-8) <br> Map 6 || rowspan="1" | 1 hour || [[File:Hagondes Hat.png|frameless]] || 25% | | rowspan="1" | '''Quu Domi the Gallant''' <br> [[File:Quu Domi the Gallant.png|frameless|250px]] || rowspan="1" | 115 || rowspan="1" | Castle Oztroja || rowspan="1" | (H-8) <br> Map 6 || rowspan="1" | 1 hour || '''Hagondes Hat'''[[File:Hagondes Hat.png|frameless]] || 25% | ||
|- | |- | ||
| colspan = "7" style="background-color:#000000;" | | | colspan = "7" style="background-color:#000000;" | | ||
|- | |- | ||
| rowspan="1" | '''Yaa Haqa the Profane''' <br> [[File:Yaa Haqa the Profane.png|frameless|250px]] || rowspan="1" | 115 || rowspan="1" | Castle Oztroja || rowspan="1" | (I-10) <br> Map 2 || rowspan="1" | 1 hour || [[File:Hagondes Coat.png|frameless]] || 25% | | rowspan="1" | '''Yaa Haqa the Profane''' <br> [[File:Yaa Haqa the Profane.png|frameless|250px]] || rowspan="1" | 115 || rowspan="1" | Castle Oztroja || rowspan="1" | (I-10) <br> Map 2 || rowspan="1" | 1 hour || '''Hagondes Coat'''[[File:Hagondes Coat.png|frameless]] || 25% | ||
|- | |- | ||
| colspan = "7" style="background-color:#000000;" | | | colspan = "7" style="background-color:#000000;" | | ||
|- | |- | ||
| rowspan="1" | '''Duke Haborym''' <br> [[File:Duke Haborym.png|frameless|250px]] || rowspan="1" | 115 || rowspan="1" | Castle Zvahl Baileys || rowspan="1" | (G-7) || rowspan="1" | 1 hour || [[File:Cizin Breeches.png|frameless]] || 25% | | rowspan="1" | '''Duke Haborym''' <br> [[File:Duke Haborym.png|frameless|250px]] || rowspan="1" | 115 || rowspan="1" | Castle Zvahl Baileys || rowspan="1" | (G-7) || rowspan="1" | 1 hour || '''Cizin Breeches'''[[File:Cizin Breeches.png|frameless]] || 25% | ||
|- | |- | ||
| colspan = "7" style="background-color:#000000;" | | | colspan = "7" style="background-color:#000000;" | | ||
|- | |- | ||
| rowspan="1" | '''Grand Duke Batym''' <br> [[File:Grand Duke Batym.png|frameless|250px]] || rowspan="1" | 115 || rowspan="1" | Castle Zvahl Baileys || rowspan="1" | (G-8) || rowspan="1" | 1 hour || [[File:Gendewitha Caubeen.png|frameless]] || 25% | | rowspan="1" | '''Grand Duke Batym''' <br> [[File:Grand Duke Batym.png|frameless|250px]] || rowspan="1" | 115 || rowspan="1" | Castle Zvahl Baileys || rowspan="1" | (G-8) || rowspan="1" | 1 hour || '''Gendewitha Caubeen''' [[File:Gendewitha Caubeen.png|frameless]] || 25% | ||
|- | |- | ||
| colspan = "7" style="background-color:#000000;" | | | colspan = "7" style="background-color:#000000;" | | ||
|- | |- | ||
| rowspan="1" | '''Marquis Allocen''' <br> [[File:Marquis Allocen.png|frameless|250px]] || rowspan="1" | 115 || rowspan="1" | Castle Zvahl Baileys || rowspan="1" | (H-7) || rowspan="1" | 1 hour || [[File:Gendewitha Bliaut.png|frameless]] || 25% | | rowspan="1" | '''Marquis Allocen''' <br> [[File:Marquis Allocen.png|frameless|250px]] || rowspan="1" | 115 || rowspan="1" | Castle Zvahl Baileys || rowspan="1" | (H-7) || rowspan="1" | 1 hour || '''Gendewitha Bliaut'''[[File:Gendewitha Bliaut.png|frameless]] || 25% | ||
|- | |- | ||
| colspan = "7" style="background-color:#000000;" | | | colspan = "7" style="background-color:#000000;" | | ||
|- | |- | ||
| rowspan="1" | '''Marquis Amon''' <br> [[File:Marquis Amon.png|frameless|250px]] || rowspan="1" | 115 || rowspan="1" | Castle Zvahl Baileys || rowspan="1" | (G-7) || rowspan="1" | 1 hour || [[File:Gendewitha Gages.png|frameless]] || 25% | | rowspan="1" | '''Marquis Amon''' <br> [[File:Marquis Amon.png|frameless|250px]] || rowspan="1" | 115 || rowspan="1" | Castle Zvahl Baileys || rowspan="1" | (G-7) || rowspan="1" | 1 hour || '''Gendewitha Gages'''[[File:Gendewitha Gages.png|frameless]] || 25% | ||
|- | |- | ||
| colspan = "7" style="background-color:#000000;" | | | colspan = "7" style="background-color:#000000;" | | ||
|- | |- | ||
| rowspan="1" | '''Marquis Andrealphus''' <br> [[File:Marquis Andrealphus.png|frameless|250px]] || rowspan="1" | 115 || rowspan="1" | Castle Zvahl Baileys || rowspan="1" | (I-8) <br> Map 2 || rowspan="1" | 1 hour || [[File:Otronif Boots.png|frameless]] || 25% | | rowspan="1" | '''Marquis Andrealphus''' <br> [[File:Marquis Andrealphus.png|frameless|250px]] || rowspan="1" | 115 || rowspan="1" | Castle Zvahl Baileys || rowspan="1" | (I-8) <br> Map 2 || rowspan="1" | 1 hour || '''Otronif Boots'''[[File:Otronif Boots.png|frameless]] || 25% | ||
|- | |- | ||
| colspan = "7" style="background-color:#000000;" | | | colspan = "7" style="background-color:#000000;" | | ||
|- | |- | ||
| rowspan="1" | '''Marquis Naberius''' <br> [[File:Marquis Naberius.png|frameless|250px]] || rowspan="1" | 115 || rowspan="1" | Castle Zvahl Baileys || rowspan="1" | (I-6) || rowspan="1" | 1 hour || [[File:Cizin Greaves.png|frameless]] || 25% | | rowspan="1" | '''Marquis Naberius''' <br> [[File:Marquis Naberius.png|frameless|250px]] || rowspan="1" | 115 || rowspan="1" | Castle Zvahl Baileys || rowspan="1" | (I-6) || rowspan="1" | 1 hour || '''Cizin Greaves'''[[File:Cizin Greaves.png|frameless]] || 25% | ||
|- | |- | ||
| colspan = "7" style="background-color:#000000;" | | | colspan = "7" style="background-color:#000000;" | | ||
|- | |- | ||
| rowspan="1" | '''Baron Vapula''' <br> [[File:Baron Vapula.png|frameless|250px]] || rowspan="1" | 115 || rowspan="1" | Castle Zvahl Keep || rowspan="1" | (G-8) || rowspan="1" | 1 hour || [[File:Cizin Helm.png|frameless]] || 25% | | rowspan="1" | '''Baron Vapula''' <br> [[File:Baron Vapula.png|frameless|250px]] || rowspan="1" | 115 || rowspan="1" | Castle Zvahl Keep || rowspan="1" | (G-8) || rowspan="1" | 1 hour || '''Cizin Helm'''[[File:Cizin Helm.png|frameless]] || 25% | ||
|- | |- | ||
| colspan = "7" style="background-color:#000000;" | | | colspan = "7" style="background-color:#000000;" | | ||
|- | |- | ||
| rowspan="2" | '''Baronet Romwe''' <br> [[File:Baronet Romwe.png|frameless|250px]] || rowspan="2" | 115 || rowspan="2" | Castle Zvahl Keep || rowspan="2" | (I-7) || rowspan="2" | 1 hour || [[File:Beatific Shield.png|frameless]] || 25% | | rowspan="2" | '''Baronet Romwe''' <br> [[File:Baronet Romwe.png|frameless|250px]] || rowspan="2" | 115 || rowspan="2" | Castle Zvahl Keep || rowspan="2" | (I-7) || rowspan="2" | 1 hour || '''Beatific Shield'''[[File:Beatific Shield.png|frameless]] || 25% | ||
|- | |- | ||
| [[File:Iuitl Gaiters.png|frameless]] || 25% | | '''Iuitl Gaiters'''[[File:Iuitl Gaiters.png|frameless]] || 25% | ||
|- | |- | ||
| colspan = "7" style="background-color:#000000;" | | | colspan = "7" style="background-color:#000000;" | | ||
|- | |- | ||
| rowspan="1" | '''Count Bifrons''' <br> [[File:Count Bifrons.png|frameless|250px]] || rowspan="1" | 115 || rowspan="1" | Castle Zvahl Keep || rowspan="1" | (I-9) || rowspan="1" | 1 hour || [[File:Cizin Mail.png|frameless]] || 25% | | rowspan="1" | '''Count Bifrons''' <br> [[File:Count Bifrons.png|frameless|250px]] || rowspan="1" | 115 || rowspan="1" | Castle Zvahl Keep || rowspan="1" | (I-9) || rowspan="1" | 1 hour || '''Cizin Mail'''[[File:Cizin Mail.png|frameless]] || 25% | ||
|- | |- | ||
| colspan = "7" style="background-color:#000000;" | | | colspan = "7" style="background-color:#000000;" | | ||
|- | |- | ||
| rowspan="1" | '''Viscount Morax''' <br> [[File:Viscount Morax.png|frameless|250px]] || rowspan="1" | 115 || rowspan="1" | Castle Zvahl Keep || rowspan="1" | (G-10) || rowspan="1" | 1 hour || [[File:Cizin Mufflers.png|frameless]] || 25% | | rowspan="1" | '''Viscount Morax''' <br> [[File:Viscount Morax.png|frameless|250px]] || rowspan="1" | 115 || rowspan="1" | Castle Zvahl Keep || rowspan="1" | (G-10) || rowspan="1" | 1 hour || '''Cizin Mufflers'''[[File:Cizin Mufflers.png|frameless]] || 25% | ||
|- | |- | ||
| colspan = "7" style="background-color:#000000;" | | | colspan = "7" style="background-color:#000000;" | | ||
|- | |- | ||
| rowspan="1" | '''Blubbery Bulge''' <br> [[File:Blubbery Bulge.png|frameless|250px]] || rowspan="1" | 115 || rowspan="1" | Davoi || rowspan="1" | (E-10) || rowspan="1" | 1 hour || [[File:Iuitl Headgear.png|frameless]] || 25% | | rowspan="1" | '''Blubbery Bulge''' <br> [[File:Blubbery Bulge.png|frameless|250px]] || rowspan="1" | 115 || rowspan="1" | Davoi || rowspan="1" | (E-10) || rowspan="1" | 1 hour || '''Iuitl Headgear'''[[File:Iuitl Headgear.png|frameless]] || 25% | ||
|- | |- | ||
| colspan = "7" style="background-color:#000000;" | | | colspan = "7" style="background-color:#000000;" | | ||
|- | |- | ||
| rowspan="1" | '''Dirtyhanded Gochakzuk''' <br> [[File:Dirtyhanded Gochakzuk.png|frameless|250px]] || rowspan="1" | 115 || rowspan="1" | Davoi || rowspan="1" | (H-8) || rowspan="1" | 1 hour || [[File:Iuitl Vest.png|frameless]] || 25% | | rowspan="1" | '''Dirtyhanded Gochakzuk''' <br> [[File:Dirtyhanded Gochakzuk.png|frameless|250px]] || rowspan="1" | 115 || rowspan="1" | Davoi || rowspan="1" | (H-8) || rowspan="1" | 1 hour || '''Iuitl Vest'''[[File:Iuitl Vest.png|frameless]] || 25% | ||
|- | |- | ||
| colspan = "7" style="background-color:#000000;" | | | colspan = "7" style="background-color:#000000;" | | ||
|- | |- | ||
| rowspan="1" | '''Hawkeyed Dnatbat''' <br> [[File:Hawkeyed Dnatbat.png|frameless|250px]] || rowspan="1" | 115 || rowspan="1" | Davoi || rowspan="1" | (L-9) || rowspan="1" | 1 hour || [[File:Hagondes Cuffs.png|frameless]] || 25% | | rowspan="1" | '''Hawkeyed Dnatbat''' <br> [[File:Hawkeyed Dnatbat.png|frameless|250px]] || rowspan="1" | 115 || rowspan="1" | Davoi || rowspan="1" | (L-9) || rowspan="1" | 1 hour || '''Hagondes Cuffs'''[[File:Hagondes Cuffs.png|frameless]] || 25% | ||
|- | |- | ||
| colspan = "7" style="background-color:#000000;" | | | colspan = "7" style="background-color:#000000;" | | ||
|- | |- | ||
| rowspan="1" | '''Poisonhand Gnadgad''' <br> [[File:Poisonhand Gnadgad.png|frameless|250px]] || rowspan="1" | 115 || rowspan="1" | Davoi || rowspan="1" | (G-6) || rowspan="1" | 1 hour || [[File:Hagondes Pants.png|frameless]] || 25% | | rowspan="1" | '''Poisonhand Gnadgad''' <br> [[File:Poisonhand Gnadgad.png|frameless|250px]] || rowspan="1" | 115 || rowspan="1" | Davoi || rowspan="1" | (G-6) || rowspan="1" | 1 hour || '''Hagondes Pants'''[[File:Hagondes Pants.png|frameless]] || 25% | ||
|- | |- | ||
| colspan = "7" style="background-color:#000000;" | | | colspan = "7" style="background-color:#000000;" | | ||
|- | |- | ||
| rowspan="1" | '''Steelbiter Gudrud''' <br> [[File:Steelbiter Gudrud.png|frameless|250px]] || rowspan="1" | 115 || rowspan="1" | Davoi || rowspan="1" | (K-10) || rowspan="1" | 1 hour || [[File:Hagondes Sabots.png|frameless]] || 25% | | rowspan="1" | '''Steelbiter Gudrud''' <br> [[File:Steelbiter Gudrud.png|frameless|250px]] || rowspan="1" | 115 || rowspan="1" | Davoi || rowspan="1" | (K-10) || rowspan="1" | 1 hour || '''Hagondes Sabots'''[[File:Hagondes Sabots.png|frameless]] || 25% | ||
|- | |- | ||
| colspan = "7" style="background-color:#000000;" | | | colspan = "7" style="background-color:#000000;" | | ||
|- | |- | ||
| rowspan="1" | '''Tigerbane Bakdak''' <br> [[File:Tigerbane Bakdak.png|frameless|250px]] || rowspan="1" | 115 || rowspan="1" | Davoi || rowspan="1" | (J-7) || rowspan="1" | 1 hour || [[File:Otronif Mask.png|frameless]] || 25% | | rowspan="1" | '''Tigerbane Bakdak''' <br> [[File:Tigerbane Bakdak.png|frameless|250px]] || rowspan="1" | 115 || rowspan="1" | Davoi || rowspan="1" | (J-7) || rowspan="1" | 1 hour || '''Otronif Mask'''[[File:Otronif Mask.png|frameless]] || 25% | ||
|} | |} | ||
| Line 611: | Line 742: | ||
| style="background-color:#cfcfcf;" | '''Notorious Monster''' || style="background-color:#cfcfcf;" | '''Level''' || style="background-color:#cfcfcf;" | '''Zone''' || style="background-color:#cfcfcf;" | '''Position''' || style="background-color:#cfcfcf;" | '''Respawn''' || style="background-color:#cfcfcf;" | '''Reward''' || style="background-color:#cfcfcf;" | '''Drop Chance''' | | style="background-color:#cfcfcf;" | '''Notorious Monster''' || style="background-color:#cfcfcf;" | '''Level''' || style="background-color:#cfcfcf;" | '''Zone''' || style="background-color:#cfcfcf;" | '''Position''' || style="background-color:#cfcfcf;" | '''Respawn''' || style="background-color:#cfcfcf;" | '''Reward''' || style="background-color:#cfcfcf;" | '''Drop Chance''' | ||
|- | |- | ||
| rowspan="2" | '''La Velue''' <br> [[File:La Velue.png|frameless|250px]] || rowspan="2" | 118 || rowspan="2" | Batallia Downs (S) || rowspan="2" | (G/H-7/8) || rowspan="2" | 1 hour || [[File:Surefire Arquebus.png|frameless]] || 20% | | rowspan="2" | '''La Velue''' <br> [[File:La Velue.png|frameless|250px]] || rowspan="2" | 118 || rowspan="2" | Batallia Downs (S) || rowspan="2" | (G/H-7/8) || rowspan="2" | 1 hour || '''Surefire Arquebus'''[[File:Surefire Arquebus.png|frameless]] || 20% | ||
|- | |- | ||
| [[File:Soothsayer Staff.png|frameless]] || 20% | | '''Soothsayer Staff'''[[File:Soothsayer Staff.png|frameless]] || 20% | ||
|- | |- | ||
| colspan = "7" style="background-color:#000000;" | | | colspan = "7" style="background-color:#000000;" | | ||
|- | |- | ||
| rowspan="2" | '''Came-cruse''' <br> [[File:Came-cruse.png|frameless|250px]] || rowspan="2" | 118 || rowspan="2" | Beaucedine Glacier (S) || rowspan="2" | (H-8) || rowspan="2" | 1 hour || [[File:Uguisumari.png|frameless]] || 20% | | rowspan="2" | '''Came-cruse''' <br> [[File:Came-cruse.png|frameless|250px]] || rowspan="2" | 118 || rowspan="2" | Beaucedine Glacier (S) || rowspan="2" | (H-8) || rowspan="2" | 1 hour || '''Uguisumari'''[[File:Uguisumari.png|frameless]] || 20% | ||
|- | |- | ||
| [[File:Transluscent Broth.png|frameless]] || 20% | | '''Transluscent Broth'''[[File:Transluscent Broth.png|frameless]] || 20% | ||
|- | |- | ||
| colspan = "7" style="background-color:#000000;" | | | colspan = "7" style="background-color:#000000;" | | ||
|- | |- | ||
| rowspan="2" | '''Scylla''' <br> [[File:Scylla.png|frameless|250px]] || rowspan="2" | 118 || rowspan="2" | Beaucedine Glacier (S) || rowspan="2" | (J-7) || rowspan="2" | 1 hour || [[File:Yaskomo's Pole.png|frameless]] || 20% | | rowspan="2" | '''Scylla''' <br> [[File:Scylla.png|frameless|250px]] || rowspan="2" | 118 || rowspan="2" | Beaucedine Glacier (S) || rowspan="2" | (J-7) || rowspan="2" | 1 hour || '''Yaskomo's Pole'''[[File:Yaskomo's Pole.png|frameless]] || 20% | ||
|- | |- | ||
| [[File:Bereaver.png|frameless]] || 20% | | '''Bereaver'''[[File:Bereaver.png|frameless]] || 20% | ||
|- | |- | ||
| colspan = "7" style="background-color:#000000;" | | | colspan = "7" style="background-color:#000000;" | | ||
|- | |- | ||
| rowspan="2" | '''Vulkodlac''' <br> [[File:Vulkodlac.png|frameless|250px]] || rowspan="2" | 118 || rowspan="2" | Jugner Forest (S) || rowspan="2" | (H-11) || rowspan="2" | 1 hour || [[File:Halachuinic Sword.png|frameless]] || 20% | | rowspan="2" | '''Vulkodlac''' <br> [[File:Vulkodlac.png|frameless|250px]] || rowspan="2" | 118 || rowspan="2" | Jugner Forest (S) || rowspan="2" | (H-11) || rowspan="2" | 1 hour || '''Halachuinic Sword'''[[File:Halachuinic Sword.png|frameless]] || 20% | ||
|- | |- | ||
| [[File:Kiji.png|frameless]] || 20% | | '''Kiji'''[[File:Kiji.png|frameless]] || 20% | ||
|- | |- | ||
| colspan = "7" style="background-color:#000000;" | | | colspan = "7" style="background-color:#000000;" | | ||
|- | |- | ||
| rowspan="2" | '''Bloodlapper''' <br> [[File:Bloodlapper.png|frameless|250px]] || rowspan="2" | 118 || rowspan="2" | Meriphataud Mountains (S) || rowspan="2" | (L-11) || rowspan="2" | 1 hour || [[File:Rigor Baghnakhs.png|frameless]] || 20% | | rowspan="2" | '''Bloodlapper''' <br> [[File:Bloodlapper.png|frameless|250px]] || rowspan="2" | 118 || rowspan="2" | Meriphataud Mountains (S) || rowspan="2" | (L-11) || rowspan="2" | 1 hour || '''Rigor Baghnakhs'''[[File:Rigor Baghnakhs.png|frameless]] || 20% | ||
|- | |- | ||
| [[File:Dimmet Scythe.png|frameless]] || 20% | | '''Dimmet Scythe'''[[File:Dimmet Scythe.png|frameless]] || 20% | ||
|- | |- | ||
| colspan = "7" style="background-color:#000000;" | | | colspan = "7" style="background-color:#000000;" | | ||
|- | |- | ||
| rowspan="2" | '''Kinepikwa''' <br> [[File:Kinepikwa.png|frameless|250px]] || rowspan="2" | 118 || rowspan="2" | Pashhow Marshlands (S) || rowspan="2" | (G-10) || rowspan="2" | 1 hour || [[File:Ophidian Trident.png|frameless]] || 20% | | rowspan="2" | '''Kinepikwa''' <br> [[File:Kinepikwa.png|frameless|250px]] || rowspan="2" | 118 || rowspan="2" | Pashhow Marshlands (S) || rowspan="2" | (G-10) || rowspan="2" | 1 hour || '''Ophidian Trident'''[[File:Ophidian Trident.png|frameless]] || 20% | ||
|- | |- | ||
| [[File:Speleogen Bow.png|frameless]] || 20% | | '''Speleogen Bow'''[[File:Speleogen Bow.png|frameless]] || 20% | ||
|- | |- | ||
| colspan = "7" style="background-color:#000000;" | | | colspan = "7" style="background-color:#000000;" | | ||
|- | |- | ||
| rowspan="2" | '''Dyinyinga''' <br> [[File:Dyinyinga.png|frameless|250px]] || rowspan="2" | 118 || rowspan="2" | Rolanberry Fields (S) || rowspan="2" | (J-9) || rowspan="2" | 1 hour || [[File:Bloodbath Axe.png|frameless]] || 20% | | rowspan="2" | '''Dyinyinga''' <br> [[File:Dyinyinga.png|frameless|250px]] || rowspan="2" | 118 || rowspan="2" | Rolanberry Fields (S) || rowspan="2" | (J-9) || rowspan="2" | 1 hour || '''Bloodbath Axe'''[[File:Bloodbath Axe.png|frameless]] || 20% | ||
|- | |- | ||
| [[File:Aphotic Kukri.png|frameless]] || 20% | | '''Aphotic Kukri'''[[File:Aphotic Kukri.png|frameless]] || 20% | ||
|- | |- | ||
| colspan = "7" style="background-color:#000000;" | | | colspan = "7" style="background-color:#000000;" | | ||
|- | |- | ||
| rowspan="2" | '''Balam-Quitz''' <br> [[File:Balam-Quitz.png|frameless|250px]] || rowspan="2" | 118 || rowspan="2" | Sauromugue Champaign (S) || rowspan="2" | (K-7) || rowspan="2" | 1 hour || [[File:Mondaha Cudgel.png|frameless]] || 20% | | rowspan="2" | '''Balam-Quitz''' <br> [[File:Balam-Quitz.png|frameless|250px]] || rowspan="2" | 118 || rowspan="2" | Sauromugue Champaign (S) || rowspan="2" | (K-7) || rowspan="2" | 1 hour || '''Mondaha Cudgel'''[[File:Mondaha Cudgel.png|frameless]] || 20% | ||
|- | |- | ||
| [[File:Brethren Axe.png|frameless]] || 20% | | '''Brethren Axe'''[[File:Brethren Axe.png|frameless]] || 20% | ||
|} | |} | ||
| Line 667: | Line 798: | ||
| style="background-color:#cfcfcf;" | '''Notorious Monster''' || style="background-color:#cfcfcf;" | '''Level''' || style="background-color:#cfcfcf;" | '''Zone''' || style="background-color:#cfcfcf;" | '''Position''' || style="background-color:#cfcfcf;" | '''Respawn''' || style="background-color:#cfcfcf;" | '''Reward''' || style="background-color:#cfcfcf;" | '''Drop Chance''' | | style="background-color:#cfcfcf;" | '''Notorious Monster''' || style="background-color:#cfcfcf;" | '''Level''' || style="background-color:#cfcfcf;" | '''Zone''' || style="background-color:#cfcfcf;" | '''Position''' || style="background-color:#cfcfcf;" | '''Respawn''' || style="background-color:#cfcfcf;" | '''Reward''' || style="background-color:#cfcfcf;" | '''Drop Chance''' | ||
|- | |- | ||
| rowspan="2" | '''Friar Rush''' <br> [[File:Friar Rush.png|frameless|250px]] || rowspan="2" | 118 || rowspan="2" | Den of Rancor || rowspan="2" | (D-5) - (E-5) || rowspan="2" | 1 hour || [[File:Kuakuakait.png|frameless]] || 20% | | rowspan="2" | '''Friar Rush''' <br> [[File:Friar Rush.png|frameless|250px]] || rowspan="2" | 118 || rowspan="2" | Den of Rancor || rowspan="2" | (D-5) - (E-5) || rowspan="2" | 1 hour || '''Kuakuakait'''[[File:Kuakuakait.png|frameless]] || 20% | ||
|- | |- | ||
| [[File:Xbalanque.png|frameless]] || 20% | | '''Xbalanque'''[[File:Xbalanque.png|frameless]] || 20% | ||
|- | |- | ||
| colspan = "7" style="background-color:#000000;" | | | colspan = "7" style="background-color:#000000;" | | ||
|- | |- | ||
| rowspan="2" | '''Hakutaku''' <br> [[File:Hakutaku.png|frameless|250px]] || rowspan="2" | 118 || rowspan="2" | Den of Rancor || rowspan="2" | (H-8) || rowspan="2" | 1 hour || [[File:Taikogane.png|frameless]] || 20% | | rowspan="2" | '''Hakutaku''' <br> [[File:Hakutaku.png|frameless|250px]] || rowspan="2" | 118 || rowspan="2" | Den of Rancor || rowspan="2" | (H-8) || rowspan="2" | 1 hour || '''Taikogane'''[[File:Taikogane.png|frameless]] || 20% | ||
|- | |- | ||
| [[File:Azukinagamitsu.png|frameless]] || 20% | | '''Azukinagamitsu'''[[File:Azukinagamitsu.png|frameless]] || 20% | ||
|- | |- | ||
| colspan = "7" style="background-color:#000000;" | | | colspan = "7" style="background-color:#000000;" | | ||
|- | |- | ||
| rowspan="1" | '''Ogama''' <br> [[File:Ogama.png|frameless|250px]] || rowspan="1" | 118 || rowspan="1" | Den of Rancor || rowspan="1" | (F-9) || rowspan="1" | 1 hour || [[File:Kaquljaan.png|frameless]] || 20% | | rowspan="1" | '''Ogama''' <br> [[File:Ogama.png|frameless|250px]] || rowspan="1" | 118 || rowspan="1" | Den of Rancor || rowspan="1" | (F-9) || rowspan="1" | 1 hour || '''Kaquljaan'''[[File:Kaquljaan.png|frameless]] || 20% | ||
|- | |- | ||
| colspan = "7" style="background-color:#000000;" | | | colspan = "7" style="background-color:#000000;" | | ||
|- | |- | ||
| rowspan="3" | '''Sozu | | rowspan="3" | '''Sozu Bliberry''' <br> [[File:Sozu Bilberry.png|frameless|250px]] || rowspan="3" | 118 || rowspan="3" | Den of Rancor || rowspan="3" | (I-6) || rowspan="3" | 1 hour || '''Tamaxchi'''[[File:Tamaxchi.png|frameless]] || 20% | ||
|- | |- | ||
| [[File:Baqil Staff.png|frameless]] || 20% | | '''Baqil Staff'''[[File:Baqil Staff.png|frameless]] || 20% | ||
|- | |- | ||
| [[File:Rancor Collar.png|frameless]] || 20% | | '''Rancor Collar'''[[File:Rancor Collar.png|frameless]] || 20% | ||
|- | |- | ||
| colspan = "7" style="background-color:#000000;" | | | colspan = "7" style="background-color:#000000;" | | ||
|- | |- | ||
| rowspan="2" | '''Tonberry Pontifex''' <br> [[File:Tonberry Pontifex.png|frameless|250px]] || rowspan="2" | 118 || rowspan="2" | Den of Rancor || rowspan="2" | (H-8) || rowspan="2" | 1 hour || [[File:Ajjub Bow.png|frameless]] || 20% | | rowspan="2" | '''Tonberry Pontifex''' <br> [[File:Tonberry Pontifex.png|frameless|250px]] || rowspan="2" | 118 || rowspan="2" | Den of Rancor || rowspan="2" | (H-8) || rowspan="2" | 1 hour || '''Ajjub Bow'''[[File:Ajjub Bow.png|frameless]] || 20% | ||
|- | |- | ||
| [[File:Atetepeyorg.png|frameless]] || 20% | |'''Atetepeyorg''' [[File:Atetepeyorg.png|frameless]] || 20% | ||
|- | |- | ||
| colspan = "7" style="background-color:#000000;" | | | colspan = "7" style="background-color:#000000;" | | ||
|- | |- | ||
| rowspan=" | | rowspan="2" | '''Triarius X-XV''' <br> [[File:Triarius X-XV.png|frameless|250px]] || rowspan="2" | 118 || rowspan="2" | Quicksand Caves || rowspan="2" | (I-7) <br> Map 4 || rowspan="2" | 1 hour ||'''Steadfast Shield''' [[File:Steadfast Shield.png|frameless]] || 20% | ||
|- | |||
| '''Pyf Harp'''[[File:Pyf_Harp.png|frameless]] || 20% | |||
|- | |- | ||
| colspan = "7" style="background-color:#000000;" | | | colspan = "7" style="background-color:#000000;" | | ||
|- | |- | ||
| rowspan="2" | '''Alkyoneus''' <br> [[File:Alkyoneus.png|frameless|250px]] || rowspan="2" | 118 || rowspan="2" | Upper Delkfutt's Tower || rowspan="2" | (H-8) <br> Map 3 || rowspan="2" | 1 hour || [[File:Ixtab (Great Axe).png|frameless]] || 20% | | rowspan="2" | '''Alkyoneus''' <br> [[File:Alkyoneus.png|frameless|250px]] || rowspan="2" | 118 || rowspan="2" | Upper Delkfutt's Tower || rowspan="2" | (H-8) <br> Map 3 || rowspan="2" | 1 hour || '''Ixtab (Great Axe)'''[[File:Ixtab (Great Axe).png|frameless]] || 20% | ||
|- | |- | ||
| [[File:Xiutleato.png|frameless]] || 20% | |'''Xiutleato''' [[File:Xiutleato.png|frameless]] || 20% | ||
|- | |- | ||
| colspan = "7" style="background-color:#000000;" | | | colspan = "7" style="background-color:#000000;" | | ||
|- | |- | ||
| rowspan="2" | '''Ixtab''' <br> [[File:Ixtab(Monster).png|frameless|250px]] || rowspan="2" | 118 || rowspan="2" | Upper Delkfutt's Tower || rowspan="2" | (H-8) <br> Map 3 || rowspan="2" | 1 hour || [[File:Atoyac.png|frameless]] || 20% | | rowspan="2" | '''Ixtab''' <br> [[File:Ixtab(Monster).png|frameless|250px]] || rowspan="2" | 118 || rowspan="2" | Upper Delkfutt's Tower || rowspan="2" | (H-8) <br> Map 3 || rowspan="2" | 1 hour ||'''Atoyac'''[[File:Atoyac.png|frameless]] || 20% | ||
|- | |- | ||
| [[File:Maochinoli.png|frameless]] || 20% | | '''Maochinoli'''[[File:Maochinoli.png|frameless]] || 20% | ||
|- | |- | ||
| colspan = "7" style="background-color:#000000;" | | | colspan = "7" style="background-color:#000000;" | | ||
|- | |- | ||
| rowspan="2" | '''Pallas''' <br> [[File:Pallas.png|frameless|250px]] || rowspan="2" | 118 || rowspan="2" | Upper Delkfutt's Tower || rowspan="2" | (H-8) <br> Map 2 || rowspan="2" | 1 hour || [[File:Hatxiik.png|frameless]] || 20% | | rowspan="2" | '''Pallas''' <br> [[File:Pallas.png|frameless|250px]] || rowspan="2" | 118 || rowspan="2" | Upper Delkfutt's Tower || rowspan="2" | (H-8) <br> Map 2 || rowspan="2" | 1 hour || '''Hatxiik'''[[File:Hatxiik.png|frameless]] || 20% | ||
|- | |- | ||
| [[File:Hunahpu.png|frameless]] || 20% | | '''Hunahpu'''[[File:Hunahpu.png|frameless]] || 20% | ||
|} | |} | ||
| Line 727: | Line 860: | ||
| style="background-color:#cfcfcf;" | '''Notorious Monster''' || style="background-color:#cfcfcf;" | '''Level''' || style="background-color:#cfcfcf;" | '''Zone''' || style="background-color:#cfcfcf;" | '''Position''' || style="background-color:#cfcfcf;" | '''Respawn''' || style="background-color:#cfcfcf;" | '''Reward''' || style="background-color:#cfcfcf;" | '''Drop Chance''' | | style="background-color:#cfcfcf;" | '''Notorious Monster''' || style="background-color:#cfcfcf;" | '''Level''' || style="background-color:#cfcfcf;" | '''Zone''' || style="background-color:#cfcfcf;" | '''Position''' || style="background-color:#cfcfcf;" | '''Respawn''' || style="background-color:#cfcfcf;" | '''Reward''' || style="background-color:#cfcfcf;" | '''Drop Chance''' | ||
|- | |- | ||
| rowspan="2" | ''' | | rowspan="2" | '''Lamie No. 9''' <br> [[File:Lamie No 9.png|frameless|250px]] || rowspan="2" | 118 || rowspan="2" | Arrapago Reef || rowspan="2" | (I-6) <br> Map 3 || rowspan="2" | 1 hour || '''Ejekamal Mask'''[[File:Ejekamal Mask.png|frameless]] || 25% | ||
|- | |- | ||
| [[File:Ejekamal Boots.png|frameless]] || 25% | | '''Ejekamal Boots'''[[File:Ejekamal Boots.png|frameless]] || 25% | ||
|- | |- | ||
| colspan = "7" style="background-color:#000000;" | | | colspan = "7" style="background-color:#000000;" | | ||
|- | |- | ||
| rowspan="2" | '''Merrow No 5''' <br> [[File:Merrow No 5.png|frameless|250px]] || rowspan="3" | 118 || rowspan="3" | Arrapago Reef || rowspan="3" | (F-6) <br> Map 2 || rowspan="3" | 1 hour || [[File:Quiahuiz Helm.png|frameless]] || 25% | | rowspan="2" | '''Merrow No 5''' <br> [[File:Merrow No 5.png|frameless|250px]] || rowspan="3" | 118 || rowspan="3" | Arrapago Reef || rowspan="3" | (F-6) <br> Map 2 || rowspan="3" | 1 hour || '''Quiahuiz Helm'''[[File:Quiahuiz Helm.png|frameless]] || 25% | ||
|- | |- | ||
| [[File:Quiahuiz Trousers.png|frameless]] || 25% | | '''Quiahuiz Trousers'''[[File:Quiahuiz Trousers.png|frameless]] || 25% | ||
|- | |- | ||
| colspan = "7" style="background-color:#000000;" | | | colspan = "7" style="background-color:#000000;" | | ||
|- | |- | ||
| rowspan="2" | '''Dorgerwor the Astute''' <br> [[File:Dorgerwor the Astute.png|frameless|250px]] || rowspan="2" | 118 || rowspan="2" | Halvung || rowspan="2" | (I-6) <br> Map 1 || rowspan="2" | 1 hour || [[File:Otomi Helm.png|frameless]] || 25% | | rowspan="2" | '''Dorgerwor the Astute''' <br> [[File:Dorgerwor the Astute.png|frameless|250px]] || rowspan="2" | 118 || rowspan="2" | Halvung || rowspan="2" | (I-6) <br> Map 1 || rowspan="2" | 1 hour || '''Otomi Helm'''[[File:Otomi Helm.png|frameless]] || 25% | ||
|- | |- | ||
| [[File:Otomi Gloves.png|frameless]] || 25% | | '''Otomi Gloves'''[[File:Otomi Gloves.png|frameless]] || 25% | ||
|- | |- | ||
| colspan = "7" style="background-color:#000000;" | | | colspan = "7" style="background-color:#000000;" | | ||
|- | |- | ||
| rowspan="2" | '''Farlarder the Shrewd''' <br> [[File:Farlarder the Shrewd.png|frameless|250px]] || rowspan="2" | 118 || rowspan="2" | Halvung || rowspan="2" | (D-8) <br> Map 1 || rowspan="2" | 1 hour || [[File:Kaabnax Hat.png|frameless]] || 25% | | rowspan="2" | '''Farlarder the Shrewd''' <br> [[File:Farlarder the Shrewd.png|frameless|250px]] || rowspan="2" | 118 || rowspan="2" | Halvung || rowspan="2" | (D-8) <br> Map 1 || rowspan="2" | 1 hour || '''Kaabnax Hat'''[[File:Kaabnax Hat.png|frameless]] || 25% | ||
|- | |- | ||
| [[File:Kaabnax Trousers.png|frameless]] || 25% | |'''Kaabnax Trousers''' [[File:Kaabnax Trousers.png|frameless]] || 25% | ||
|- | |- | ||
| colspan = "7" style="background-color:#000000;" | | | colspan = "7" style="background-color:#000000;" | | ||
|- | |- | ||
| rowspan="2" | '''Darting Kachaal Ja''' <br> [[File:Darting Kachaal Ja.png|frameless|250px]] || rowspan="2" | 118 || rowspan="2" | Mamook || rowspan="2" | (I-8) <br> Map 2 || rowspan="2" | 1 hour || [[File:Uk'uxkaj Cap.png|frameless]] || 25% | | rowspan="2" | '''Darting Kachaal Ja''' <br> [[File:Darting Kachaal Ja.png|frameless|250px]] || rowspan="2" | 118 || rowspan="2" | Mamook || rowspan="2" | (I-8) <br> Map 2 || rowspan="2" | 1 hour || '''Uk'uxkaj Cape'''[[File:Uk'uxkaj Cap.png|frameless]] || 25% | ||
|- | |- | ||
| [[File:Uk'uxkaj Boots.png|frameless]] || 25% | | '''Uk'uxkaj Boots'''[[File:Uk'uxkaj Boots.png|frameless]] || 25% | ||
|- | |- | ||
| colspan = "7" style="background-color:#000000;" | | | colspan = "7" style="background-color:#000000;" | | ||
|- | |- | ||
| rowspan="2" | '''Devout Radol Ja''' <br> [[File:Devout Radol Ja.png|frameless|250px]] || rowspan="2" | 118 || rowspan="2" | Mamook || rowspan="2" | (I-7) <br> Map 1 || rowspan="2" | 1 hour || [[File:Buremte Hat.png|frameless]] || 25% | | rowspan="2" | '''Devout Radol Ja''' <br> [[File:Devout Radol Ja.png|frameless|250px]] || rowspan="2" | 118 || rowspan="2" | Mamook || rowspan="2" | (I-7) <br> Map 1 || rowspan="2" | 1 hour || '''Buremte Hat'''[[File:Buremte Hat.png|frameless]] || 25% | ||
|- | |- | ||
| [[File:Buremte Gloves.png|frameless]] || 25% | | '''Buremte Gloves'''[[File:Buremte Gloves.png|frameless]] || 25% | ||
|} | |} | ||
| Line 766: | Line 899: | ||
* '''These weapons are deceptively powerful in the right situations.''' <br> | * '''These weapons are deceptively powerful in the right situations.''' <br> | ||
* '''Please see [[Item Special Effects]] for applicable circumstances.''' | * '''Please see [[Item Special Effects]] for applicable circumstances.''' | ||
* '''All Homestead Weapon ANM's have a 100% and 7.5% chance to drop an [[Vesca | Aged Box (Bayld)]].''' | |||
{| class="wikitable mw-collapsible mw-collapsed" style="text-align: center"; width="1000px;" | {| class="wikitable mw-collapsible mw-collapsed" style="text-align: center"; width="1000px;" | ||
| Line 772: | Line 906: | ||
| style="background-color:#cfcfcf;" | '''Notorious Monster''' || style="background-color:#cfcfcf;" | '''Level''' || style="background-color:#cfcfcf;" | '''Zone''' || style="background-color:#cfcfcf;" | '''Position''' || style="background-color:#cfcfcf;" | '''Respawn''' || style="background-color:#cfcfcf;" | '''Reward''' || style="background-color:#cfcfcf;" | '''Drop Chance''' | | style="background-color:#cfcfcf;" | '''Notorious Monster''' || style="background-color:#cfcfcf;" | '''Level''' || style="background-color:#cfcfcf;" | '''Zone''' || style="background-color:#cfcfcf;" | '''Position''' || style="background-color:#cfcfcf;" | '''Respawn''' || style="background-color:#cfcfcf;" | '''Reward''' || style="background-color:#cfcfcf;" | '''Drop Chance''' | ||
|- | |- | ||
| rowspan="2" | '''Ambusher Antlion''' <br> [[File:Ambusher Antlion.png|frameless|250px]] || rowspan="2" | 130 || rowspan="2" | Attohwa Chasm || rowspan="2" | (E-8) || rowspan="2" | 5 hours || [[File:Homestead Axe.png|frameless]] || 20% | | rowspan="2" | '''Ambusher Antlion''' <br> [[File:Ambusher Antlion.png|frameless|250px]] || rowspan="2" | 130 || rowspan="2" | Attohwa Chasm || rowspan="2" | (E-8) || rowspan="2" | 5 hours || '''Homestead Axe'''[[File:Homestead Axe.png|frameless]] || 20% | ||
|- | |- | ||
| [[File:Homestead Labrys.png|frameless]] || 20% | | '''Homestead Labrys'''[[File:Homestead Labrys.png|frameless]] || 20% | ||
|- | |- | ||
| colspan = "7" style="background-color:#000000;" | | | colspan = "7" style="background-color:#000000;" | | ||
|- | |- | ||
| rowspan="2" | '''Sekhmet''' <br> [[File:Sekhmet.png|frameless|250px]] || rowspan="2" | 130 || rowspan="2" | Attohwa Chasm || rowspan="2" | (J-9) || rowspan="2" | 5 hours || [[File:Homestead Blade.png|frameless]] || 20% | | rowspan="2" | '''Sekhmet''' <br> [[File:Sekhmet.png|frameless|250px]] || rowspan="2" | 130 || rowspan="2" | Attohwa Chasm || rowspan="2" | (I/J-9) || rowspan="2" | 5 hours ||'''Homestead Blade''' [[File:Homestead Blade.png|frameless]] || 20% | ||
|- | |- | ||
| [[File:Homestead Claymore.png|frameless]] || 20% | | '''Homestead Claymore'''[[File:Homestead Claymore.png|frameless]] || 20% | ||
|- | |- | ||
| colspan = "7" style="background-color:#000000;" | | | colspan = "7" style="background-color:#000000;" | | ||
|- | |- | ||
| rowspan="2" | '''Splacknuck''' <br> [[File:Splacknuck.png|frameless|250px]] || rowspan="2" | 130 || rowspan="2" | Bibiki Bay || rowspan="2" | (F-6) || rowspan="2" | 5 hours || [[File:Senkutanto.png|frameless]] || 20% | | rowspan="2" | '''Splacknuck''' <br> [[File:Splacknuck.png|frameless|250px]] || rowspan="2" | 130 || rowspan="2" | Bibiki Bay || rowspan="2" | (F-6) || rowspan="2" | 5 hours || '''Senkutanto'''[[File:Senkutanto.png|frameless]] || 20% | ||
|- | |- | ||
| [[File:Senkuto.png|frameless]] || 20% | | '''Senkuto'''[[File:Senkuto.png|frameless]] || 20% | ||
|- | |- | ||
| colspan = "7" style="background-color:#000000;" | | | colspan = "7" style="background-color:#000000;" | | ||
|- | |- | ||
| rowspan="2" | '''Mycophile''' <br> [[File:Mycophile.png|frameless|250px]] || rowspan="2" | 130 || rowspan="2" | Carpenter's Landing || rowspan="2" | (I-11) || rowspan="2" | 5 hours || [[File:Homestead Wand.png|frameless]] || 20% | | rowspan="2" | '''Mycophile''' <br> [[File:Mycophile.png|frameless|250px]] || rowspan="2" | 130 || rowspan="2" | Carpenter's Landing || rowspan="2" | (I-11) || rowspan="2" | 5 hours || '''Homestead Wand'''[[File:Homestead Wand.png|frameless]] || 20% | ||
|- | |- | ||
| [[File:Homestead Staff.png|frameless]] || 20% | | '''Homestead Staff'''[[File:Homestead Staff.png|frameless]] || 20% | ||
|- | |- | ||
| colspan = "7" style="background-color:#000000;" | | | colspan = "7" style="background-color:#000000;" | | ||
|- | |- | ||
| rowspan="2" | '''Sengann''' <br> [[File:Sengann.png|frameless|250px]] || rowspan="2" | 130 || rowspan="2" | Lufaise Meadows || rowspan="2" | (F-8) || rowspan="2" | 5 hours || [[File:Homestead Cesti.png|frameless]] || 20% | | rowspan="2" | '''Sengann''' <br> [[File:Sengann.png|frameless|250px]] || rowspan="2" | 130 || rowspan="2" | Lufaise Meadows || rowspan="2" | (F-8) || rowspan="2" | 5 hours || '''Homestead Cesti'''[[File:Homestead Cesti.png|frameless]] || 20% | ||
|- | |- | ||
| [[File:Homestead Dagger.png|frameless]] || 20% | | '''Homestead Dagger'''[[File:Homestead Dagger.png|frameless]] || 20% | ||
|- | |- | ||
| colspan = "7" style="background-color:#000000;" | | | colspan = "7" style="background-color:#000000;" | | ||
|- | |- | ||
| rowspan="2" | '''Megalobugard''' <br> [[File:Megalobugard.png|frameless|250px]] || rowspan="2" | 130 || rowspan="2" | Lufaise Meadows || rowspan="2" | (G-7) || rowspan="2" | 5 hours || [[File:Homestead Scythe.png|frameless]] || 20% | | rowspan="2" | '''Megalobugard''' <br> [[File:Megalobugard.png|frameless|250px]] || rowspan="2" | 130 || rowspan="2" | Lufaise Meadows || rowspan="2" | (G-7) || rowspan="2" | 5 hours || '''Homestead Scythe'''[[File:Homestead Scythe.png|frameless]] || 20% | ||
|- | |- | ||
| [[File:Homestead Lance.png|frameless]] || 20% | | '''Homestead Lance'''[[File:Homestead Lance.png|frameless]] || 20% | ||
|- | |- | ||
| colspan = "7" style="background-color:#000000;" | | | colspan = "7" style="background-color:#000000;" | | ||
|- | |- | ||
| rowspan="2" | '''Gration''' <br> [[File:Gration.png|frameless|250px]] || rowspan="2" | 130 || rowspan="2" | Misareaux Coast || rowspan="2" | (H-8) || rowspan="2" | 5 hours || [[File:Homestead Scepter.png|frameless]] || 20% | | rowspan="2" | '''Gration''' <br> [[File:Gration.png|frameless|250px]] || rowspan="2" | 130 || rowspan="2" | Misareaux Coast || rowspan="2" | (H-8) || rowspan="2" | 5 hours || '''Homestead Scepter'''[[File:Homestead Scepter.png|frameless]] || 20% | ||
|- | |- | ||
| [[File:Homestead Bowgun.png|frameless]] || 20% | |'''Homestead Bowgun''' [[File:Homestead Bowgun.png|frameless]] || 20% | ||
|- | |- | ||
| colspan = "7" style="background-color:#000000;" | | | colspan = "7" style="background-color:#000000;" | | ||
|- | |- | ||
| rowspan="2" | '''Upyri''' <br> [[File:Upyri.png|frameless|250px]] || rowspan="2" | 130 || rowspan="2" | Misareaux Coast || rowspan="2" | (E-7)/(F-8) || rowspan="2" | 5 hours || [[File:Homestead Gun.png|frameless]] || 20% | | rowspan="2" | '''Upyri''' <br> [[File:Upyri.png|frameless|250px]] || rowspan="2" | 130 || rowspan="2" | Misareaux Coast || rowspan="2" | (E-7)/(F-8) || rowspan="2" | 5 hours || '''Homestead Gun'''[[File:Homestead Gun.png|frameless]] || 20% | ||
|- | |- | ||
| [[File:Homestead Flute.png|frameless]] || 20% | | '''Homestead Flute'''[[File:Homestead Flute.png|frameless]] || 20% | ||
|- | |- | ||
| rowspan="2" | '''Bomb King''' <br> [[File:Bomb King.PNG|frameless|250px]] || rowspan="2" | 130 || rowspan="2" | Outer Horutoto Ruins || rowspan="2" | (G-7), (I-7), (J-6) || rowspan="2" | 5 hours || [[File:Homestead Bow.PNG|frameless]] || 20% | | rowspan="2" | '''Bomb King''' <br> [[File:Bomb King.PNG|frameless|250px]] || rowspan="2" | 130 || rowspan="2" | Outer Horutoto Ruins || rowspan="2" | (G-7), (I-7), (J-6) || rowspan="2" | 5 hours || '''Homestead Bow'''[[File:Homestead Bow.PNG|frameless]] || 20% | ||
|- | |- | ||
| [[File:Homestead Shield.PNG|frameless]] || 20% | | '''Homestead Shield'''[[File:Homestead Shield.PNG|frameless]] || 20% | ||
|- | |||
| rowspan="2" | '''Boroka''' <br> [[File:Boroka.PNG|frameless|250px]] || rowspan="1" | 130 || rowspan="1" | Riverne - Site B01 || rowspan="1" | (F-8) || rowspan="1" | 5 hours || '''Camaraderie Harp'''[[File:Camaraderie Harp.PNG|frameless]] || 10% | |||
|- | |- | ||
|} | |} | ||
| Line 833: | Line 969: | ||
| style="background-color:#cfcfcf;" | '''Notorious Monster''' || style="background-color:#cfcfcf;" | '''Level''' || style="background-color:#cfcfcf;" | '''Zone''' || style="background-color:#cfcfcf;" | '''Position''' || style="background-color:#cfcfcf;" | '''Respawn''' || style="background-color:#cfcfcf;" | '''Reward''' || style="background-color:#cfcfcf;" | '''Drop Chance''' | | style="background-color:#cfcfcf;" | '''Notorious Monster''' || style="background-color:#cfcfcf;" | '''Level''' || style="background-color:#cfcfcf;" | '''Zone''' || style="background-color:#cfcfcf;" | '''Position''' || style="background-color:#cfcfcf;" | '''Respawn''' || style="background-color:#cfcfcf;" | '''Reward''' || style="background-color:#cfcfcf;" | '''Drop Chance''' | ||
|- | |- | ||
| rowspan="2" | '''Marchelute''' <br> [[File:Marchelute.png|frameless|250px]] || rowspan="3" | 130 || rowspan="3" | Valkurm Dunes || rowspan="3" | (B-8) || rowspan="3" | | | rowspan="2" | '''Marchelute'''<br> Rages after 20 minutes. <br> [[File:Marchelute.png|frameless|250px]] || rowspan="3" | 130 || rowspan="3" | Valkurm Dunes || rowspan="3" | (B-8) || rowspan="3" | 3-5 hours or 0-2 hours after restart|| '''Argochampsa Mantle'''[[File:Argochampsa Mantle.png|frameless]] || 5% | ||
|- | |- | ||
| [[File:Pluton Box.png|frameless]] || 5% | |'''Pluton Box''' [[File:Pluton Box.png|frameless]] || 5% | ||
|- | |- | ||
| colspan = "7" style="background-color:#000000;" | | | colspan = "7" style="background-color:#000000;" | | ||
|- | |- | ||
| rowspan="2" | '''Eastern Shadow''' <br> [[File:Eastern Shadow.png|frameless|250px]] || rowspan="3" | 130 || rowspan="3" | Fei'Yin || rowspan="3" | (G-6/7) <br> Map 1 || rowspan="3" | | | rowspan="2" | '''Eastern Shadow'''<br> Rages after 20 minutes. <br> [[File:Eastern Shadow.png|frameless|250px]] || rowspan="3" | 130 || rowspan="3" | Fei'Yin || rowspan="3" | (G-6/7) <br> Map 1 || rowspan="3" | 3-5 hours or 0-2 hours after restart|| '''Kappa Necklace'''[[File:Kappa Necklace.png|frameless]] || 5% | ||
|- | |- | ||
| [[File:Pluton Box.png|frameless]] || 5% | |'''Pluton Box''' [[File:Pluton Box.png|frameless]] || 5% | ||
|- | |- | ||
| colspan = "7" style="background-color:#000000;" | | | colspan = "7" style="background-color:#000000;" | | ||
|- | |- | ||
| rowspan="2" | '''Northern Shadow''' <br> [[File:Northern Shadow.png|frameless|250px]] || rowspan="2" | 130 || rowspan="2" | Fei'Yin || rowspan="2" | (F-6) <br> Map 1 || rowspan="2" | | | rowspan="2" | '''Northern Shadow'''<br> Rages after 20 minutes. <br> [[File:Northern Shadow.png|frameless|250px]] || rowspan="2" | 130 || rowspan="2" | Fei'Yin || rowspan="2" | (F-6) <br> Map 1 || rowspan="2" | 3-5 hours or 0-2 hours after restart || '''Homiliary'''[[File:Homiliary.png|frameless]] || 5% | ||
|- | |- | ||
| [[File:Pluton Box.png|frameless]] || 5% | | '''Pluton Box'''[[File:Pluton Box.png|frameless]] || 5% | ||
|- | |- | ||
| colspan = "7" style="background-color:#000000;" | | | colspan = "7" style="background-color:#000000;" | | ||
|- | |- | ||
| rowspan="2" | '''Southern Shadow''' <br> [[File:Southern Shadow.png|frameless|250px]] || rowspan="2" | 130 || rowspan="2" | Fei'Yin || rowspan="2" | (F-7/8) <br> Map 1 || rowspan="2" | | | rowspan="2" | '''Southern Shadow'''<br> Rages after 20 minutes. <br> [[File:Southern Shadow.png|frameless|250px]] || rowspan="2" | 130 || rowspan="2" | Fei'Yin || rowspan="2" | (F-7/8) <br> Map 1 || rowspan="2" | 3-5 hours or 0-2 hours after restart || '''Epaminondas's Ring'''[[File:Epaminondas's Ring.png|frameless]] || 5% | ||
|- | |- | ||
| [[File:Pluton Box.png|frameless]] || 5% | |'''Pluton Box''' [[File:Pluton Box.png|frameless]] || 5% | ||
|- | |- | ||
| colspan = "7" style="background-color:#000000;" | | | colspan = "7" style="background-color:#000000;" | | ||
|- | |- | ||
| rowspan="2" | '''Western Shadow''' <br> [[File:Western Shadow.png|frameless|250px]] || rowspan="2" | 130 || rowspan="2" | Fei'Yin || rowspan="2" | (E/F-7) <br> Map 1 || rowspan="2" | | | rowspan="2" | '''Western Shadow''' <br> [[File:Western Shadow.png|frameless|250px]] || rowspan="2" | 130 || rowspan="2" | Fei'Yin || rowspan="2" | (E/F-7) <br> Map 1 || rowspan="2" | 3-5 hours or 0-2 hours after restart||'''Gishdubar Sash''' [[File:Gishdubar Sash.png|frameless]] || 5% | ||
|- | |- | ||
| [[File:Pluton Box.png|frameless]] || 5% | |'''Pluton Box''' [[File:Pluton Box.png|frameless]] || 5% | ||
|- | |- | ||
| colspan = "7" style="background-color:#000000;" | | | colspan = "7" style="background-color:#000000;" | | ||
|- | |- | ||
| rowspan="2" | '''Tonberry Kinq''' <br> [[File:Tonberry Kinq.png|frameless|250px]] || rowspan="2" | | | rowspan="2" | '''Tonberry Kinq''' <br> Rages after 20 minutes.<br> [[File:Tonberry Kinq.png|frameless|250px]] || rowspan="2" | 142 || rowspan="2" | Temple of Uggalepih || rowspan="2" | (I-8) <br> Map 2 || rowspan="2" | 21-24 hours or 0-2 hours after restart|| '''Tartarus Platemail'''[[File:Tartarus Platemail.png|frameless]] <br> '''OR''' <br> '''Gyve Doublet'''[[File:Gyve Doublet.png|frameless]] || 7.5% | ||
|- | |||
|'''Pluton Case''' [[File:Pluton Case.png|frameless]] || (Up to 3) <br> 40%/16%/4% | |||
|- | |||
| rowspan="2" | '''Khadem Quemquoma'''<br> Rages after 20 minutes. <br> [[File:Khadem Quemquoma.png|frameless|250px]] || rowspan="2" | 135 || rowspan="2" | Garlaige Citadel (S) || rowspan="2" | (G-8) <br> Map 1 || rowspan="2" | 3-5 hours or 0-2 hours after restart|| '''Pixie Hairpin +1'''[[File:Pixie Hairpin +1.png|frameless]] || 15% | |||
|- | |||
|'''Pluton Box''' [[File:Pluton Box.png|frameless]] || 5% | |||
|- | |||
| rowspan="2" | '''King Vinegarroon''' <br> Rages after 20 minutes.<br> [[File:King Vingarroon.png|frameless|250px]] || rowspan="2" | 135 || rowspan="2" | Western Altepa Desert || rowspan="2" | (G-11) || rowspan="2" | 3-5 hours or 0-2 hours after restart|| '''Sanctity Necklace'''[[file:Sanctity Necklace.png|frameless]] || 8% | |||
|- | |||
| '''Loop of Abdhaljs Fiber'''[[File:Loop of Abdhaljs Fiber.png|frameless]] || (Up to 3) <br> 80%/30%/5% | |||
|- | |||
| rowspan="2" | '''Serket''' <br> Rages after 20 minutes.<br> [[File:Serket.png|frameless|250px]] || rowspan="2" | 135 || rowspan="2" | Garlaige Citadel || rowspan="2" | (F-7)<br>(I-7) || rowspan="2" | 3-5 hours or 0-2 hours after restart ||'''Eabani Earring''' [[file:Eabani Earring.png|frameless]] || 8% | |||
|- | |||
| '''Loop of Abdhaljs Fiber'''[[File:Loop of Abdhaljs Fiber.png|frameless]] || (Up to 3) <br> 80%/30%/5% | |||
|- | |||
| rowspan="2" | '''Tyrannic Tunnok''' <br> Rages after 20 minutes.<br> [[File:Tyrannic Tunnok.png|frameless|250px]] || rowspan="2" | 135 || rowspan="2" | Ifrit's Cauldron || rowspan="2" | (E-10) || rowspan="2" | 3-5 hours or 0-2 hours after restart|| '''Izdubar Mantle'''[[file:Izdubar Mantle.png|frameless]] || 8% | |||
|- | |||
|'''Loop of Abdhaljs Fiber''' [[File:Loop of Abdhaljs Fiber.png|frameless]] || (Up to 3) <br> 80%/30%/5% | |||
|- | |||
| rowspan="2" | '''Amikiri''' <br> Rages after 20 minutes.<br> [[File:Amikiri.png|frameless|250px]] || rowspan="2" | 135 || rowspan="2" | Gustav Tunnel || rowspan="2" | (F-7) || rowspan="2" | 3-5 hours or 0-2 hours after restart||'''Respite Cloak''' [[file:Respite Cloak.png|frameless]] || 8% | |||
|- | |||
| '''Loop of Abdhaljs Fiber'''[[File:Loop of Abdhaljs Fiber.png|frameless]] || (Up to 3) <br> 80%/30%/5% | |||
|- | |||
| '''Sargas''' <br> Rages after 20 minutes.<br> [[File:Sargas.png|frameless|250px]] || 135 || Attohwa Chasm || (G-9) || 3-5 hours or 0-2 hours after restart|| '''Loop of Abdhaljs Fiber'''[[File:Loop of Abdhaljs Fiber.png|frameless]] || (Up to 3) <br> 80%/30%/5% | |||
|- | |||
| '''Lesath''' <br> Rages after 20 minutes.<br> [[File:Lesath.png|frameless|250px]] || 135 || Maze of Shakhrami || (H-9) || 3-5 hours or 0-2 hours after restart|| '''Loop of Abdhaljs Fiber'''[[File:Loop of Abdhaljs Fiber.png|frameless]] || (Up to 3) <br> 80%/30%/5% | |||
|- | |||
| '''Calchas''' <br> Rages after 20 minutes.<br> [[File:Calchas.png|frameless|250px]] || 135 || Western Altepa Desert || (F-9) || 3-5 hours or 0-2 hours after restart|| '''Loop of Abdhaljs Fiber'''[[File:Loop of Abdhaljs Fiber.png|frameless]] || (Up to 3) <br> 80%/30%/5% | |||
|- | |||
| '''Aqrabuamelu''' <br> Rages after 20 minutes.<br> [[File:Aqrabuamelu.png|frameless|250px]] || 135 || Crawler's Nest || (F-7) || 3-5 hours or 0-2 hours after restart|| '''Loop of Abdhaljs Fiber'''[[File:Loop of Abdhaljs Fiber.png|frameless]] || (Up to 3) <br> 80%/30%/5% | |||
|- | |||
| rowspan="2" | '''All-Seeing Onyx Eye''' <br> Rages after 20 minutes.<br> [[File:All-Seeing Onyx Eye.png|frameless|250px]] || rowspan="2" | 135 || rowspan="2" | La Vaule (S) || rowspan="2" | (J-11) || rowspan="2" | 3-5 hours or 0-2 hours after restart|| '''Tokko Axe'''[[file:Tokko Axe.png|frameless]] <br> '''Tokko Chopper'''[[file:Tokko Chopper.png|frameless]] || 15% | |||
|- | |||
| '''Pluton Box''' [[File:Pluton Box.png|frameless]] || 5% | |||
|- | |||
| rowspan="2" | '''Amaranth'''<br> Rages after 20 minutes.<br> [[File:Amaranth.png|frameless|250px]] || rowspan="2" | 135 || rowspan="2" | Fort Karugo-Narugo (S) || rowspan="2" | (E-9) || rowspan="2" | 3-5 hours or 0-2 hours after restart || '''Tokko Claymore'''[[file:Tokko Claymore.png|frameless]] <br> '''Tokko Katana''' [[file:Tokko Katana.png|frameless]] || 15% | |||
|- | |||
|'''Pluton Box''' [[File:Pluton Box.png|frameless]] || 5% | |||
|- | |||
| rowspan="2" | '''Kirtimukha''' <br> Rages after 20 minutes. <br> [[File:Kirtimukha.png|frameless|250px]] || rowspan="2" | 135 || rowspan="2" | Fort Karugo-Narugo (S) || rowspan="2" | (I-10) || rowspan="2" | 3-5 hours or 0-2 hours after restart||'''Tokko Knife''' [[file:Tokko Knife.png|frameless]] <br> '''Tokko Knuckles'''[[file:Tokko Knuckles.png|frameless]] || 15% | |||
|- | |||
| '''Pluton Box''' [[File:Pluton Box.png|frameless]] || 5% | |||
|- | |||
| rowspan="2" | '''Judgmental Julika '''<br> Rages after 20 minutes. <br> [[File:Judgmental Julika.png|frameless|250px]] || rowspan="2" | 135 || rowspan="2" | Vunkerl Inlet (S) || rowspan="2" | (G-13) || rowspan="2" | 3-5 hours or 0-2 hours after restart || '''Tokko Scythe'''[[file:Tokko Scythe.png|frameless]] <br> '''Tokko Staff''' [[file:Tokko Staff.png|frameless]] || 15% | |||
|- | |||
|'''Pluton Box'''[[File:Pluton Box.png|frameless]] || 5% | |||
|- | |||
| rowspan="2" | '''Big Bang '''<br> Rages after 20 minutes. <br> [[File:Big Bang.png|frameless|250px]] || rowspan="2" | 135 || rowspan="2" | Vunkerl Inlet (S) || rowspan="2" | (E/F-10) || rowspan="2" | 3-5 hours or 0-2 hours after restart||'''Tokko Sword''' [[file:Tokko Sword.png|frameless]] <br> '''Tokko Tachi''' [[file:Tokko Tachi.png|frameless]] || 15% | |||
|- | |||
| '''Pluton Box'''[[File:Pluton Box.png|frameless]] || 5% | |||
|- | |||
| rowspan="2" | '''Scitalis'''<br> Rages after 20 minutes. <br> [[File:Scitalis.png|frameless|250px]] || rowspan="2" | 135 || rowspan="2" | Grauberg (S) || rowspan="2" | (F-9) || rowspan="2" | 3-5 hours or 0-2 hours after restart ||'''Tokko Lance''' [[file:Tokko Lance.png|frameless]] <br> '''Tokko Rod''' [[file:Tokko Rod.png|frameless]] || 15% | |||
|- | |||
| '''Pluton Box'''[[File:Pluton Box.png|frameless]] || 5% | |||
|- | |||
| rowspan="2" | '''Simorg'''<br> Rages after 20 minutes. <br> [[File:Simorg.png|frameless|250px]] || rowspan="2" | 135 || rowspan="2" | Grauberg (S) || rowspan="2" | (D-8) || rowspan="2" | 3-5 hours or 0-2 hours after restart||'''Tokko Grip''' [[file:Tokko Grip.png|frameless]] <br> '''Tokko Bow''' [[file:Tokko Bow.png|frameless]] || 15% | |||
|- | |||
| '''Pluton Box'''[[File:Pluton Box.png|frameless]] || 5% | |||
|- | |||
| rowspan="3" | '''Drooling Daisy'''<br> Rages after 20 minutes. <br> [[File:Drooling Daisy.png|frameless|250px]] || rowspan="3" | 130 || rowspan="3" | Rolanberry Fields || rowspan="3" | (D-11) || rowspan="3" | 3-5 hours or 0-2 hours after restart||'''Barkarole Earring''' [[file:Barkarole Earring.png|frameless]] || 5% | |||
|- | |||
|'''Wyrm Ash''' [[file:Pile of Wyrm Ash.png|frameless]] || 10% | |||
|- | |||
|'''Pluton Box''' [[File:Pluton Box.png|frameless]] || 5% | |||
|- | |||
| rowspan="3" | '''Noble Mold'''<br> Rages after 20 minutes. <br> [[File:Noble Mold.png|frameless|250px]] || rowspan="3" | 130 || rowspan="3" | The Sanctuary of Zi'Tah || rowspan="3" | (E-9) || rowspan="3" | 3-5 hours or 0-2 hours after restart|| '''Crematio Earring'''[[File:Crematio Earring.png|frameless]] || 5% | |||
|- | |||
| '''Wyrm Blood'''[[File:Vial of Wyrm Blood.png|frameless]] || 10% | |||
|- | |||
| '''Pluton Box'''[[File:Pluton Box.png|frameless]] || 5% | |||
|- | |||
| rowspan="3" | '''Morbolger'''<br> Rages after 20 minutes. <br> [[File:Morbolger.png|frameless|250px]] || rowspan="3" | 130 || rowspan="3" | Ordelle's Caves || rowspan="3" | (H-10) || rowspan="3" | 3-5 hours or 0-2 hours after restart||'''Trux Earring''' [[File:Trux Earring.png|frameless]] || 5% | |||
|- | |||
| '''Macuil Horn'''[[File:Macuil Horn.png|frameless]] || 10% | |||
|- | |||
|'''Pluton Box''' [[File:Pluton Box.png|frameless]] || 5% | |||
|- | |||
| rowspan="3" | '''Rose Garden'''<br> Rages after 20 minutes. <br> [[File:Rose Garden.png|frameless|250px]] || rowspan="3" | 130 || rowspan="3" | Yuhtunga Jungle || rowspan="3" | (I-7) || rowspan="3" | 3-5 hours or 0-2 hours after restart||'''Tripudio Earring''' [[File:Tripudio Earring.png|frameless]] || 5% | |||
|- | |||
| '''Plovid Effluvium'''[[File:Vial of Plovid Effluvium.png|frameless]] || 10% | |||
|- | |||
| '''Pluton Box'''[[File:Pluton Box.png|frameless]] || 5% | |||
|- | |||
| rowspan="3" | '''Voluptuous Vivian'''<br> Rages after 20 minutes. <br> [[File:Voluptuous Vivian.png|frameless|250px]] || rowspan="3" | 130 || rowspan="3" | The Boyahda Tree || rowspan="3" | (G-5/H-6) || rowspan="3" | 3-5 hours or 0-2 hours after restart||'''Sanare Earring''' [[File:Sanare Earring.png|frameless]] || 5% | |||
|- | |||
| '''Defiant Sweat'''[[File:Vial of Defiant Sweat.png|frameless]] || 10% | |||
|- | |||
|'''Pluton Box''' [[File:Pluton Box.png|frameless]] || 5% | |||
|- | |- | ||
| [[File: | | rowspan="3" | '''Voluptuous Vilma'''<br> Rages after 20 minutes. <br> [[File:Voluptuous Vilma.png|frameless|250px]] || rowspan="3" | 130 || rowspan="3" | Yuhtunga Jungle || rowspan="3" | (I-7) || rowspan="3" | 3-5 hours or 0-2 hours after restart|| '''Gelai Earring'''[[File:Gelai Earring.png|frameless]] || 5% | ||
|- | |- | ||
|'''Tartarian Chain''' [[File:Tartarian Chain.png|frameless]] || 10% | |||
|- | |- | ||
| [[File:Pluton Box.png|frameless]] || 5% | | '''Pluton Box'''[[File:Pluton Box.png|frameless]] || 5% | ||
|- | |- | ||
| rowspan=" | | rowspan="4" | '''Buarainech''' <br> Rages after 20 minutes. <br> [[File:Buarainech.png|frameless|250px]] || rowspan="4" | 130 || rowspan="4" | Garlaige Citadel (S) || rowspan="4" | (H-7) || rowspan="4" | 3-5 hours or 0-2 hours after restart || '''Balarama Grip''' [[File:Balarama Grip.png|frameless]] || 20% | ||
|- | |- | ||
| [[File: | | '''Bztavian Wing'''[[File:Bztavian Wing.png|frameless]] || 5% | ||
|- | |- | ||
| '''Macuil Horn'''[[File:Macuil Horn.png|frameless]] || 5% | |||
|- | |- | ||
| [[File: | | '''Ruthenium Ore'''[[File:Ruthenium Ore.png|frameless]] || 5% | ||
|- | |- | ||
| rowspan=" | | rowspan="5" | '''Balor'''<br> Rages after 20 minutes. <br> [[File:Balor.png|frameless|250px]] || rowspan="5" | 130 || rowspan="5" | Sacrarium || rowspan="5" | (L-8) || rowspan="5" | 3-5 hours or 0-2 hours after restart|| '''Ajax''' <br> [[File:Ajax.png|frameless]] || 3% | ||
|- | |- | ||
| [[File: | | '''Ajax +1''' <br> [[File:Ajax +1.png|frameless]] || 0.3% | ||
|- | |- | ||
| '''Beitetsu Parcel'''[[File:Beitetsu Parcel.png|frameless]] || 10% | |||
|- | |- | ||
| [[File: | | '''Empress Board'''[[File:Empress Board.png|frameless]] || 5% | ||
|- | |- | ||
| '''Princess Board'''[[File:Princess Board.png|frameless]] || 5% | |||
|- | |- | ||
| [[File: | | rowspan="5" | '''Caithlean'''<br> Rages after 20 minutes. <br> [[File:Caithlean.png|frameless|250px]] || rowspan="5" | 130 || rowspan="5" | Sacrarium || rowspan="5" | (L-8) || rowspan="5" | 3-5 hours or 0-2 hours after restart || '''Contemplator''' [[File:Contemplator.png|frameless]] || 3% | ||
|- | |- | ||
| '''Contemplator +1''' [[File:Contemplator +1.png|frameless]] || 0.3% | |||
|- | |- | ||
| [[File: | | '''Beitetsu Parcel''' [[File:Beitetsu Parcel.png|frameless]] || 10% | ||
|- | |- | ||
| '''Empress Board'''[[File:Empress Board.png|frameless]] || 5% | |||
|- | |- | ||
| [[File: | | '''Princess Board'''[[File:Princess Board.png|frameless]] || 5% | ||
|- | |- | ||
| rowspan=" | | rowspan="5" | '''Lobais'''<br> Rages after 20 minutes. <br> [[File:Lobais.png|frameless|250px]] || rowspan="5" | 130 || rowspan="5" | Sacrarium || rowspan="5" | (L-8) || rowspan="5" | 3-5 hours or 0-2 hours after restart|| '''Imati''' <br> [[File:Imati.png|frameless]] || 3% | ||
|- | |- | ||
| [[File: | | '''Imati +1''' <br> [[File:Imati +1.png|frameless]] || 0.3% | ||
|- | |- | ||
| '''Beitetsu Parcel''' [[File:Beitetsu Parcel.png|frameless]] || 10% | |||
|- | |- | ||
| [[File: | | '''Empress Board''' [[File:Empress Board.png|frameless]] || 5% | ||
|- | |- | ||
|'''Princess Board''' [[File:Princess Board.png|frameless]] || 5% | |||
|- | |- | ||
| [[File: | | rowspan="5" | '''Luaith''' <br> Rages after 20 minutes.<br> [[File:Luaith.png|frameless|250px]] || rowspan="5" | 130 || rowspan="5" | Sacrarium || rowspan="5" | (L-8) || rowspan="5" | 3-5 hours or 0-2 hours after restart||'''Triska Scythe''' [[File:Triska Scythe.png|frameless]] || 3% | ||
|- | |- | ||
| '''Triska Scythe +1''' [[File:Triska Scythe +1.png|frameless]] || 0.3% | |||
|- | |- | ||
| [[File: | |'''Beitetsu Parcel''' [[File:Beitetsu Parcel.png|frameless]] || 10% | ||
|- | |- | ||
| '''Empress Board''' [[File:Empress Board.png|frameless]] || 5% | |||
|- | |- | ||
| [[ | | '''Princess Board''' [[File:Princess Board.png|frameless]] || 5% | ||
|- | |- | ||
| [[File: | | rowspan="5" | '''Indich'''<br> Rages after 20 minutes. <br> [[File:Indich.png|frameless|250px]] || rowspan="5" | 130 || rowspan="5" | Sacrarium || rowspan="5" | (L-8) || rowspan="5" | 3-5 hours or 0-2 hours after restart|| '''Perun''' <br> [[File:Perun.png|frameless]] || 3% | ||
|- | |- | ||
| '''Perun +1''' <br> [[File:Perun +1.png|frameless]] || 0.3% | |||
|- | |- | ||
| [[File: | | '''Beitetsu Parcel'''[[File:Beitetsu Parcel.png|frameless]] || 10% | ||
|- | |- | ||
| [[File: | |'''Empress Board''' [[File:Empress Board.png|frameless]] || 5% | ||
|- | |- | ||
|'''Princess Board''' [[File:Princess Board.png|frameless]] || 5% | |||
|- | |- | ||
| [[File: | | rowspan="5" | '''Elel'''<br> Rages after 20 minutes. <br> [[File:Elel.png|frameless|250px]] || rowspan="5" | 130 || rowspan="5" | Sacrarium || rowspan="5" | (L-8) || rowspan="5" | 3-5 hours or 0-2 hours after restart|| '''Flyssa''' <br> [[File:Flyssa.png|frameless]] || 3% | ||
|- | |- | ||
| [[File: | |'''Flyssa +1''' [[File:Flyssa +1.png|frameless]] || 0.3% | ||
|- | |- | ||
|'''Beitetsu Parcel''' [[File:Beitetsu Parcel.png|frameless]] || 10% | |||
|- | |- | ||
| [[File: | | '''Empress Board'''[[File:Empress Board.png|frameless]] || 5% | ||
|- | |- | ||
| [[File: | | '''Princess Board'''[[File:Princess Board.png|frameless]] || 5% | ||
|- | |- | ||
| rowspan=" | | rowspan="5" | '''Keremet'''<br> Rages after 20 minutes. <br> [[File:Keremet.png|frameless|250px]] || rowspan="5" | 130 || rowspan="5" | Sacrarium || rowspan="5" | (L-8) || rowspan="5" | 3-5 hours or 0-2 hours after restart || '''Ababinili''' <br> [[File:Ababinili.png|frameless]] || 3% | ||
|- | |- | ||
| [[File: | | '''Ababinili +1''' [[File:Ababinili +1.png|frameless]] || 0.3% | ||
|- | |- | ||
| [[File: | |'''Beitetsu Parcel''' [[File:Beitetsu Parcel.png|frameless]] || 10% | ||
|- | |- | ||
| '''Empress Board'''[[File:Empress Board.png|frameless]] || 5% | |||
|- | |- | ||
| [[File: | | '''Princess Board'''[[File:Princess Board.png|frameless]] || 5% | ||
|- | |- | ||
| [[File: | | rowspan="4" | '''Taxim'''<br> Rages after 20 minutes. <br> [[File:Taxim.png|frameless|250px]] || rowspan="4" | 130 || rowspan="4" | Gustav Tunnel || rowspan="4" | Map 2 (G-8) || rowspan="4" | 3-5 hour or 0-2 hours after restart || '''Hretha Earring'''[[File:hretha earring.png|frameless]] || 5% | ||
|- | |||
| '''Bishop's Sash'''[[File:Bishop's Sash.png|frameless]] || 35% | |||
|- | |||
| '''Ran Earring'''[[File:ran earring.png|frameless]] || 5% | |||
|- | |||
|'''Boulder Case''' [[File:Boulder Case.png|frameless]] || 25% | |||
|- | |||
| rowspan="4" | '''Ah Puch'''<br> Rages after 20 minutes. <br> [[File:Ah Puch.png|frameless|250px]] || rowspan="4" | 130 || rowspan="4" | Outer Horutoto Ruins || rowspan="4" | Map 5 (G-8) || rowspan="4" | 3-5 hour or 0-2 hours after restart || '''Foresti Earring'''[[File:foresti earring.png|frameless]] || 5% | |||
|- | |||
| '''Casso Sash'''[[File:Casso Sash.png|frameless]] || 35% | |||
|- | |||
|'''Hermodr Earring''' [[File:hermodr earring.png|frameless]] || 5% | |||
|- | |||
|'''Boulder Case''' [[File:Boulder Case.png|frameless]] || 25% | |||
|- | |||
| rowspan="4" | '''Oupire'''<br> Rages after 20 minutes. <br> [[File:Oupire.png|frameless|250px]] || rowspan="4" | 130 || rowspan="4" | Alzadaal Undersea Ruins || rowspan="4" | Map 1 (I-10) || rowspan="4" | 3-5 hour or 0-2 hours after restart || '''Saxnot Earring'''[[File:saxnot earring.png|frameless]] || 5% | |||
|- | |||
|'''Cimmerian Sash''' [[File:Cimmerian Sash.png|frameless]] || 35% | |||
|- | |||
| '''Mimir Earring'''[[File:mimir earring.png|frameless]] || 5% | |||
|- | |||
| '''Boulder Case'''[[File:Boulder Case.png|frameless]] || 25% | |||
|- | |||
| rowspan="4" | '''Wounded Wurfel'''<br> Rages after 20 minutes. <br> [[File:Wounded Wurfel.png|frameless|250px]] || rowspan="4" | 130 || rowspan="4" | Gusgen Mines || rowspan="4" | Map 4 (H-6) || rowspan="4" | 3-5 hour or 0-2 hours after restart || '''Vor Earring'''[[File:Vor earring.png|frameless]] || 5% | |||
|- | |||
|'''Harfner's Sash''' [[File:Harfner's Sash.png|frameless]] || 35% | |||
|- | |||
| '''Ilmr Earring'''[[File:ilmr earring.png|frameless]] || 5% | |||
|- | |||
| '''Boulder Case'''[[File:Boulder Case.png|frameless]] || 25% | |||
|- | |||
| rowspan="4" | '''Smothered Schmidt'''<br> Rages after 20 minutes. <br> [[File:Smothered Schmidt.png|frameless|250px]] || rowspan="4" | 130 || rowspan="4" | Gusgen Mines || rowspan="4" | Map 1 (J-7) || rowspan="4" | 3-5 hour or 0-2 hours after restart ||'''Mani Earring''' [[File:mani earring.png|frameless]] || 5% | |||
|- | |||
|'''Accursed Belt''' [[File:Accursed Belt.png|frameless]] || 35% | |||
|- | |||
| '''Lodurr Earring'''[[File:lodurr earring.png|frameless]] || 5% | |||
|- | |||
|'''Boulder Case''' [[File:Boulder Case.png|frameless]] || 25% | |||
|- | |||
| rowspan="4" | '''Aynu-kaysey'''<br> Rages after 20 minutes. <br> [[File:Aynu-kaysey.png|frameless|250px]] || rowspan="4" | 130 || rowspan="4" | Caedarva Mire || rowspan="4" | Map 2 (H-8) || rowspan="4" | 3-5 hour or 0-2 hours after restart || '''Boulder Case'''[[File:Boulder Case.png|frameless]] || 25% | |||
|- | |||
| '''Olympus Sash'''[[File:Olympus Sash.png|frameless]] || 35% | |||
|- | |||
|'''Choleric Earring'''[[File:Choleric Earring.png|frameless]] || 5% | |||
|- | |||
|'''Njordr Earring'''[[File:Njordr Earring.png|frameless]] || 5% | |||
|- | |||
| rowspan="4" | '''Hellion'''<br> Rages after 20 minutes. <br> [[File:Hellion.png|frameless|250px]] || rowspan="4" | 130 || rowspan="4" | Labyrinth of Onzozo || rowspan="4" | (J-6) || rowspan="4" | 3-5 hour or 0-2 hours after restart || '''Bragi Earring'''[[File:Bragi Earring.png|frameless]] || 5% | |||
|- | |||
| '''Glassblower's Belt'''[[File:Glassblower's Belt.png|frameless]] || 35% | |||
|- | |||
| '''Dellingr Earring'''[[File:Dellingr earring.png|frameless]] || 5% | |||
|- | |||
|'''Boulder Case''' [[File:Boulder Case.png|frameless]] || 25% | |||
|- | |||
| rowspan="4" | '''Ereshkigal'''<br> Rages after 20 minutes. <br> [[File:Ereshkigal.png|frameless|250px]] || rowspan="4" | 130 || rowspan="4" | Xarcabard || rowspan="4" | (F-7) || rowspan="4" | 3-5 hour or 0-2 hours after restart ||'''Gna Earring''' [[File:Gna Earring.png|frameless]] || 5% | |||
|- | |||
|'''Field Rope''' [[File:Field Rope.png|frameless]] || 35% | |||
|- | |||
| '''Fulla Earring'''[[File:Fulla Earring.png|frameless]] || 5% | |||
|- | |||
| '''Boulder Case'''[[File:Boulder Case.png|frameless]] || 25% | |||
|- | |||
| rowspan="4" | '''Mahishasura'''<br> Rages after 20 minutes. <br> [[File:Mahishasura.png|frameless|250px]] || rowspan="4" | 130 || rowspan="4" | Bhaflau Thickets || rowspan="4" | (G-8) || rowspan="4" | 3-5 hour or 0-2 hours after restart || '''Gersemi Earring'''[[File:Gersemi earring.png|frameless]] || 5% | |||
|- | |||
|'''Emphatikos Rope''' [[File:Emphatikos Rope.png|frameless]] || 35% | |||
|- | |||
| '''Hnoss Earring'''[[File:hnoss earring.png|frameless]] || 5% | |||
|- | |||
| '''Boulder Case'''[[File:Boulder Case.png|frameless]] || 25% | |||
|} | |} | ||
<!--== | == DNANM's == | ||
* '''These NMs are level 140-150 and carry considerably more valuable rewards than lesser ANMs.''' | |||
{| class="wikitable" style="text-align: center; | |||
| scope="row" colspan="7" | '''DNANM's''' | |||
|- | |||
| scope="row" colspan="1" | [[Lehko Habhoka]] <br> [[File:Lehko Habhoka.png|frameless|120px|link=[[Lehko Habhoka]]]] || ! scope="row" colspan="1" | [[Selh'teus]] <br> [[File:selhteus.png|frameless|120px|link=[[Selh'teus]]]] || ! scope="row" colspan="1" | [[Tom Tit Tat]] <br> [[File:Tom Tit Tat.png|frameless|110px|link=[[Tom Tit Tat]]]] || ! scope="row" colspan="1" | [[Vidhula the Wrathborn]] <br> [[File:Vidhula the Wrathborn.png|frameless|120px|link=[[Vidhula the Wrathborn]]]] || ! scope="row" colspan="1" | [[Calcabrina]] <br> [[File:Calcabrina.PNG|frameless|120px|link=[[Calcabrina]]]] || ! scope="row" colspan="1" | [[Hippomaritimus]] <br> [[File:Hippomaritimus.png|frameless|120px|link=[[Hippomaritimus]]]] || ! scope="row" colspan="1" | [[Jolly Green]] <br> [[File:Jolly Green.png|frameless|120px|link=[[Jolly Green]]]] | |||
|- | |||
|} | |||
{| class="wikitable" style="text-align: center; | |||
| scope="row" colspan="3" | '''Sandworm System''' | |||
|- | |||
| scope="row" colspan="3" | [[Sandworm]] <br> [[File:Sandworm.png|frameless|120px|link=[[Sandworm]]]] | |||
|- | |||
| scope="row" colspan="1" | [[King Arthro]] <br> [[File:King Arthro.png|frameless|120px|link=[[King Arthro]]]] | |||
! scope="row" colspan="1" | [[Serket]] <br> [[File:Serket.png|frameless|120px|link=[[Serket]]]] | |||
! scope="row" colspan="1" | [[Guivre]] <br> [[File:Guivre.png|frameless|120px|link=[[Guivre]]]] | |||
|- | |||
|} | |||
Latest revision as of 04:07, 26 September 2025
Introduction
Arbitrary Notorious Monsters (ANM’s) are different levels of typical Notorious Monsters (NM’s) which have been buffed from retail levels but provide higher rewards. It is highly recommended to use the !check command to examine an NM before attacking because of the presence of ANM’s throughout Vana’diel.
FANM - Fairly Arbitrary Notorious Monster
ANM - Arbitrary Notorious Monster
NSANM - Not So Arbitrary Notorious Monster
DNANM - Definitely Not Arbitrary Notorious Monster
Non Item Level Equipment
Weapons
| ANM's | ||||||
|---|---|---|---|---|---|---|
| Notorious Monster | Level | Zone | Position | Respawn | Reward | Drop Chance |
Lord of Onzozo  |
102 | Labyrinth of Onzozo | (H-8) | Lottery: Flying Mantas 1-2 hours |
Kraken Club  |
8% |
Octave Club  |
8% | |||||
Aiatar  |
120 | Riverne - Site A01 | (G-7) | 2 hours | Apollo's Flute  |
15% |
Cantabanks Horn  |
15% | |||||
Pan's Horn  |
15% | |||||
Feet
| ANM's | ||||||
|---|---|---|---|---|---|---|
| Notorious Monster | Level | Zone | Position | Respawn | Reward | Drop Chance |
Cactrot Rapido  |
102 | Eastern Altepa Desert | Roaming | 6 hours | Herald's Gaiters  |
7.5% |
Hermes' Sandals  |
7.5% | |||||
Strider Boots  |
7.5% | |||||
Tandava Crackows  |
7.5% | |||||
Danzo Sune-Ate  |
7.5% | |||||
Accessories (Neck/Earrings/Rings/Back/Waist/instruments)
| ANM's | ||||||
|---|---|---|---|---|---|---|
| Notorious Monster | Level | Zone | Position | Respawn | Reward | Drop Chance |
Bloodsucker  |
105 | Bostaunieux Oubliette | (H-8) Map 2 |
1 hour | Jelly Ring  |
20% |
Jaggedy-Eared Jack  |
108 | West Ronfaure | (G/H-9) | 30 minutes | Fortune Egg  |
15% |
Happy Egg  |
15% | |||||
Spiny Spipi  |
108 | East Sarutabaruta | (I/J-7) | 30 minutes | Dasra's Ring  |
15% |
Nasatya's Ring  |
15% | |||||
Bubbly Bernie  |
108 | South Gustaberg | (M-10) | 30 minutes | Repelling Collar  |
25% |
Impatiens  |
15% | |||||
Beet Leafhopper  |
110 | The Boyahda Tree | (J-8) Map 3 |
1 hour | Siegel Sash  |
15% |
Myrddin Pearl  |
15% | |||||
Garharlor the Unruly  |
110 | Mount Zhayolm | (H-8) | 1 hour | Genie Gages  |
15% |
Trance Belt  |
15% | |||||
Antican Praefectus  |
115 | Quicksand Caves | (J-12) Map 1 |
1 hour | Repulse Mantle  |
25% |
Chuparrosa Mantle  |
20% | |||||
Centurio X-I  |
115 | Quicksand Caves | (G/H/I-9/10) Map 1 |
1 hour | Omphalos Bullet  |
15% |
Windbuffet Belt  |
25% | |||||
Proconsul XII  |
115 | Quicksand Caves | (H/I-6/7) or (K/L-6/7) or (H/I-9/10) or (K/L-9/10) Map 7 |
1 hour | Vertex Bolt  |
15% |
Medala Cape  |
25% | |||||
Fyuu the Seabellow  |
115 | Sea Serpent Grotto | (L/M-11) Map 1 |
2 hours | Hirudinea Earring  |
20% |
Roundel Earring  |
20% | |||||
Mouu the Waverider  |
115 | Sea Serpent Grotto | (J-6) Map 3 |
2 hours | Invidia Torque  |
20% |
Praecis Gorget  |
20% | |||||
Namtar  |
115 | Sea Serpent Grotto | (D-8) Map 1 |
2 hours | Justiciar's Torque  |
20% |
Torero Torque  |
20% | |||||
Pahh the Gullcaller  |
115 | Sea Serpent Grotto | (K/L-8) Map 3 |
2 hours | Blood Ring  |
20% |
Insect Ring  |
20% | |||||
Qull the Shellbuster  |
115 | Sea Serpent Grotto | (J-10) Map 2 |
2 hours | Excelsis Ring  |
20% |
Griffon Ring  |
20% | |||||
Seww the Squidlimbed  |
115 | Sea Serpent Grotto | (J-10) Map 2 |
2 hours | Roller's Ring  |
20% |
Mujin Mantle  |
20% | |||||
Voll the Sharkfinned  |
115 | Sea Serpent Grotto | (J-10) Map 2 |
2 hours | Mujin Necklace  |
20% |
Mujin Stud  |
20% | |||||
Wuur the Sandcomber  |
115 | Sea Serpent Grotto | (H-9) Map 1 |
2 hours | Archon Ring  |
20% |
Oneiros Annulet  |
20% | |||||
Zuug the Shoreleaper  |
115 | Sea Serpent Grotto | (F-10) Map 4 |
2 hours | Lycopodium Earring  |
20% |
Succor Ring  |
20% | |||||
Archon Cape  |
20% | |||||
Gargantua  |
120 | Beaucedine Glacier | (J-8) | 1.5 hours | Phalaina Locket  |
10% |
Rioter's Collar  |
10% | |||||
Humbaba  |
120 | Beaucedine Glacier | (I-7) or (I/J-9) or (G-9/10) or (H/I-8) |
1.5 hours | Solemnity Cape  |
10% |
Audumbla Sash  |
10% | |||||
Nue  |
120 | Beaucedine Glacier | (F-7) | 1.5 hours | Erlene's Notebook  |
10% |
Ritter Gorget  |
10% | |||||
Capricious Cassie  |
120 | Fei'yin | (G/H-6) Map 2 | 1.5 hours | Orunmila's Torque  |
10% |
Fenian Ring  |
10% | |||||
Stray Mary  |
125 | Konschtat Highlands | (F-6/8)-(G-6/8) | 1 hour | Damani Horn  |
25% |
Mass Chalemie  |
25% | |||||
Mouflon Ring  |
25% | |||||
Acipayam Belt  |
25% | |||||
Lumbering Lambert  |
125 | La Theine Plateau | (G-9)-(I-9) | 1 hour | Baldurno's Horn  |
100% |
Grit Earring  |
25% | |||||
Bleating Mantle  |
25% | |||||
Rampaging Ram  |
110 | Konschtat Highlands | (H-6)-(H-8) | 1 hour | Hearty Earring |
10% |
Prolix Ring |
10% | |||||
Serpopard Ishtar  |
125 | Tahrongi Canyon | (H-5)-(H-6) or (H-8)-(I-8) |
1 hour | Serpopard Ninlil's Bone  |
100% |
Narmar Boomerang |
25% | |||||
Cloud Hairpin |
25% | |||||
Nekhen Ring |
25% | |||||
Observant Zekka  |
125 | Beadeaux (S) | (J-6) | 2 hours | ||
Eidolon Pendant +1 |
33% | |||||
Felictas Cape +1 |
33% | |||||
Austerity Belt +1  |
33% | |||||
Shen  |
125 | Bibiki Bay | (J-9) | 1 hour | Tempered Cape |
10% |
Tempered Cape +1 |
1% | |||||
Numbing Norman  |
115 | West Sarutabaruta | (F-5) | 2 hour | Dilletante Grip +1 |
10% |
Erudition Necklace  |
15% | |||||
Habergoass  |
125 | Batallia Downs (S) | (I-10) | 2 hours | Oneiros Rope  |
8% |
Gaudryi Necklace  |
15% | |||||
Muq Shabeel  |
130 | Meriphataud Mountains (S) | (K-4) | 90 minutes | Salire Belt  |
10% |
Genesis Locket  |
15% | |||||
Nunyenunc  |
120 | West Sarutabaruta | (H-5) | 2 Hours | Duplus Grip  |
10% |
Iron Gobbet  |
17% | |||||
Taisaijin  |
125 | Ranguemont Pass | (G-9) | 4 Hours | Maquette Ring  |
20% |
| Chuparrosa Mantle |
37% | |||||
Dread Dealing Dredodak  |
125 | Oldtown Movalpolos | (G-8) | 4 Hours | Grapevine Cape  |
7% |
Moondoe Mantle  |
15% | |||||
Swashstox Beadblinker  |
125 | Newtown Movalpolos | (I-9) | 4 Hours | Volunteer's Earring  |
22% |
Matanki Earring  |
14% | |||||
Skogs Fru  |
120 | East Ronfaure (S) | (H-10) | 2 Hours | Oneiros Knife  |
10% |
Carrier's Sash  |
26% | |||||
Coalition Shield  |
20% | |||||
Koropokkur  |
125 | Yuhtunga Jungle | (G7) | 2 Hours | Atalanta  |
5% |
Zennaroi Earring  |
10% | |||||
Sortiarius Earring  |
7% | |||||
Bune  |
130 | Gustav Tunnel | (G-10) | 2 Hours | Esper Earring  |
12% |
Beneficus  |
50% | |||||
Hermetic Earring  |
25% | |||||
Suu Xicu the Cantabile  |
130 | Castle Oztroja (S) | (H-8) | 4 Hours | Requiem Flute  |
20% |
Quest Items
| ANM's | ||||||
|---|---|---|---|---|---|---|
| Notorious Monster | Level | Zone | Position | Respawn | Reward | Drop Chance |
Ziphius  |
120 - 155 (Scaled based on fishing level) |
Misareaux Coast | (H-5) | Trade a Slice of Carp to the six ??? at (H-5) between 22:00-0:00, then check them at 4:00-7:00 | Sand Charm |
100% |
Ebisu Fishing Rod |
10% - 100% (Scaled based on fishing level) | |||||
Salvage & Nyzul Isle Armor (Level 99)
| FANM's | ||||||
|---|---|---|---|---|---|---|
| Notorious Monster | Level | Zone | Position | Respawn | Reward | Drop Chance |
Bloody Bones  |
105 | Arrapago Reef | (I-6) Map 2 |
1 hour | Morrigan's Coronal +1 |
20% |
Ares' Cuirass +1 |
20% | |||||
Skadi's Bazubands +1 |
20% | |||||
Usukane Hizayoroi +1 |
20% | |||||
Marduk's Crackows +1 |
20% | |||||
Lamie No. 7  |
105 | Arrapago Reef | (E-10) Map 2 |
1 hour | Ares' Mask +1 |
20% |
Skadi's Cuirie +1 |
20% | |||||
Usukane Gote +1 |
20% | |||||
Marduk's Shalwar +1  |
20% | |||||
Morrigan's Pigaches +1  |
20% | |||||
Energetic Eruca  |
105 | Mount Zhayolm | (H-9) | 1 hour | Marduk's Tiara +1 |
20% |
Morrigan's Robe +1  |
20% | |||||
Usukane Sune-Ate +1  |
20% | |||||
Ares' Gauntlets +1 |
20% | |||||
Skadi's Chausses +1 |
20% | |||||
Garfurlar the Rabid  |
105 | Mount Zhayolm | (H-8) | 1 hour | Usukane Somen +1 |
20% |
Marduk's Jubbah +1 |
20% | |||||
Morrigan's Cuffs +1 |
20% | |||||
Ares' Flanchard +1 |
20% | |||||
Skadi's Jambeaux +1  |
20% | |||||
Jaded Jody  |
105 | Wajaom Woodlands | (E-11) | 1 hour | Skadi's Visor +1 |
20% |
Usukane Haramaki +1  |
20% | |||||
Marduk's Dastanas +1 |
20% | |||||
Morrigan's Slops +1 |
20% | |||||
Ares' Sollerets +1 |
20% | |||||
Lamie No. 8  |
105 | Arrapago Reef | (I-10) Map 2 |
1 hour | Phorcys Salade |
20% |
Nares Saio |
20% | |||||
Omodaka Haramaki |
20% | |||||
Nabu's Dastanas  |
20% | |||||
Fea's Slops |
20% | |||||
Bluestreak Gyugyuroon  |
105 | Aydeewa Subterrane | (I-9) Map 3 |
1 hour | Ker's Mask |
20% |
Sigyn's Cuirie |
20% | |||||
Omadaka Gote |
20% | |||||
Nabu's Shalwar |
20% | |||||
Fea's Pigaches  |
20% | |||||
Peallaidh  |
105 | Caedarva Mire | (J-8) Map 1 |
1 hour | Nares Cap |
20% |
Fea's Robe |
20% | |||||
Thaumas Kecks |
20% | |||||
Ker's Sollerets |
20% | |||||
Phorcys Schuhs |
20% | |||||
Zikko  |
105 | Caedarva Mire | (G-10) Map 2 |
1 hour | Omadaka Somen |
20% |
Sigyn's Visor |
20% | |||||
Nabu's Jubbah |
20% | |||||
Fea's Cuffs |
20% | |||||
Thaumas Nails |
20% | |||||
Kirlirger the Abhorrent  |
105 | Halvung | (H-8) Map 2 |
1 hour | Fea's Coronal |
20% |
Ker's Gauntlets  |
20% | |||||
Thaumas Gloves |
20% | |||||
Sigyn's Chausses |
20% | |||||
Omadaka Sune-Ate |
20% | |||||
Mythril Mouth Monamaq  |
105 | Halvung | (H-9) Map 2 |
1 hour | Nabu's Tiara |
20% |
Ker's Flanchard |
20% | |||||
Phorcys Dirs  |
20% | |||||
Nares Clogs |
20% | |||||
Sigyn's Jambeux |
20% | |||||
Dragonscaled Bugaal Ja  |
105 | Mamook | (D-7) Map 1 |
1 hour | Thaumas Hat |
20% |
Ker's Cuirass |
20% | |||||
Phorcys Korazin |
20% | |||||
Nares Cuffs |
20% | |||||
Sigyn's Bazubands |
20% | |||||
Zizzy Zillah  |
105 | Mamook | (I-9) Map 1 |
1 hour | Thaumas Coat |
20% |
Phorcys Mitts  |
20% | |||||
Nares Trews |
20% | |||||
Omodaka Hizayoroi |
20% | |||||
Nabu's Crackows |
20% | |||||
Limbus/Ultima/Omega Armor (Level 99)
| FANM's | ||||||
|---|---|---|---|---|---|---|
| Notorious Monster | Level | Zone | Position | Respawn | Reward | Drop Chance |
Citipati  |
105 | Attohwa Chasm | (F-8) | 1 hour | Murzim Zucchetto |
20% |
Shedir Manteel  |
20% | |||||
Enif Manopolas |
20% | |||||
Adhara Seraweels |
20% | |||||
Murzim Gambieras |
20% | |||||
Goaftrap  |
105 | Misareaux Coast | (L-11) | 1 hour | Enif Zucchetto |
20% |
Shedir Turban |
20% | |||||
Adhara Manteel |
20% | |||||
Murzim Cosciales |
20% | |||||
Shedir Crackows |
20% | |||||
Intulo  |
105 | Bibiki Bay | (I-7) Map 1 |
1 hour | Enif Corazza |
20% |
Murzim Corazza |
20% | |||||
Shedir Gages  |
20% | |||||
Enif Cosciales  |
20% | |||||
Adhara Crackows |
20% | |||||
Tempest Tigon  |
105 | Carpenter's Landing | (G-9) Map 1 |
1 hour | Adhara Turban |
20% |
Adhara Gages |
20% | |||||
Murzim Manopolas  |
20% | |||||
Shedir Seraweels |
20% | |||||
Enif Gambieras |
20% | |||||
Skirmish Weapons (Level 105) & Coalition Armor (Level 106)
| FANM's | ||||||
|---|---|---|---|---|---|---|
| Notorious Monster | Level | Zone | Position | Respawn | Reward | Drop Chance |
Chocoboleech  |
105 | Dangruf Wadi | (F-9) | 1 hour | Lehbrailg |
33% |
Uffrat |
33% | |||||
Gorney Brayettes  |
33% | |||||
Teporingo  |
105 | Dangruf Wadi | (I-9) | 1 hour | Bocluamni |
33% |
Hgafircian |
33% | |||||
Shneddick Tights  |
33% | |||||
Hundredscar Hajwaj  |
105 | Fort Ghelsba | (H-9) | 1 hour | Iztaasu |
33% |
Weatherspoon Corona |
33% | |||||
Gorney Haubert |
33% | |||||
Thousandarm Deshglesh  |
105 | Ghelsba Outpost | (J-6) | 1 hour | Schichishito |
33% |
Weatherspoon Pants |
33% | |||||
Shneddick Boots |
33% | |||||
Hoo Mjuu the Torrent  |
105 | Giddeus | (H-9) | 1 hour | Leisilonu |
33% |
Shneddick Tabard |
33% | |||||
Weatherspoon Cuffs |
33% | |||||
Juu Duzu the Whirlwind  |
105 | Giddeus | (J-11) | 1 hour | Qatsunoci |
33% |
Shneddick Gloves |
33% | |||||
Gorney Sollerets  |
33% | |||||
Vuu Puqu the Beguiler  |
105 | Giddeus | (H-14) | 1 hour | Aedold  |
33% |
Crobaci |
33% | |||||
Weatherspoon Souliers  |
33% | |||||
Bu'Ghi Howlblade  |
105 | Palborough Mines | (I-7) | 1 hour | Ninzas |
33% |
Gorney Morion  |
33% | |||||
Shneddick Chapeau |
33% | |||||
No'Mho Crimsonarmor  |
105 | Palborough Mines | (G-10) | 1 hour | Iizamal |
33% |
Weatherspoon Robe |
33% | |||||
Gorney Moufles  |
33% | |||||
Zi'Ghi Boneater  |
105 | Palborough Mines | (H-8) | 1 hour | Faizzeer |
33% |
Iclamar  |
33% | |||||
Kannakiri |
33% | |||||
Skirmish Armor (Level 113)
- All Skirmish Armor (Level 113) can be upgraded to 119 via Vesca.
| ANM's | ||||||
|---|---|---|---|---|---|---|
| Notorious Monster | Level | Zone | Position | Respawn | Reward | Drop Chance |
Bi'Gho Headtaker  |
115 | Beadeaux | (G-7) Map 1 |
1 hour | Otronif Harness |
25% |
Da'Dha Hundredmask  |
115 | Beadeaux | (G-9) Map 1 |
1 hour | Otronif Gloves |
25% |
Ga'Bhu Unvanquished  |
115 | Beadeaux | (J-5) Map 1 |
1 hour | Iuitl Tights |
25% |
Ge'Dha Evileye  |
115 | Beadeaux | (E/F-10/11) Map 1 |
1 hour | Otronif Brais |
25% |
Zo'Khu Blackcloud  |
115 | Beadeaux | (E-11) Map 1 |
1 hour | Iuitl Wristbands  |
25% |
Mee Deggi the Punisher  |
115 | Castle Oztroja | (H-8) Map 7 |
1 hour | Gendewitha Galoshes |
25% |
Moo Ouzi the Swiftblade  |
115 | Castle Oztroja | (G-7) Map 1 |
1 hour | Gendewitha Spats |
25% |
Quu Domi the Gallant  |
115 | Castle Oztroja | (H-8) Map 6 |
1 hour | Hagondes Hat |
25% |
Yaa Haqa the Profane  |
115 | Castle Oztroja | (I-10) Map 2 |
1 hour | Hagondes Coat |
25% |
Duke Haborym  |
115 | Castle Zvahl Baileys | (G-7) | 1 hour | Cizin Breeches |
25% |
Grand Duke Batym  |
115 | Castle Zvahl Baileys | (G-8) | 1 hour | Gendewitha Caubeen  |
25% |
Marquis Allocen  |
115 | Castle Zvahl Baileys | (H-7) | 1 hour | Gendewitha Bliaut |
25% |
Marquis Amon  |
115 | Castle Zvahl Baileys | (G-7) | 1 hour | Gendewitha Gages |
25% |
Marquis Andrealphus  |
115 | Castle Zvahl Baileys | (I-8) Map 2 |
1 hour | Otronif Boots |
25% |
Marquis Naberius  |
115 | Castle Zvahl Baileys | (I-6) | 1 hour | Cizin Greaves |
25% |
Baron Vapula  |
115 | Castle Zvahl Keep | (G-8) | 1 hour | Cizin Helm |
25% |
Baronet Romwe  |
115 | Castle Zvahl Keep | (I-7) | 1 hour | Beatific Shield |
25% |
Iuitl Gaiters |
25% | |||||
Count Bifrons  |
115 | Castle Zvahl Keep | (I-9) | 1 hour | Cizin Mail |
25% |
Viscount Morax  |
115 | Castle Zvahl Keep | (G-10) | 1 hour | Cizin Mufflers |
25% |
Blubbery Bulge  |
115 | Davoi | (E-10) | 1 hour | Iuitl Headgear |
25% |
Dirtyhanded Gochakzuk  |
115 | Davoi | (H-8) | 1 hour | Iuitl Vest |
25% |
Hawkeyed Dnatbat  |
115 | Davoi | (L-9) | 1 hour | Hagondes Cuffs |
25% |
Poisonhand Gnadgad  |
115 | Davoi | (G-6) | 1 hour | Hagondes Pants |
25% |
Steelbiter Gudrud  |
115 | Davoi | (K-10) | 1 hour | Hagondes Sabots |
25% |
Tigerbane Bakdak  |
115 | Davoi | (J-7) | 1 hour | Otronif Mask |
25% |
Delve Weapons (Level 113)
| ANM's | ||||||
|---|---|---|---|---|---|---|
| Notorious Monster | Level | Zone | Position | Respawn | Reward | Drop Chance |
La Velue  |
118 | Batallia Downs (S) | (G/H-7/8) | 1 hour | Surefire Arquebus |
20% |
Soothsayer Staff |
20% | |||||
Came-cruse  |
118 | Beaucedine Glacier (S) | (H-8) | 1 hour | Uguisumari |
20% |
Transluscent Broth |
20% | |||||
Scylla  |
118 | Beaucedine Glacier (S) | (J-7) | 1 hour | Yaskomo's Pole |
20% |
Bereaver |
20% | |||||
Vulkodlac  |
118 | Jugner Forest (S) | (H-11) | 1 hour | Halachuinic Sword |
20% |
Kiji |
20% | |||||
Bloodlapper  |
118 | Meriphataud Mountains (S) | (L-11) | 1 hour | Rigor Baghnakhs |
20% |
Dimmet Scythe |
20% | |||||
Kinepikwa  |
118 | Pashhow Marshlands (S) | (G-10) | 1 hour | Ophidian Trident |
20% |
Speleogen Bow |
20% | |||||
Dyinyinga  |
118 | Rolanberry Fields (S) | (J-9) | 1 hour | Bloodbath Axe |
20% |
Aphotic Kukri |
20% | |||||
Balam-Quitz  |
118 | Sauromugue Champaign (S) | (K-7) | 1 hour | Mondaha Cudgel |
20% |
Brethren Axe |
20% | |||||
Wildskeeper Weapons (Level 115)
- All Wildskeeper Weapons (Level 115) can be augmented via Ceciliotte.
| ANM's | ||||||
|---|---|---|---|---|---|---|
| Notorious Monster | Level | Zone | Position | Respawn | Reward | Drop Chance |
Friar Rush  |
118 | Den of Rancor | (D-5) - (E-5) | 1 hour | Kuakuakait |
20% |
Xbalanque |
20% | |||||
Hakutaku  |
118 | Den of Rancor | (H-8) | 1 hour | Taikogane |
20% |
Azukinagamitsu |
20% | |||||
Ogama  |
118 | Den of Rancor | (F-9) | 1 hour | Kaquljaan |
20% |
Sozu Bliberry  |
118 | Den of Rancor | (I-6) | 1 hour | Tamaxchi |
20% |
Baqil Staff |
20% | |||||
Rancor Collar |
20% | |||||
Tonberry Pontifex  |
118 | Den of Rancor | (H-8) | 1 hour | Ajjub Bow |
20% |
Atetepeyorg  |
20% | |||||
Triarius X-XV  |
118 | Quicksand Caves | (I-7) Map 4 |
1 hour | Steadfast Shield  |
20% |
Pyf Harp |
20% | |||||
Alkyoneus  |
118 | Upper Delkfutt's Tower | (H-8) Map 3 |
1 hour | Ixtab (Great Axe).png) |
20% |
Xiutleato  |
20% | |||||
Ixtab .png) |
118 | Upper Delkfutt's Tower | (H-8) Map 3 |
1 hour | Atoyac |
20% |
Maochinoli |
20% | |||||
Pallas  |
118 | Upper Delkfutt's Tower | (H-8) Map 2 |
1 hour | Hatxiik |
20% |
Hunahpu |
20% | |||||
Wildskeeper Armor (Level 115)
- All Wildskeeper Armor (Level 115) can be augmented via Ceciliotte.
| ANM's | ||||||
|---|---|---|---|---|---|---|
| Notorious Monster | Level | Zone | Position | Respawn | Reward | Drop Chance |
Lamie No. 9  |
118 | Arrapago Reef | (I-6) Map 3 |
1 hour | Ejekamal Mask |
25% |
Ejekamal Boots |
25% | |||||
Merrow No 5  |
118 | Arrapago Reef | (F-6) Map 2 |
1 hour | Quiahuiz Helm |
25% |
Quiahuiz Trousers |
25% | |||||
Dorgerwor the Astute  |
118 | Halvung | (I-6) Map 1 |
1 hour | Otomi Helm |
25% |
Otomi Gloves |
25% | |||||
Farlarder the Shrewd  |
118 | Halvung | (D-8) Map 1 |
1 hour | Kaabnax Hat |
25% |
Kaabnax Trousers  |
25% | |||||
Darting Kachaal Ja  |
118 | Mamook | (I-8) Map 2 |
1 hour | Uk'uxkaj Cape |
25% |
Uk'uxkaj Boots |
25% | |||||
Devout Radol Ja  |
118 | Mamook | (I-7) Map 1 |
1 hour | Buremte Hat |
25% |
Buremte Gloves |
25% | |||||
Homestead Weapons (Level 119)
- These weapons are deceptively powerful in the right situations.
- Please see Item Special Effects for applicable circumstances.
- All Homestead Weapon ANM's have a 100% and 7.5% chance to drop an Aged Box (Bayld).
| ANM's | ||||||
|---|---|---|---|---|---|---|
| Notorious Monster | Level | Zone | Position | Respawn | Reward | Drop Chance |
Ambusher Antlion  |
130 | Attohwa Chasm | (E-8) | 5 hours | Homestead Axe |
20% |
Homestead Labrys |
20% | |||||
Sekhmet  |
130 | Attohwa Chasm | (I/J-9) | 5 hours | Homestead Blade  |
20% |
Homestead Claymore |
20% | |||||
Splacknuck  |
130 | Bibiki Bay | (F-6) | 5 hours | Senkutanto |
20% |
Senkuto |
20% | |||||
Mycophile  |
130 | Carpenter's Landing | (I-11) | 5 hours | Homestead Wand |
20% |
Homestead Staff |
20% | |||||
Sengann  |
130 | Lufaise Meadows | (F-8) | 5 hours | Homestead Cesti |
20% |
Homestead Dagger |
20% | |||||
Megalobugard  |
130 | Lufaise Meadows | (G-7) | 5 hours | Homestead Scythe |
20% |
Homestead Lance |
20% | |||||
Gration  |
130 | Misareaux Coast | (H-8) | 5 hours | Homestead Scepter |
20% |
Homestead Bowgun  |
20% | |||||
Upyri  |
130 | Misareaux Coast | (E-7)/(F-8) | 5 hours | Homestead Gun |
20% |
Homestead Flute |
20% | |||||
Bomb King  |
130 | Outer Horutoto Ruins | (G-7), (I-7), (J-6) | 5 hours | Homestead Bow |
20% |
Homestead Shield |
20% | |||||
Boroka  |
130 | Riverne - Site B01 | (F-8) | 5 hours | Camaraderie Harp |
10% |
NSANM's
- These NMs are level 130-135 and carry considerably more valuable rewards than lesser ANMs.
| NSANM's | ||||||
|---|---|---|---|---|---|---|
| Notorious Monster | Level | Zone | Position | Respawn | Reward | Drop Chance |
| Marchelute Rages after 20 minutes.  |
130 | Valkurm Dunes | (B-8) | 3-5 hours or 0-2 hours after restart | Argochampsa Mantle |
5% |
Pluton Box  |
5% | |||||
| Eastern Shadow Rages after 20 minutes.  |
130 | Fei'Yin | (G-6/7) Map 1 |
3-5 hours or 0-2 hours after restart | Kappa Necklace |
5% |
| Pluton Box |
5% | |||||
| Northern Shadow Rages after 20 minutes.  |
130 | Fei'Yin | (F-6) Map 1 |
3-5 hours or 0-2 hours after restart | Homiliary |
5% |
| Pluton Box |
5% | |||||
| Southern Shadow Rages after 20 minutes.  |
130 | Fei'Yin | (F-7/8) Map 1 |
3-5 hours or 0-2 hours after restart | Epaminondas's Ring |
5% |
| Pluton Box |
5% | |||||
Western Shadow  |
130 | Fei'Yin | (E/F-7) Map 1 |
3-5 hours or 0-2 hours after restart | Gishdubar Sash  |
5% |
| Pluton Box |
5% | |||||
| Tonberry Kinq Rages after 20 minutes.  |
142 | Temple of Uggalepih | (I-8) Map 2 |
21-24 hours or 0-2 hours after restart | Tartarus Platemail OR Gyve Doublet  |
7.5% |
Pluton Case  |
(Up to 3) 40%/16%/4% | |||||
| Khadem Quemquoma Rages after 20 minutes.  |
135 | Garlaige Citadel (S) | (G-8) Map 1 |
3-5 hours or 0-2 hours after restart | Pixie Hairpin +1 |
15% |
| Pluton Box |
5% | |||||
| King Vinegarroon Rages after 20 minutes.  |
135 | Western Altepa Desert | (G-11) | 3-5 hours or 0-2 hours after restart | Sanctity Necklace |
8% |
Loop of Abdhaljs Fiber |
(Up to 3) 80%/30%/5% | |||||
| Serket Rages after 20 minutes.  |
135 | Garlaige Citadel | (F-7) (I-7) |
3-5 hours or 0-2 hours after restart | Eabani Earring  |
8% |
| Loop of Abdhaljs Fiber |
(Up to 3) 80%/30%/5% | |||||
| Tyrannic Tunnok Rages after 20 minutes.  |
135 | Ifrit's Cauldron | (E-10) | 3-5 hours or 0-2 hours after restart | Izdubar Mantle |
8% |
| Loop of Abdhaljs Fiber |
(Up to 3) 80%/30%/5% | |||||
| Amikiri Rages after 20 minutes.  |
135 | Gustav Tunnel | (F-7) | 3-5 hours or 0-2 hours after restart | Respite Cloak  |
8% |
| Loop of Abdhaljs Fiber |
(Up to 3) 80%/30%/5% | |||||
| Sargas Rages after 20 minutes.  |
135 | Attohwa Chasm | (G-9) | 3-5 hours or 0-2 hours after restart | Loop of Abdhaljs Fiber |
(Up to 3) 80%/30%/5% |
| Lesath Rages after 20 minutes.  |
135 | Maze of Shakhrami | (H-9) | 3-5 hours or 0-2 hours after restart | Loop of Abdhaljs Fiber |
(Up to 3) 80%/30%/5% |
| Calchas Rages after 20 minutes.  |
135 | Western Altepa Desert | (F-9) | 3-5 hours or 0-2 hours after restart | Loop of Abdhaljs Fiber |
(Up to 3) 80%/30%/5% |
| Aqrabuamelu Rages after 20 minutes.  |
135 | Crawler's Nest | (F-7) | 3-5 hours or 0-2 hours after restart | Loop of Abdhaljs Fiber |
(Up to 3) 80%/30%/5% |
| All-Seeing Onyx Eye Rages after 20 minutes.  |
135 | La Vaule (S) | (J-11) | 3-5 hours or 0-2 hours after restart | Tokko Axe Tokko Chopper  |
15% |
| Pluton Box |
5% | |||||
| Amaranth Rages after 20 minutes.  |
135 | Fort Karugo-Narugo (S) | (E-9) | 3-5 hours or 0-2 hours after restart | Tokko Claymore Tokko Katana  |
15% |
| Pluton Box |
5% | |||||
| Kirtimukha Rages after 20 minutes.  |
135 | Fort Karugo-Narugo (S) | (I-10) | 3-5 hours or 0-2 hours after restart | Tokko Knife  Tokko Knuckles  |
15% |
| Pluton Box |
5% | |||||
| Judgmental Julika Rages after 20 minutes.  |
135 | Vunkerl Inlet (S) | (G-13) | 3-5 hours or 0-2 hours after restart | Tokko Scythe Tokko Staff  |
15% |
| Pluton Box |
5% | |||||
| Big Bang Rages after 20 minutes.  |
135 | Vunkerl Inlet (S) | (E/F-10) | 3-5 hours or 0-2 hours after restart | Tokko Sword  Tokko Tachi  |
15% |
| Pluton Box |
5% | |||||
| Scitalis Rages after 20 minutes.  |
135 | Grauberg (S) | (F-9) | 3-5 hours or 0-2 hours after restart | Tokko Lance  Tokko Rod  |
15% |
| Pluton Box |
5% | |||||
| Simorg Rages after 20 minutes.  |
135 | Grauberg (S) | (D-8) | 3-5 hours or 0-2 hours after restart | Tokko Grip  Tokko Bow  |
15% |
| Pluton Box |
5% | |||||
| Drooling Daisy Rages after 20 minutes.  |
130 | Rolanberry Fields | (D-11) | 3-5 hours or 0-2 hours after restart | Barkarole Earring  |
5% |
Wyrm Ash  |
10% | |||||
| Pluton Box |
5% | |||||
| Noble Mold Rages after 20 minutes.  |
130 | The Sanctuary of Zi'Tah | (E-9) | 3-5 hours or 0-2 hours after restart | Crematio Earring |
5% |
Wyrm Blood |
10% | |||||
| Pluton Box |
5% | |||||
| Morbolger Rages after 20 minutes.  |
130 | Ordelle's Caves | (H-10) | 3-5 hours or 0-2 hours after restart | Trux Earring  |
5% |
Macuil Horn |
10% | |||||
| Pluton Box |
5% | |||||
| Rose Garden Rages after 20 minutes.  |
130 | Yuhtunga Jungle | (I-7) | 3-5 hours or 0-2 hours after restart | Tripudio Earring  |
5% |
Plovid Effluvium |
10% | |||||
| Pluton Box |
5% | |||||
| Voluptuous Vivian Rages after 20 minutes.  |
130 | The Boyahda Tree | (G-5/H-6) | 3-5 hours or 0-2 hours after restart | Sanare Earring  |
5% |
Defiant Sweat |
10% | |||||
| Pluton Box |
5% | |||||
| Voluptuous Vilma Rages after 20 minutes.  |
130 | Yuhtunga Jungle | (I-7) | 3-5 hours or 0-2 hours after restart | Gelai Earring |
5% |
Tartarian Chain  |
10% | |||||
| Pluton Box |
5% | |||||
| Buarainech Rages after 20 minutes.  |
130 | Garlaige Citadel (S) | (H-7) | 3-5 hours or 0-2 hours after restart | Balarama Grip  |
20% |
Bztavian Wing |
5% | |||||
| Macuil Horn |
5% | |||||
Ruthenium Ore |
5% | |||||
| Balor Rages after 20 minutes.  |
130 | Sacrarium | (L-8) | 3-5 hours or 0-2 hours after restart | Ajax  |
3% |
Ajax +1  |
0.3% | |||||
Beitetsu Parcel |
10% | |||||
Empress Board |
5% | |||||
Princess Board |
5% | |||||
| Caithlean Rages after 20 minutes.  |
130 | Sacrarium | (L-8) | 3-5 hours or 0-2 hours after restart | Contemplator  |
3% |
Contemplator +1  |
0.3% | |||||
| Beitetsu Parcel |
10% | |||||
| Empress Board |
5% | |||||
| Princess Board |
5% | |||||
| Lobais Rages after 20 minutes.  |
130 | Sacrarium | (L-8) | 3-5 hours or 0-2 hours after restart | Imati  |
3% |
Imati +1  |
0.3% | |||||
| Beitetsu Parcel |
10% | |||||
| Empress Board |
5% | |||||
| Princess Board |
5% | |||||
| Luaith Rages after 20 minutes.  |
130 | Sacrarium | (L-8) | 3-5 hours or 0-2 hours after restart | Triska Scythe  |
3% |
Triska Scythe +1  |
0.3% | |||||
| Beitetsu Parcel |
10% | |||||
| Empress Board |
5% | |||||
| Princess Board |
5% | |||||
| Indich Rages after 20 minutes.  |
130 | Sacrarium | (L-8) | 3-5 hours or 0-2 hours after restart | Perun  |
3% |
Perun +1  |
0.3% | |||||
| Beitetsu Parcel |
10% | |||||
| Empress Board |
5% | |||||
| Princess Board |
5% | |||||
| Elel Rages after 20 minutes.  |
130 | Sacrarium | (L-8) | 3-5 hours or 0-2 hours after restart | Flyssa  |
3% |
Flyssa +1  |
0.3% | |||||
| Beitetsu Parcel |
10% | |||||
| Empress Board |
5% | |||||
| Princess Board |
5% | |||||
| Keremet Rages after 20 minutes.  |
130 | Sacrarium | (L-8) | 3-5 hours or 0-2 hours after restart | Ababinili  |
3% |
Ababinili +1  |
0.3% | |||||
| Beitetsu Parcel |
10% | |||||
| Empress Board |
5% | |||||
| Princess Board |
5% | |||||
| Taxim Rages after 20 minutes.  |
130 | Gustav Tunnel | Map 2 (G-8) | 3-5 hour or 0-2 hours after restart | Hretha Earring |
5% |
Bishop's Sash |
35% | |||||
Ran Earring |
5% | |||||
Boulder Case  |
25% | |||||
| Ah Puch Rages after 20 minutes.  |
130 | Outer Horutoto Ruins | Map 5 (G-8) | 3-5 hour or 0-2 hours after restart | Foresti Earring |
5% |
Casso Sash |
35% | |||||
Hermodr Earring  |
5% | |||||
| Boulder Case |
25% | |||||
| Oupire Rages after 20 minutes.  |
130 | Alzadaal Undersea Ruins | Map 1 (I-10) | 3-5 hour or 0-2 hours after restart | Saxnot Earring |
5% |
Cimmerian Sash  |
35% | |||||
Mimir Earring |
5% | |||||
| Boulder Case |
25% | |||||
| Wounded Wurfel Rages after 20 minutes.  |
130 | Gusgen Mines | Map 4 (H-6) | 3-5 hour or 0-2 hours after restart | Vor Earring |
5% |
Harfner's Sash  |
35% | |||||
Ilmr Earring |
5% | |||||
| Boulder Case |
25% | |||||
| Smothered Schmidt Rages after 20 minutes.  |
130 | Gusgen Mines | Map 1 (J-7) | 3-5 hour or 0-2 hours after restart | Mani Earring  |
5% |
Accursed Belt  |
35% | |||||
Lodurr Earring |
5% | |||||
| Boulder Case |
25% | |||||
| Aynu-kaysey Rages after 20 minutes.  |
130 | Caedarva Mire | Map 2 (H-8) | 3-5 hour or 0-2 hours after restart | Boulder Case |
25% |
Olympus Sash |
35% | |||||
Choleric Earring |
5% | |||||
Njordr Earring |
5% | |||||
| Hellion Rages after 20 minutes.  |
130 | Labyrinth of Onzozo | (J-6) | 3-5 hour or 0-2 hours after restart | Bragi Earring |
5% |
Glassblower's Belt |
35% | |||||
Dellingr Earring |
5% | |||||
| Boulder Case |
25% | |||||
| Ereshkigal Rages after 20 minutes.  |
130 | Xarcabard | (F-7) | 3-5 hour or 0-2 hours after restart | Gna Earring  |
5% |
Field Rope  |
35% | |||||
Fulla Earring |
5% | |||||
| Boulder Case |
25% | |||||
| Mahishasura Rages after 20 minutes.  |
130 | Bhaflau Thickets | (G-8) | 3-5 hour or 0-2 hours after restart | Gersemi Earring |
5% |
Emphatikos Rope  |
35% | |||||
Hnoss Earring |
5% | |||||
| Boulder Case |
25% | |||||
DNANM's
- These NMs are level 140-150 and carry considerably more valuable rewards than lesser ANMs.
| DNANM's | ||||||
Lehko Habhoka  |
Selh'teus  |
Tom Tit Tat  |
Vidhula the Wrathborn  |
Calcabrina  |
Hippomaritimus  |
Jolly Green 
|
| Sandworm System | ||
Sandworm 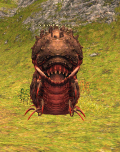
| ||
King Arthro 
|
Serket 
|
Guivre 
|
|---|---|---|