Arbitrary NMs: Difference between revisions
Jump to navigation
Jump to search
No edit summary |
m →DNANMs |
||
| (330 intermediate revisions by 9 users not shown) | |||
| Line 1: | Line 1: | ||
== Introduction == | |||
Arbitrary Notorious Monsters (ANM’s) are different levels of typical Notorious Monsters (NM’s) which have been buffed from retail levels but provide higher rewards. It is highly recommended to use the !check command to examine an NM before attacking because of the presence of ANM’s throughout Vana’diel. | |||
{| class="wikitable" style="text-align: center"; | FANM - Fairly Arbitrary Notorious Monster <br> | ||
| | ANM - Arbitrary Notorious Monster <br> | ||
NSANM - Not So Arbitrary Notorious Monster <br> | |||
DNANM - Definitely Not Arbitrary Notorious Monster <br> | |||
== Non Item Level Equipment == | |||
{| class="wikitable mw-collapsible mw-collapsed" style="text-align: center"; width="1280px;" | |||
! scope="row" colspan="7" style="text-align: left" | FANMs - Salvage & Nyzul Isle Armor (Level 99) | |||
|- | |||
| '''[[Bloody Bones]]''' || '''[[Lamie No. 7]]''' || '''[[Energetic Eruca]]''' || '''[[Garfurlar the Rabid]]''' || '''[[Jaded Jody]]''' || '''[[Lamie No. 8]]''' | |||
|- | |||
| style="width: 200px;" | [[File:Bloody Bones.png|frameless|center|200px|link=[[Bloody Bones]]]] || style="width: 200px;" | [[File:Lamie No. 7.png|frameless|center|200px|link=[[Lamie No. 7]]]] || style="width: 200px;" | [[File:Energetic Eruca.png|frameless|center|200px|link=[[Energetic Eruca]]]] || style="width: 200px;" | [[File:Garfurlar the Rabid.png|frameless|center|200px|link=[[Garfurlar the Rabid]]]] || style="width: 200px;" | [[File:Jaded Jody.png|frameless|center|200px|link=[[Jaded Jody]]]] || style="width: 200px;" | [[File:Lamie No. 8.png|frameless|center|200px|link=[[Lamie No. 8]]]] | |||
|- | |||
| '''[[Bluestreak Gyugyuroon]]''' || '''[[Peallaidh]]''' || '''[[Zikko]]''' || '''[[Kirlirger the Abhorrent]]''' || '''[[Mythril Mouth Monamaq]]''' || '''[[Dragonscaled Bugaal Ja]]''' | |||
|- | |||
| style="width: 200px;" | [[File:Bluestreak Gyugyuroon.png|frameless|center|200px|link=[[Bluestreak Gyugyuroon]]]] || style="width: 200px;" | [[File:Peallaidh.png|frameless|center|200px|link=[[Peallaidh]]]] || style="width: 200px;" | [[File:Zikko.png|frameless|center|200px|link=[[Zikko]]]] || style="width: 200px;" | [[File:Kirlirger the Abhorrent.png|frameless|center|200px|link=[[Kirlirger the Abhorrent]]]] || style="width: 200px;" | [[File:Mythril Mouth Monamaq.png|frameless|center|200px|link=[[Mythril Mouth Monamaq]]]] || style="width: 200px;" | [[File:Dragonscaled Bugaal Ja.png|frameless|center|200px|link=[[Dragonscaled Bugaal Ja]]]] | |||
|- | |||
| scope="row" colspan="1" | '''[[Zizzy Zillah]]''' | |||
|- | |||
| style="width: 200px;" | [[File:Zizzy Zillah.png|frameless|center|200px|link=[[Zizzy Zillah]]]] || style="width: 200px;" | || style="width: 200px;" | || style="width: 200px;" | || style="width: 200px;" | || style="width: 200px;" | | |||
|} | |||
{| class="wikitable mw-collapsible mw-collapsed" style="text-align: center"; width="1280px;" | |||
! scope="row" colspan="7" style="text-align: left" | FANMs - Limbus/Ultima/Omega Armor (Level 99) | |||
|- | |||
| '''[[Citipati]]''' || '''[[Goaftrap]]''' || '''[[Intulo]]''' || '''[[Tempest Tigon]]''' | |||
|- | |||
| style="width: 200px;" | [[File:Citipati.png|frameless|center|200px|link=[[Citipati]]]] || style="width: 200px;" | [[File:Goaftrap.png|frameless|center|200px|link=[[Goaftrap]]]] || style="width: 200px;" | [[File:Intulo.png|frameless|center|200px|link=[[Intulo]]]] || style="width: 200px;" | [[File:Tempest Tigon.png|frameless|center|200px|link=[[Tempest Tigon]]]] || style="width: 200px;" | || style="width: 200px;" | | |||
|} | |||
{| class="wikitable mw-collapsible mw-collapsed" style="text-align: center"; width="1280px;" | |||
! scope="row" colspan="7" style="text-align: left" | ANMs - Weapons | |||
|- | |||
| '''[[Lord of Onzozo]]''' || '''[[Aiatar]]''' | |||
|- | |||
| style="width: 200px;" | [[File:Lord of Onzozo.png|frameless|center|200px|link=[[Lord of Onzozo]]]] || style="width: 200px;" | [[File:Aiatar.png|frameless|center|200px|link=[[Aiatar]]]] || style="width: 200px;" | || style="width: 200px;" | || style="width: 200px;" | || style="width: 200px;" | | |||
|} | |||
{| class="wikitable mw-collapsible mw-collapsed" style="text-align: center"; width="1280px;" | |||
! scope="row" colspan="7" style="text-align: left" | ANMs - Feet | |||
|- | |||
| scope="row" colspan="1" | '''[[Cactrot Rapido]]''' | |||
|- | |||
| style="width: 200px;" | [[File:Cactrot Rapido.png|frameless|center|200px|link=[[Cactrot Rapido]]]] || style="width: 200px;" | || style="width: 200px;" | || style="width: 200px;" | || style="width: 200px;" | || style="width: 200px;" | | |||
|} | |||
{| class="wikitable mw-collapsible mw-collapsed" style="text-align: center"; width="1280px;" | |||
! scope="row" colspan="7" style="text-align: left" | ANMs - Accessories (Neck/Earrings/Rings/Back/Waist/Instruments) | |||
|- | |||
| '''[[Bloodsucker]]''' || '''[[Geush Urvan]]''' || '''[[Jaggedy-Eared Jack]]''' || '''[[Spiny Spipi]]''' || '''[[Bubbly Bernie]]''' || '''[[Beet Leafhopper]]''' | |||
|- | |||
| style="width: 200px;" | [[File:Bloodsucker.png|frameless|center|200px|link=[[Bloodsucker]]]] || style="width: 200px;" | [[File:Geush Urvan.png|frameless|center|200px|link=[[Geush Urvan]]]] || style="width: 200px;" | [[File:Jaggedy-Eared Jack.png|frameless|center|200px|link=[[Jaggedy-Eared Jack]]]] || style="width: 200px;" | [[File:Spiny Spipi.png|frameless|center|200px|link=[[Spiny Spipi]]]] || style="width: 200px;" | [[File:Bubbly Bernie.png|frameless|center|200px|link=[[Bubbly Bernie]]]] || style="width: 200px;" | [[File:Beet Leafhopper.png|frameless|center|200px|link=[[Beet Leafhopper]]]] | |||
|- | |||
| '''[[Garharlor the Unruly]]''' || '''[[Antican Praefectus]]''' || '''[[Centurio X-I]]''' || '''[[Proconsul XII]]''' || '''[[Fyuu the Seabellow]]''' || '''[[Mouu the Waverider]]''' | |||
|- | |||
| style="width: 200px;" | [[File:Garharlor the Unruly.png|frameless|center|200px|link=[[Garharlor the Unruly]]]] || style="width: 200px;" | [[File:Antican Praefectus.png|frameless|center|200px|link=[[Antican Praefectus]]]] || style="width: 200px;" | [[File:Centurio X-I.png|frameless|center|200px|link=[[Centurio X-I]]]] || style="width: 200px;" | [[File:Proconsul XII.png|frameless|center|200px|link=[[Proconsul XII]]]] || style="width: 200px;" | [[File:Fyuu the Seabellow.png|frameless|center|200px|link=[[Fyuu the Seabellow]]]] || style="width: 200px;" | [[File:Mouu the Waverider.png|frameless|center|200px|link=[[Mouu the Waverider]]]] | |||
|- | |||
| '''[[Namtar]]''' || '''[[Pahh the Gullcaller]]''' || '''[[Qull the Shellbuster]]''' || '''[[Seww the Squidlimbed]]''' || '''[[Voll the Sharkfinned]]''' || '''[[Wuur the Sandcomber]]''' | |||
|- | |||
| style="width: 200px;" | [[File:Namtar.png|frameless|center|200px|link=[[Namtar]]]] || style="width: 200px;" | [[File:Pahh the Gullcaller.png|frameless|center|200px|link=[[Pahh the Gullcaller]]]] || style="width: 200px;" | [[File:Qull the Shellbuster.png|frameless|center|200px|link=[[Qull the Shellbuster]]]] || style="width: 200px;" | [[File:Seww the Squidlimbed.png|frameless|center|200px|link=[[Seww the Squidlimbed]]]] || style="width: 200px;" | [[File:Voll the Sharkfinned.png|frameless|center|200px|link=[[Voll the Sharkfinned]]]] || style="width: 200px;" | [[File:Wuur the Sandcomber.png|frameless|center|200px|link=[[Wuur the Sandcomber]]]] | |||
|- | |||
| '''[[Lumbering Lambert]]''' || '''[[Rampaging Ram]]''' || '''[[Serpopard Ishtar]]''' || '''[[Observant Zekka]]''' || '''[[Shen]]''' || '''[[Numbing Norman]]''' | |||
|- | |||
| style="width: 200px;" | [[File:Lumbering Lambert.png|frameless|center|200px|link=[[Lumbering Lambert]]]] || style="width: 200px;" | [[File:Rampaging Ram.png|frameless|center|200px|link=[[Rampaging Ram]]]] || style="width: 200px;" | [[File:Serpopard Ishtar.png|frameless|center|200px|link=[[Serpopard Ishtar]]]] || style="width: 200px;" | [[File:Observant Zekka.png|frameless|center|200px|link=[[Observant Zekka]]]] || style="width: 200px;" | [[File:Shen.png|frameless|center|200px|link=[[Shen]]]] || style="width: 200px;" | [[File:Numbing Norman.png|frameless|center|200px|link=[[Numbing Norman]]]] | |||
|- | |||
| '''[[Habergoass]]''' || '''[[Muq Shabeel]]''' || '''[[Nunyenunc]]''' || '''[[Taisaijin]]''' || '''[[Dread Dealing Dredodak]]''' || '''[[Swashstox Beadblinker]]''' | |||
|- | |- | ||
| | | style="width: 200px;" | [[File:Habergoass.png|frameless|center|200px|link=[[Habergoass]]]] || style="width: 200px;" | [[File:Muq Shabeel.png|frameless|center|200px|link=[[Muq Shabeel]]]] || style="width: 200px;" | [[File:Nunyenunc.png|frameless|center|200px|link=[[Nunyenunc]]]] || style="width: 200px;" | [[File:Taisaijin.png|frameless|center|200px|link=[[Taisaijin]]]] || style="width: 200px;" | [[File:Dread Dealing Dredodak.png|frameless|center|200px|link=[[Dread Dealing Dredodak]]]] || style="width: 200px;" | [[File:Swashstox Beadblinker.png|frameless|center|200px|link=[[Swashstox Beadblinker]]]] | ||
|- | |- | ||
| '' | | '''[[Skogs Fru]]''' || '''[[Koropokkur]]''' || '''[[Bune]]''' || '''[[Suu Xicu the Cantabile]]''' || || | ||
|- | |- | ||
| | | style="width: 200px;" | [[File:Skogs Fru.png|frameless|center|200px|link=[[Skogs Fru]]]] || style="width: 200px;" | [[File:Koropokkur.png|frameless|center|200px|link=[[Koropokkur]]]] || style="width: 200px;" | [[File:Bune.png|frameless|center|200px|link=[[Bune]]]] || style="width: 200px;" | [[File:Suu Xicu the Cantabile.png|frameless|center|200px|link=[[Suu Xicu the Cantabile]]]] || || | ||
|} | |||
{| class="wikitable mw-collapsible mw-collapsed" style="text-align: center"; width="1280px;" | |||
! scope="row" colspan="7" style="text-align: left" | ANMs - Quest Items | |||
|- | |||
| '''[[Ziphius]]''' || | |||
|- | |||
| style="width: 200px;" | [[File:Ziphius.png|frameless|center|200px|link=[[Ziphius]]]] || || || || || | |||
|} | |||
== Skirmish Weapons (Level 105) & Coalition Armor (Level 106) == | |||
{| class="wikitable mw-collapsible mw-collapsed" style="text-align: center"; width="1280px;" | |||
! scope="row" colspan="7" style="text-align: left" | FANMs | |||
|- | |- | ||
| '' | | '''[[Chocoboleech]]''' || '''[[Teporingo]]''' || '''[[Hundredscar Hajwaj]]''' || '''[[Thousandarm Deshglesh]]''' || '''[[Hoo Mjuu the Torrent]]''' || '''[[Juu Duzu the Whirlwind]]''' | ||
|- | |- | ||
| | | style="width: 200px;" | [[File:Chocoboleech.png|frameless|center|200px|link=[[Chocoboleech]]]] || style="width: 200px;" | [[File:Teporingo.png|frameless|center|200px|link=[[Teporingo]]]] || style="width: 200px;" | [[File:Hundredscar Hajwaj.png|frameless|center|200px|link=[[Hundredscar Hajwaj]]]] || style="width: 200px;" | [[File:Thousandarm Deshglesh.png|frameless|center|200px|link=[[Thousandarm Deshglesh]]]] || style="width: 200px;" | [[File:Hoo Mjuu the Torrent.png|frameless|center|200px|link=[[Hoo Mjuu the Torrent]]]] || style="width: 200px;" | [[File:Juu Duzu the Whirlwind.png|frameless|center|200px|link=[[Juu Duzu the Whirlwind]]]] | ||
|- | |- | ||
| '' | | '''[[Vuu Puqu the Beguiler]]''' || '''[[Bu'Ghi Howlblade]]''' || '''[[No'Mho Crimsonarmor]]''' || '''[[Zi'Ghi Boneeater]]''' || || | ||
|- | |- | ||
| | | style="width: 200px;" | [[File:Vuu Puqu the Beguiler.png|frameless|center|200px|link=[[Vuu Puqu the Beguiler]]]] || style="width: 200px;" | [[File:Bu'Ghi Howlblade.png|frameless|center|200px|link=[[Bu'Ghi Howlblade]]]] || style="width: 200px;" | [[File:No'Mho Crimsonarmor.png|frameless|center|200px|link=[[No'Mho Crimsonarmor]]]] || style="width: 200px;" | [[File:Zi'Ghi Boneeater.png|frameless|center|200px|link=[[Zi'Ghi Boneeater]]]] || style="width: 200px;" | || style="width: 200px;" | | ||
|} | |||
== Skirmish Armor (Level 113) == | |||
* '''All Skirmish Armor (Level 113) can be upgraded to 119 via [[Vesca]].''' | |||
{| class="wikitable mw-collapsible mw-collapsed" style="text-align: center"; width="1280px;" | |||
! scope="row" colspan="7" style="text-align: left" | ANMs | |||
|- | |- | ||
| '' | | '''[[Bi'Gho Headtaker]]''' || '''[[Da'Dha Hundredmask]]''' || '''[[Ga'Bhu Unvanquished]]''' || '''[[Ge'Dha Evileye]]''' || '''[[Zo'Khu Blackcloud]]''' || '''[[Mee Deggi the Punisher]]''' | ||
|- | |- | ||
| '' | | style="width: 200px;" | [[File:Bi'Gho Headtaker.png|frameless|center|200px|link=[[Bi'Gho Headtaker]]]] || style="width: 200px;" | [[File:Da'Dha Hundredmask.png|frameless|center|200px|link=[[Da'Dha Hundredmask]]]] || style="width: 200px;" | [[File:Ga'Bhu Unvanquished.png|frameless|center|200px|link=[[Ga'Bhu Unvanquished]]]] || style="width: 200px;" | [[File:Ge'Dha Evileye.png|frameless|center|200px|link=[[Ge'Dha Evileye]]]] || style="width: 200px;" | [[File:Zo'Khu Blackcloud.png|frameless|center|200px|link=[[Zo'Khu Blackcloud]]]] || style="width: 200px;" | [[File:Mee Deggi the Punisher.png|frameless|center|200px|link=[[Mee Deggi the Punisher]]]] | ||
|- | |- | ||
| '' | | '''[[Moo Ouzi the Swiftblade]]''' || '''[[Quu Domi the Gallant]]''' || '''[[Yaa Haqa the Profane]]''' || '''[[Duke Haborym]]''' || '''[[Grand Duke Batym]]''' || '''[[Marquis Allocen]]''' | ||
|- | |- | ||
| | | style="width: 200px;" | [[File:Moo Ouzi the Swiftblade.png|frameless|center|200px|link=[[Moo Ouzi the Swiftblade]]]] || style="width: 200px;" | [[File:Quu Domi the Gallant.png|frameless|center|200px|link=[[Quu Domi the Gallant]]]] || style="width: 200px;" | [[File:Yaa Haqa the Profane.png|frameless|center|200px|link=[[Yaa Haqa the Profane]]]] || style="width: 200px;" | [[File:Duke Haborym.png|frameless|center|200px|link=[[Duke Haborym]]]] || style="width: 200px;" | [[File:Grand Duke Batym.png|frameless|center|200px|link=[[Grand Duke Batym]]]] || style="width: 200px;" | [[File:Marquis Allocen.png|frameless|center|200px|link=[[Marquis Allocen]]]] | ||
|- | |- | ||
| '' | | '''[[Marquis Amon]]''' || '''[[Marquis Andrealphus]]''' || '''[[Marquis Naberius]]''' || '''[[Baron Vapula]]''' || '''[[Baronet Romwe]]''' || '''[[Count Bifrons]]''' | ||
|- | |- | ||
| | | style="width: 200px;" | [[File:Marquis Amon.png|frameless|center|200px|link=[[Marquis Amon]]]] || style="width: 200px;" | [[File:Marquis Andrealphus.png|frameless|center|200px|link=[[Marquis Andrealphus]]]] || style="width: 200px;" | [[File:Marquis Naberius.png|frameless|center|200px|link=[[Marquis Naberius]]]] || style="width: 200px;" | [[File:Baron Vapula.png|frameless|center|200px|link=[[Baron Vapula]]]] || style="width: 200px;" | [[File:Baronet Romwe.png|frameless|center|200px|link=[[Baronet Romwe]]]] || style="width: 200px;" | [[File:Count Bifrons.png|frameless|center|200px|link=[[Count Bifrons]]]] | ||
|- | |- | ||
| '' | | '''[[Viscount Morax]]''' || '''[[Blubbery Bulge]]''' || '''[[Dirtyhanded Gochakzuk]]''' || '''[[Hawkeyed Dnatbat]]''' || '''[[Poisonhand Gnadgad]]''' || '''[[Steelbiter Gudrud]]''' | ||
|- | |- | ||
| | | style="width: 200px;" | [[File:Viscount Morax.png|frameless|center|200px|link=[[Viscount Morax]]]] || style="width: 200px;" | [[File:Blubbery Bulge.png|frameless|center|200px|link=[[Blubbery Bulge]]]] || style="width: 200px;" | [[File:Dirtyhanded Gochakzuk.png|frameless|center|200px|link=[[Dirtyhanded Gochakzuk]]]] || style="width: 200px;" | [[File:Hawkeyed Dnatbat.png|frameless|center|200px|link=[[Hawkeyed Dnatbat]]]] || style="width: 200px;" | [[File:Poisonhand Gnadgad.png|frameless|center|200px|link=[[Poisonhand Gnadgad]]]] || style="width: 200px;" | [[File:Steelbiter Gudrud.png|frameless|center|200px|link=[[Steelbiter Gudrud]]]] | ||
|- | |- | ||
| '' | | '''[[Tigerbane Bakdak]]''' || || || || || | ||
|- | |- | ||
| | | style="width: 200px;" | [[File:Tigerbane Bakdak.png|frameless|center|200px|link=[[Tigerbane Bakdak]]]] || style="width: 200px;" | || style="width: 200px;" | || style="width: 200px;" | || style="width: 200px;" | || style="width: 200px;" | | ||
|} | |||
== Delve Weapons (Level 113) == | |||
{| class="wikitable mw-collapsible mw-collapsed" style="text-align: center"; width="1280px;" | |||
! scope="row" colspan="7" style="text-align: left" | ANMs | |||
|- | |- | ||
| '' | | '''[[La Velue]]''' || '''[[Came-cruse]]''' || '''[[Scylla]]''' || '''[[Vulkodlac]]''' || '''[[Bloodlapper]]''' || '''[[Kinepikwa]]''' | ||
|- | |- | ||
| | | style="width: 200px;" | [[File:La Velue.png|frameless|center|200px|link=[[La Velue]]]] || style="width: 200px;" | [[File:Came-cruse.png|frameless|center|200px|link=[[Came-cruse]]]] || style="width: 200px;" | [[File:Scylla.png|frameless|center|200px|link=[[Scylla]]]] || style="width: 200px;" | [[File:Vulkodlac.png|frameless|center|200px|link=[[Vulkodlac]]]] || style="width: 200px;" | [[File:Bloodlapper.png|frameless|center|200px|link=[[Bloodlapper]]]] || style="width: 200px;" | [[File:Kinepikwa.png|frameless|center|200px|link=[[Kinepikwa]]]] | ||
|- | |- | ||
| '' | | '''[[Dyinyinga]]''' || '''[[Balam-Quitz]]''' || || || || | ||
|- | |- | ||
| '' | | style="width: 200px;" | [[File:Dyinyinga.png|frameless|center|200px|link=[[Dyinyinga]]]] || style="width: 200px;" | [[File:Balam-Quitz.png|frameless|center|200px|link=[[Balam-Quitz]]]] || style="width: 200px;" | || style="width: 200px;" | || style="width: 200px;" | || style="width: 200px;" | | ||
|} | |||
== Wildskeeper Weapons (Level 115) == | |||
* '''All Wildskeeper Weapons (Level 115) can be augmented via [[Ceciliotte]].''' | |||
{| class="wikitable mw-collapsible mw-collapsed" style="text-align: center"; width="1280px;" | |||
! scope="row" colspan="7" style="text-align: left" | ANMs | |||
|- | |- | ||
| '' | | '''[[Friar Rush]]''' || '''[[Hakutaku]]''' || '''[[Ogama]]''' || '''[[Sozu Bliberry]]''' || '''[[Tonberry Pontifex]]''' || '''[[Triarius X-XV]]''' | ||
|- | |- | ||
| | | style="width: 200px;" | [[File:Friar Rush.png|frameless|center|200px|link=[[Friar Rush]]]] || style="width: 200px;" | [[File:Hakutaku.png|frameless|center|200px|link=[[Hakutaku]]]] || style="width: 200px;" | [[File:Ogama.png|frameless|center|200px|link=[[Ogama]]]] || style="width: 200px;" | [[File:Sozu Bliberry.png|frameless|center|200px|link=[[Sozu Bliberry]]]] || style="width: 200px;" | [[File:Tonberry Pontifex.png|frameless|center|200px|link=[[Tonberry Pontifex]]]] || style="width: 200px;" | [[File:Triarius X-XV.png|frameless|center|200px|link=[[Triarius X-XV]]]] | ||
|- | |- | ||
| '' | | '''[[Alkyoneus]]''' || '''[[Ixtab]]''' || '''[[Pallas]]''' || || || | ||
|- | |- | ||
| '' | | style="width: 200px;" | [[File:Alkyoneus.png|frameless|center|200px|link=[[Alkyoneus]]]] || style="width: 200px;" | [[File:Ixtab.png|frameless|center|200px|link=[[Ixtab]]]] || style="width: 200px;" | [[File:Pallas.png|frameless|center|200px|link=[[Pallas]]]] || style="width: 200px;" | || style="width: 200px;" | || style="width: 200px;" | | ||
|} | |||
== Wildskeeper Armor (Level 115) == | |||
* '''All Wildskeeper Armor (Level 115) can be augmented via [[Ceciliotte]].''' | |||
{| class="wikitable mw-collapsible mw-collapsed" style="text-align: center"; width="1280px;" | |||
! scope="row" colspan="7" style="text-align: left" | ANMs | |||
|- | |||
| '''[[Lamie No. 9]]''' || '''[[Merrow No. 5]]''' || '''[[Dorgerwor the Astute]]''' || '''[[Farlarder the Shrewd]]''' || '''[[Darting Kachaal Ja]]''' || '''[[Devout Radol Ja]]''' | |||
|- | |||
| style="width: 200px;" | [[File:Lamie No. 9.png|frameless|center|200px|link=[[Lamie No. 9]]]] || style="width: 200px;" | [[File:Merrow No. 5.png|frameless|center|200px|link=[[Merrow No. 5]]]] || style="width: 200px;" | [[File:Dorgerwor the Astute.png|frameless|center|200px|link=[[Dorgerwor the Astute]]]] || style="width: 200px;" | [[File:Farlarder the Shrewd.png|frameless|center|200px|link=[[Farlarder the Shrewd]]]] || style="width: 200px;" | [[File:Darting Kachaal Ja.png|frameless|center|200px|link=[[Darting Kachaal Ja]]]] || style="width: 200px;" | [[File:Devout Radol Ja.png|frameless|center|200px|link=[[Devout Radol Ja]]]] | |||
|} | |||
== Homestead Weapons (Level 119) == | |||
* '''These weapons are deceptively powerful in the right situations.''' <br> | |||
* '''Please see [[Item Special Effects]] for applicable circumstances.''' | |||
* '''All Homestead Weapon ANM's have a 100% and 7.5% chance to drop an [[Vesca | Aged Box (Bayld)]].''' | |||
{| class="wikitable mw-collapsible mw-collapsed" style="text-align: center"; width="1280px;" | |||
! scope="row" colspan="7" style="text-align: left" | ANMs | |||
|- | |||
| '''[[Ambusher Antlion]]''' || '''[[Sekhmet]]''' || '''[[Splacknuck]]''' || '''[[Mycophile]]''' || '''[[Sengann]]''' || '''[[Megalobugard]]''' | |||
|- | |||
| style="width: 200px;" | [[File:Ambusher Antlion.png|frameless|center|200px|link=[[Ambusher Antlion]]]] || style="width: 200px;" | [[File:Sekhmet.png|frameless|center|200px|link=[[Sekhmet]]]] || style="width: 200px;" | [[File:Splacknuck.png|frameless|center|200px|link=[[Splacknuck]]]] || style="width: 200px;" | [[File:Mycophile.png|frameless|center|200px|link=[[Mycophile]]]] || style="width: 200px;" | [[File:Sengann.png|frameless|center|200px|link=[[Sengann]]]] || style="width: 200px;" | [[File:Megalobugard.png|frameless|center|200px|link=[[Megalobugard]]]] | |||
|- | |||
| '''[[Gration]]''' || '''[[Upyri]]''' || '''[[Bomb King]]''' || '''[[Boroka]]''' || || | |||
|- | |||
| style="width: 200px;" | [[File:Gration.png|frameless|center|200px|link=[[Gration]]]] || style="width: 200px;" | [[File:Upyri.png|frameless|center|200px|link=[[Upyri]]]] || style="width: 200px;" | [[File:Bomb King.png|frameless|center|200px|link=[[Bomb King]]]] || style="width: 200px;" | [[File:Boroka.png|frameless|center|200px|link=[[Boroka]]]] || style="width: 200px;" | || style="width: 200px;" | | |||
|} | |||
== NSANM's == | |||
* '''These NMs are level 130-135 and carry considerably more valuable rewards than lesser ANMs.''' | |||
{| class="wikitable mw-collapsible mw-collapsed" style="text-align: center"; width="1280px;" | |||
! scope="row" colspan="7" style="text-align: left" | NSANMs | |||
|- | |||
| '''[[Marchelute]]''' || '''[[Eastern Shadow]]''' || '''[[Northern Shadow]]''' || '''[[Southern Shadow]]''' || '''[[Western Shadow]]''' || '''[[Tonberry Kinq]]''' | |||
|- | |||
| style="width: 200px;" | [[File:Marchelute.png|frameless|center|200px|link=[[Marchelute]]]] || style="width: 200px;" | [[File:Eastern Shadow.png|frameless|center|200px|link=[[Eastern Shadow]]]] || style="width: 200px;" | [[File:Northern Shadow.png|frameless|center|200px|link=[[Northern Shadow]]]] || style="width: 200px;" | [[File:Southern Shadow.png|frameless|center|200px|link=[[Southern Shadow]]]] || style="width: 200px;" | [[File:Western Shadow.png|frameless|center|200px|link=[[Western Shadow]]]] || style="width: 200px;" | [[File:Tonberry Kinq.png|frameless|center|200px|link=[[Tonberry Kinq]]]] | |||
|- | |||
| '''[[Khadem Quemquoma]]''' || '''[[King Vinegarroon]]''' || '''[[Serket]]''' || '''[[Tyrannic Tunnok]]''' || '''[[Amikiri]]''' || '''[[Sargas]]''' | |||
|- | |||
| style="width: 200px;" | [[File:Khadem Quemquoma.png|frameless|center|200px|link=[[Khadem Quemquoma]]]] || style="width: 200px;" | [[File:King Vinegarroon.png|frameless|center|200px|link=[[King Vinegarroon]]]] || style="width: 200px;" | [[File:Serket.png|frameless|center|200px|link=[[Serket]]]] || style="width: 200px;" | [[File:Tyrannic Tunnok.png|frameless|center|200px|link=[[Tyrannic Tunnok]]]] || style="width: 200px;" | [[File:Amikiri.png|frameless|center|200px|link=[[Amikiri]]]] || style="width: 200px;" | [[File:Sargas.png|frameless|center|200px|link=[[Sargas]]]] | |||
|- | |||
| '''[[Lesath]]''' || '''[[Calchas]]''' || '''[[Aqrabuamelu]]''' || '''[[All-Seeing Onyx Eye]]''' || '''[[Amaranth]]''' || '''[[Kirtimukha]]''' | |||
|- | |||
| style="width: 200px;" | [[File:Lesath.png|frameless|center|200px|link=[[Lesath]]]] || style="width: 200px;" | [[File:Calchas.png|frameless|center|200px|link=[[Calchas]]]] || style="width: 200px;" | [[File:Aqrabuamelu.png|frameless|center|200px|link=[[Aqrabuamelu]]]] || style="width: 200px;" | [[File:All-Seeing Onyx Eye.png|frameless|center|200px|link=[[All-Seeing Onyx Eye]]]] || style="width: 200px;" | [[File:Amaranth.png|frameless|center|200px|link=[[Amaranth]]]] || style="width: 200px;" | [[File:Kirtimukha.png|frameless|center|200px|link=[[Kirtimukha]]]] | |||
|- | |||
| '''[[Judgmental Julika]]''' || '''[[Big Bang]]''' || '''[[Scitalis]]''' || '''[[Simorg]]''' || '''[[Drooling Daisy]]''' || '''[[Noble Mold]]''' | |||
|- | |||
| style="width: 200px;" | [[File:Judgmental Julika.png|frameless|center|200px|link=[[Judgmental Julika]]]] || style="width: 200px;" | [[File:Big Bang.png|frameless|center|200px|link=[[Big Bang]]]] || style="width: 200px;" | [[File:Scitalis.png|frameless|center|200px|link=[[Scitalis]]]] || style="width: 200px;" | [[File:Simorg.png|frameless|center|200px|link=[[Simorg]]]] || style="width: 200px;" | [[File:Drooling Daisy.png|frameless|center|200px|link=[[Drooling Daisy]]]] || style="width: 200px;" | [[File:Noble Mold.png|frameless|center|200px|link=[[Noble Mold]]]] | |||
|- | |||
| '''[[Morbolger]]''' || '''[[Rose Garden]]''' || '''[[Voluptuous Vivian]]''' || '''[[Voluptuous Vilma]]''' || '''[[Buarainech]]''' || '''[[Balor]]''' | |||
|- | |||
| style="width: 200px;" | [[File:Morbolger.png|frameless|center|200px|link=[[Morbolger]]]] || style="width: 200px;" | [[File:Rose Garden.png|frameless|center|200px|link=[[Rose Garden]]]] || style="width: 200px;" | [[File:Voluptuous Vivian.png|frameless|center|200px|link=[[Voluptuous Vivian]]]] || style="width: 200px;" | [[File:Voluptuous Vilma.png|frameless|center|200px|link=[[Voluptuous Vilma]]]] || style="width: 200px;" | [[File:Buarainech.png|frameless|center|200px|link=[[Buarainech]]]] || style="width: 200px;" | [[File:Balor.png|frameless|center|200px|link=[[Balor]]]] | |||
|- | |||
| '''[[Caithlean]]''' || '''[[Lobais]]''' || '''[[Luaith]]''' || '''[[Indich]]''' || '''[[Elel]]''' || '''[[Keremet]]''' | |||
|- | |||
| style="width: 200px;" | [[File:Caithlean.png|frameless|center|200px|link=[[Caithlean]]]] || style="width: 200px;" | [[File:Lobais.png|frameless|center|200px|link=[[Lobais]]]] || style="width: 200px;" | [[File:Luaith.png|frameless|center|200px|link=[[Luaith]]]] || style="width: 200px;" | [[File:Indich.png|frameless|center|200px|link=[[Indich]]]] || style="width: 200px;" | [[File:Elel.png|frameless|center|200px|link=[[Elel]]]] || style="width: 200px;" | [[File:Keremet.png|frameless|center|200px|link=[[Keremet]]]] | |||
|- | |||
| '''[[Taxim]]''' || '''[[Ah Puch]]''' || '''[[Oupire]]''' || '''[[Wounded Wurfel]]''' || '''[[Smothered Schmidt]]''' || '''[[Aynu-kaysey]]''' | |||
|- | |||
| style="width: 200px;" | [[File:Taxim.png|frameless|center|200px|link=[[Taxim]]]] || style="width: 200px;" | [[File:Ah Puch.png|frameless|center|200px|link=[[Ah Puch]]]] || style="width: 200px;" | [[File:Oupire.png|frameless|center|200px|link=[[Oupire]]]] || style="width: 200px;" | [[File:Wounded Wurfel.png|frameless|center|200px|link=[[Wounded Wurfel]]]] || style="width: 200px;" | [[File:Smothered Schmidt.png|frameless|center|200px|link=[[Smothered Schmidt]]]] || style="width: 200px;" | [[File:Aynu-kaysey.png|frameless|center|200px|link=[[Aynu-kaysey]]]] | |||
|- | |||
| '''[[Hellion]]''' || '''[[Ereshkigal]]''' || '''[[Mahishasura]]''' || || || | |||
|- | |||
| style="width: 200px;" | [[File:Hellion.png|frameless|center|200px|link=[[Hellion]]]] || style="width: 200px;" | [[File:Ereshkigal.png|frameless|center|200px|link=[[Ereshkigal]]]] || style="width: 200px;" | [[File:Mahishasura.png|frameless|center|200px|link=[[Mahishasura]]]] || style="width: 200px;" | || style="width: 200px;" | || style="width: 200px;" | | |||
|} | |||
== DNANMs == | |||
* '''These NMs are level 140-150 and carry considerably more valuable rewards than lesser ANMs.''' | |||
{| class="wikitable mw-collapsible mw-collapsed" style="text-align: center"; width="1280px;" | |||
! scope="row" colspan="7" style="text-align: left" | DNANMs | |||
|- | |||
| '''[[Lehko Habhoka]]''' || '''[[Selh'teus]]''' || '''[[Tom Tit Tat]]''' || '''[[Vidhuwa the Wrathborn]]''' || '''[[Calcabrina]]''' || '''[[Hippomaritimus]]''' | |||
|- | |||
| style="width: 200px;" | [[File:Lehko Habhoka.png|frameless|center|200px|link=[[Lehko Habhoka]]]] || style="width: 200px;" | [[File:Selh'teus.png|frameless|center|200px|link=[[Selh'teus]]]] || style="width: 200px;" | [[File:Tom Tit Tat.png|frameless|center|200px|link=[[Tom Tit Tat]]]] || style="width: 200px;" | [[File:Vidhuwa the Wrathborn.png|frameless|center|200px|link=[[Vidhuwa the Wrathborn]]]] || style="width: 200px;" | [[File:Calcabrina.png|frameless|center|200px|link=[[Calcabrina]]]] || style="width: 200px;" | [[File:Hippomaritimus.png|frameless|center|200px|link=[[Hippomaritimus]]]] | |||
|- | |||
| '''[[Jolly Green]]''' || || || || || | |||
|- | |||
| style="width: 200px;" | [[File:Jolly Green.png|frameless|center|200px|link=[[Jolly Green]]]] || style="width: 200px;" | || style="width: 200px;" | || style="width: 200px;" | || style="width: 200px;" | || style="width: 200px;" | | |||
|} | |||
{| class="wikitable mw-collapsible mw-collapsed" style="text-align: center"; width="1280px;" | |||
! scope="row" colspan="7" style="text-align: left" | Sandworm System | |||
|- | |- | ||
| '' | | '''[[Sandworm]]''' || '''[[King Arthro]]''' || '''[[Serket (Sandworm) | Serket]]''' || '''[[Guivre]]''' || || | ||
|- | |- | ||
| style="width: 200px;" | [[File:Sandworm.png|frameless|center|200px|link=[[Sandworm]]]] || style="width: 200px;" | [[File:King Arthro.png|frameless|center|200px|link=[[King Arthro]]]] || style="width: 200px;" | [[File:Serket.png|frameless|center|200px|link=[[Serket (Sandworm)]]]] || style="width: 200px;" | [[File:Guivre.png|frameless|center|200px|link=[[Guivre]]]] || style="width: 200px;" | || style="width: 200px;" | | |||
|} | |} | ||
Latest revision as of 00:05, 16 November 2026
Introduction
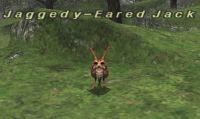
Arbitrary Notorious Monsters (ANM’s) are different levels of typical Notorious Monsters (NM’s) which have been buffed from retail levels but provide higher rewards. It is highly recommended to use the !check command to examine an NM before attacking because of the presence of ANM’s throughout Vana’diel.
FANM - Fairly Arbitrary Notorious Monster
ANM - Arbitrary Notorious Monster
NSANM - Not So Arbitrary Notorious Monster
DNANM - Definitely Not Arbitrary Notorious Monster
Non Item Level Equipment
| FANMs - Salvage & Nyzul Isle Armor (Level 99) | ||||||
|---|---|---|---|---|---|---|
| Bloody Bones | Lamie No. 7 | Energetic Eruca | Garfurlar the Rabid | Jaded Jody | Lamie No. 8 | |
 |
 |
 |
 |
 |
 | |
| Bluestreak Gyugyuroon | Peallaidh | Zikko | Kirlirger the Abhorrent | Mythril Mouth Monamaq | Dragonscaled Bugaal Ja | |
 |
 |
 |
 |
 |
 | |
| Zizzy Zillah | ||||||
 |
||||||
| FANMs - Limbus/Ultima/Omega Armor (Level 99) | ||||||
|---|---|---|---|---|---|---|
| Citipati | Goaftrap | Intulo | Tempest Tigon | |||
 |
 |
 |
 |
|||
| ANMs - Weapons | ||||||
|---|---|---|---|---|---|---|
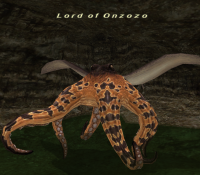
| Lord of Onzozo | Aiatar | |||||
 |
 |
|||||
| ANMs - Feet | ||||||
|---|---|---|---|---|---|---|
| Cactrot Rapido | ||||||
 |
||||||




| ANMs - Quest Items | ||||||
|---|---|---|---|---|---|---|
| Ziphius | ||||||
 |
||||||
Skirmish Weapons (Level 105) & Coalition Armor (Level 106)
| FANMs | ||||||
|---|---|---|---|---|---|---|
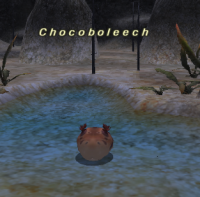
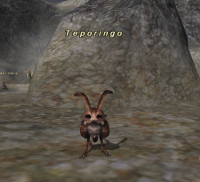
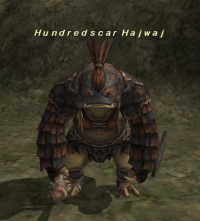
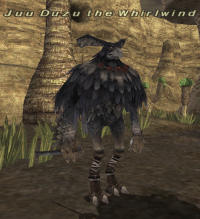
| Chocoboleech | Teporingo | Hundredscar Hajwaj | Thousandarm Deshglesh | Hoo Mjuu the Torrent | Juu Duzu the Whirlwind | |
 |
 |
 |
 |
 |
 | |
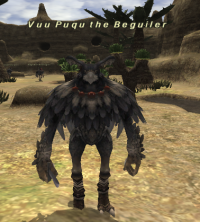
| Vuu Puqu the Beguiler | Bu'Ghi Howlblade | No'Mho Crimsonarmor | Zi'Ghi Boneeater | |||
 |
 |
 |
 |
|||
Skirmish Armor (Level 113)
- All Skirmish Armor (Level 113) can be upgraded to 119 via Vesca.


Delve Weapons (Level 113)
| ANMs | ||||||
|---|---|---|---|---|---|---|
| La Velue | Came-cruse | Scylla | Vulkodlac | Bloodlapper | Kinepikwa | |
 |
 |
 |
 |
 |
 | |
| Dyinyinga | Balam-Quitz | |||||
 |
 |
|||||
Wildskeeper Weapons (Level 115)
- All Wildskeeper Weapons (Level 115) can be augmented via Ceciliotte.
| ANMs | ||||||
|---|---|---|---|---|---|---|
| Friar Rush | Hakutaku | Ogama | Sozu Bliberry | Tonberry Pontifex | Triarius X-XV | |
 |
 |
 |
 |
 |
 | |
| Alkyoneus | Ixtab | Pallas | ||||
 |
 |
 |
||||
Wildskeeper Armor (Level 115)
- All Wildskeeper Armor (Level 115) can be augmented via Ceciliotte.
| ANMs | ||||||
|---|---|---|---|---|---|---|
| Lamie No. 9 | Merrow No. 5 | Dorgerwor the Astute | Farlarder the Shrewd | Darting Kachaal Ja | Devout Radol Ja | |
 |
 |
 |
 |
 |
 | |
Homestead Weapons (Level 119)
- These weapons are deceptively powerful in the right situations.
- Please see Item Special Effects for applicable circumstances.
- All Homestead Weapon ANM's have a 100% and 7.5% chance to drop an Aged Box (Bayld).
| ANMs | ||||||
|---|---|---|---|---|---|---|
| Ambusher Antlion | Sekhmet | Splacknuck | Mycophile | Sengann | Megalobugard | |
 |
 |
 |
 |
 |
 | |
| Gration | Upyri | Bomb King | Boroka | |||
 |
 |
 |
 |
|||
NSANM's
- These NMs are level 130-135 and carry considerably more valuable rewards than lesser ANMs.


DNANMs
- These NMs are level 140-150 and carry considerably more valuable rewards than lesser ANMs.
| DNANMs | ||||||
|---|---|---|---|---|---|---|
| Lehko Habhoka | Selh'teus | Tom Tit Tat | Vidhuwa the Wrathborn | Calcabrina | Hippomaritimus | |
 |
 |
 |
 |
 |
 | |
| Jolly Green | ||||||
 |
||||||
| Sandworm System | ||||||
|---|---|---|---|---|---|---|
| Sandworm | King Arthro | Serket | Guivre | |||
 |
 |
 |
 |
|||