|
|
| (23 intermediate revisions by the same user not shown) |
| Line 8: |
Line 8: |
| DNANM - Definitely Not Arbitrary Notorious Monster <br> | | DNANM - Definitely Not Arbitrary Notorious Monster <br> |
|
| |
|
| <!--
| |
| == FANMs ==
| |
|
| |
| {| class="wikitable mw-collapsible mw-collapsed" style="text-align: center"; width="1000px;"
| |
| ! scope="row" colspan="7" | Non-Item Level Gear and Accessories
| |
| |- style="vertical-align: bottom;"
| |
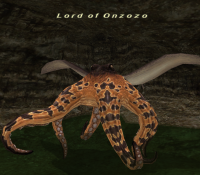
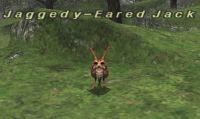
| | scope="row" colspan="1" | [[File:Lord of Onzozo.png|frameless|150px|link=[[Lord of Onzozo]]]] <br> '''[[Lord of Onzozo]]''' || ! scope="row" colspan="1" | [[File:Aiatar.png|frameless|150px|link=[[Aiatar]]]] <br> '''[[Aiatar]]''' || ! scope="row" colspan="1" | [[File:Cactrot Rapido.png|frameless|150px|link=[[Cactrot Rapido]]]] <br> '''[[Cactrot Rapido]]''' || ! scope="row" colspan="1" | [[File:Bloodsucker.png|frameless|150px|link=[[Bloodsucker]]]] <br> '''[[Bloodsucker]]''' || ! scope="row" colspan="1" | [[File:Jaggedy-Eared Jack.png|frameless|150px|link=[[Jaggedy-Eared Jack]]]] <br> '''[[Jaggedy-Eared Jack]]''' || ! scope="row" colspan="1" | [[File:Spiny Spipi.png|frameless|150px|link=[[Spiny Spipi]]]] <br> '''[[Spiny Spipi]]''' || ! scope="row" colspan="1" | [[File:Bubbly Bernie.png|frameless|150px|link=[[Bubbly Bernie]]]] <br> '''[[Bubbly Bernie]]'''
| |
| |- style="vertical-align: bottom;"
| |
| | scope="row" colspan="1" | [[File:Beet Leafhopper.png|frameless|150px|link=[[Beet Leafhopper]]]] <br> '''[[Beet Leafhopper]]''' || ! scope="row" colspan="1" | [[File:Garharlor the Unruly.png|frameless|150px|link=[[Garharlor the Unruly]]]] <br> '''[[Garharlor the Unruly]]''' || ! scope="row" colspan="1" | [[File:Antican Praefectus.png|frameless|150px|link=[[Antican Praefectus]]]] <br> '''[[Antican Praefectus]]''' || ! scope="row" colspan="1" | [[File:Centurio X-I.png|frameless|150px|link=[[Centurio X-I]]]] <br> '''[[Centurio X-I]]''' || ! scope="row" colspan="1" | [[File:Proconsul XII.png|frameless|150px|link=[[Proconsul XII]]]] <br> '''[[Proconsul XII]]''' || ! scope="row" colspan="1" | [[File:Fyuu the Seabellow.png|frameless|150px|link=[[Fyuu the Seabellow]]]] <br> '''[[Fyuu the Seabellow]]''' || ! scope="row" colspan="1" | [[File:Mouu the Waverider.png|frameless|150px|link=[[Mouu the Waverider]]]] <br> '''[[Mouu the Waverider]]'''
| |
| |- style="vertical-align: bottom;"
| |
| | scope="row" colspan="1" | [[File:Namtar.png|frameless|150px|link=[[Namtar]]]] <br> '''[[Namtar]]''' || ! scope="row" colspan="1" | [[File:Pahh the Gullcaller.png|frameless|150px|link=[[Pahh the Gullcaller]]]] <br> '''[[Pahh the Gullcaller]]''' || ! scope="row" colspan="1" | [[File:Qull the Shellbuster.png|frameless|150px|link=[[Qull the Shellbuster]]]] <br> '''[[Qull the Shellbuster]]''' || ! scope="row" colspan="1" | [[File:Seww the Squidlimbed.png|frameless|150px|link=[[Seww the Squidlimbed]]]] <br> '''[[Seww the Squidlimbed]]''' || ! scope="row" colspan="1" | [[File:Voll the Sharkfinned.png|frameless|150px|link=[[Voll the Sharkfinned]]]] <br> '''[[Voll the Sharkfinned]]''' || ! scope="row" colspan="1" | [[File:Wuur the Sandcomber.png|frameless|150px|link=[[Wuur the Sandcomber]]]] <br> '''[[Wuur the Sandcomber]]''' || ! scope="row" colspan="1" | [[File:Zuug the Shoreleaper.png|frameless|150px|link=[[Zuug the Shoreleaper]]]] <br> '''[[Zuug the Shoreleaper]]'''
| |
| |- style="vertical-align: bottom;"
| |
| | scope="row" colspan="1" | [[File:Gargantua.png|frameless|150px|link=[[Gargantua]]]] <br> '''[[Gargantua]]''' || ! scope="row" colspan="1" | [[File:Humbaba.png|frameless|150px|link=[[Humbaba]]]] <br> '''[[Humbaba]]''' || ! scope="row" colspan="1" | [[File:Nue.png|frameless|150px|link=[[Nue]]]] <br> '''[[Nue]]''' || ! scope="row" colspan="1" | [[File:Capricious Cassie.png|frameless|150px|link=[[Capricious Cassie]]]] <br> '''[[Capricious Cassie]]''' || ! scope="row" colspan="1" | [[File:Stray Mary.png|frameless|150px|link=[[Stray Mary]]]] <br> '''[[Stray Mary]]''' || ! scope="row" colspan="1" | [[File:Lumbering Lambert.png|frameless|150px|link=[[Lumbering Lambert]]]] <br> '''[[Lumbering Lambert]]''' || ! scope="row" colspan="1" | [[File:Rampaging Ram.JPG|frameless|150px|link=[[Rampaging Ram]]]] <br> '''[[Rampaging Ram]]'''
| |
| |- style="vertical-align: bottom;"
| |
| | scope="row" colspan="1" | [[File:Serpopard Ishtar.png|frameless|150px|link=[[Serpopard Ishtar]]]] <br> '''[[Serpopard Ishtar]]''' || ! scope="row" colspan="1" | [[File:Observant Zekka.png|frameless|150px|link=[[Observant Zekka]]]] <br> '''[[Observant Zekka]]''' || ! scope="row" colspan="1" | [[File:Shen.png|frameless|150px|link=[[Shen]]]] <br> '''[[Shen]]''' || ! scope="row" colspan="1" | [[File:Numbing Norman.png|frameless|150px|link=[[Numbing Norman]]]] <br> '''[[Numbing Norman]]''' || ! scope="row" colspan="1" | [[File:Habergoass.png|frameless|150px|link=[[Habergoass]]]] <br> '''[[Habergoass]]''' || ! scope="row" colspan="1" | [[File:Muq Shabeel.png|frameless|150px|link=[[Muq Shabeel]]]] <br> '''[[Muq Shabeel]]''' || ! scope="row" colspan="1" | [[File:Nunyenunc.png|frameless|150px|link=[[Nunyenunc]]]] <br> '''[[Nunyenunc]]'''
| |
| |- style="vertical-align: bottom;"
| |
| | scope="row" colspan="1" | [[File:Taisaijin.png|frameless|150px|link=[[Taisaijin]]]] <br> '''[[Taisaijin]]''' || ! scope="row" colspan="1" | [[File:Dread Dealing Dredodak.png|frameless|150px|link=[[Dread Dealing Dredodak]]]] <br> '''[[Dread Dealing Dredodak]]''' || ! scope="row" colspan="1" | [[File:Swashstox Beadblinker.png|frameless|150px|link=[[Swashtox Beadblinker]]]] <br> '''[[Swashstox Beadblinker]]''' || ! scope="row" colspan="1" | [[File:Skogs Fru.png|frameless|150px|link=[[Skogs Fru]]]] <br> '''[[Skogs Fru]]''' || ! scope="row" colspan="1" | [[File:Koropokkur.png|frameless|150px|link=[[Koropokkur]]]] <br> '''[[Koropokkur]]''' || ! scope="row" colspan="1" | [[File:Bune.png|frameless|150px|link=[[Bune]]]] <br> '''[[Bune]]''' || ! scope="row" colspan="1" | [[File:Suu Xicu the Cantabile.png|frameless|150px|link=[[Suu Xicu the Cantabile]]]] <br> '''[[Suu Xicu the Cantabile]]'''
| |
| |}
| |
| -->
| |
| == Non Item Level Equipment == | | == Non Item Level Equipment == |
| | | {| class="wikitable mw-collapsible mw-collapsed" style="text-align: center"; width="1280px;" |
| === Weapons ===
| | ! scope="row" colspan="7" style="text-align: left" | FANMs - Salvage & Nyzul Isle Armor (Level 99) |
| {| class="wikitable" style="text-align: center"; width="1200px;" | |
| ! scope="row" colspan="1" | [[Lord of Onzozo]] || scope="row" colspan="1" | [[Aiatar]] | |
| |- | | |- |
| | style="width: 200px;" | [[File:Lord of Onzozo.png|frameless|center|200px|link=[[Lord of Onzozo]]]] || style="width: 200px;" | [[File:Aiatar.png|frameless|center|200px|link=[[Aiatar]]]] || style="width: 200px;" | || style="width: 200px;" | || style="width: 200px;" | || style="width: 200px;" | | | | '''[[Bloody Bones]]''' || '''[[Lamie No. 7]]''' || '''[[Energetic Eruca]]''' || '''[[Garfurlar the Rabid]]''' || '''[[Jaded Jody]]''' || '''[[Lamie No. 8]]''' |
| |}
| |
| | |
| === Feet ===
| |
| {| class="wikitable" style="text-align: center"; width="1200px;"
| |
| ! scope="row" colspan="1" | [[Cactrot Rapido]]
| |
| |- | | |- |
| | style="width: 200px;" | [[File:Cactrot Rapido.png|frameless|center|200px|link=[[Cactrot Rapido]]]] || style="width: 200px;" | || style="width: 200px;" | || style="width: 200px;" | || style="width: 200px;" | || style="width: 200px;" | | | | style="width: 200px;" | [[File:Bloody Bones.png|frameless|center|200px|link=[[Bloody Bones]]]] || style="width: 200px;" | [[File:Lamie No. 7.png|frameless|center|200px|link=[[Lamie No. 7]]]] || style="width: 200px;" | [[File:Energetic Eruca.png|frameless|center|200px|link=[[Energetic Eruca]]]] || style="width: 200px;" | [[File:Garfurlar the Rabid.png|frameless|center|200px|link=[[Garfurlar the Rabid]]]] || style="width: 200px;" | [[File:Jaded Jody.png|frameless|center|200px|link=[[Jaded Jody]]]] || style="width: 200px;" | [[File:Lamie No. 8.png|frameless|center|200px|link=[[Lamie No. 8]]]] |
| |} | |
| | |
| === Accessories (Neck/Earrings/Rings/Back/Waist/Instruments) ===
| |
| {| class="wikitable mw-collapsible mw-collapsed" style="text-align: center"; width="1200px;"
| |
| ! scope="row" colspan="7" | ANM's
| |
| |- | | |- |
| | '''[[Bloodsucker]]''' || '''[[Geush Urvan]]''' || '''[[Jaggedy-Eared Jack]]''' || '''[[Spiny Spipi]]''' || '''[[Bubbly Bernie]]''' || '''[[Beet Leafhopper]]''' | | | '''[[Bluestreak Gyugyuroon]]''' || '''[[Peallaidh]]''' || '''[[Zikko]]''' || '''[[Kirlirger the Abhorrent]]''' || '''[[Mythril Mouth Monamaq]]''' || '''[[Dragonscaled Bugaal Ja]]''' |
| |- | | |- |
| | style="width: 200px;" | [[File:Bloodsucker.png|frameless|center|200px|link=[[Bloodsucker]]]] || style="width: 200px;" | [[File:Geush Urvan.png|frameless|center|200px|link=[[Geush Urvan]]]] || style="width: 200px;" | [[File:Jaggedy-Eared Jack.png|frameless|center|200px|link=[[Jaggedy-Eared Jack]]]] || style="width: 200px;" | [[File:Spiny Spipi.png|frameless|center|200px|link=[[Spiny Spipi]]]] || style="width: 200px;" | [[File:Bubbly Bernie.png|frameless|center|200px|link=[[Bubbly Bernie]]]] || style="width: 200px;" | [[File:Beet Leafhopper.png|frameless|center|200px|link=[[Beet Leafhopper]]]] | | | style="width: 200px;" | [[File:Bluestreak Gyugyuroon.png|frameless|center|200px|link=[[Bluestreak Gyugyuroon]]]] || style="width: 200px;" | [[File:Peallaidh.png|frameless|center|200px|link=[[Peallaidh]]]] || style="width: 200px;" | [[File:Zikko.png|frameless|center|200px|link=[[Zikko]]]] || style="width: 200px;" | [[File:Kirlirger the Abhorrent.png|frameless|center|200px|link=[[Kirlirger the Abhorrent]]]] || style="width: 200px;" | [[File:Mythril Mouth Monamaq.png|frameless|center|200px|link=[[Mythril Mouth Monamaq]]]] || style="width: 200px;" | [[File:Dragonscaled Bugaal Ja.png|frameless|center|200px|link=[[Dragonscaled Bugaal Ja]]]] |
| |- | | |- |
| ! scope="row" colspan="1" | [[Garharlor the Unruly]] !! scope="row" colspan="1" | [[Antican Praefectus]] !! scope="row" colspan="1" | [[Centurio X-I]] !! scope="row" colspan="1" | [[Proconsul XII]] !! scope="row" colspan="1" | [[Fyuu the Seabellow]] !! scope="row" colspan="1" | [[Mouu the Waverider]]
| | | scope="row" colspan="1" | '''[[Zizzy Zillah]]''' |
| |- | | |- |
| | style="width: 200px;" | [[File:Garharlor the Unruly.png|frameless|center|200px|link=[[Garharlor the Unruly]]]] || style="width: 200px;" | [[File:Antican Praefectus.png|frameless|center|200px|link=[[Antican Praefectus]]]] || style="width: 200px;" | [[File:Centurio X-I.png|frameless|center|200px|link=[[Centurio X-I]]]] || style="width: 200px;" | [[File:Proconsul XII.png|frameless|center|200px|link=[[Proconsul XII]]]] || style="width: 200px;" | [[File:Fyuu the Seabellow.png|frameless|center|200px|link=[[Fyuu the Seabellow]]]] || style="width: 200px;" | [[File:Mouu the Waverider.png|frameless|center|200px|link=[[Mouu the Waverider]]]] | | | style="width: 200px;" | [[File:Zizzy Zillah.png|frameless|center|200px|link=[[Zizzy Zillah]]]] || style="width: 200px;" | || style="width: 200px;" | || style="width: 200px;" | || style="width: 200px;" | || style="width: 200px;" | |
| |} | | |} |
|
| |
|
| {| class="wikitable mw-collapsible mw-collapsed" style="text-align: center"; width="1000px;" | | {| class="wikitable mw-collapsible mw-collapsed" style="text-align: center"; width="1280px;" |
| ! scope="row" colspan="7" | ANM's | | ! scope="row" colspan="7" style="text-align: left" | FANMs - Limbus/Ultima/Omega Armor (Level 99) |
| |- | | |- |
| | style="background-color:#cfcfcf;" | '''Notorious Monster''' || style="background-color:#cfcfcf;" | '''Level''' || style="background-color:#cfcfcf;" | '''Zone''' || style="background-color:#cfcfcf;" | '''Position''' || style="background-color:#cfcfcf;" | '''Respawn''' || style="background-color:#cfcfcf;" | '''Reward''' || style="background-color:#cfcfcf;" | '''Drop Chance'''
| | | '''[[Citipati]]''' || '''[[Goaftrap]]''' || '''[[Intulo]]''' || '''[[Tempest Tigon]]''' |
| |- | | |- |
| | colspan = "7" style="background-color:#000000;" | | | | style="width: 200px;" | [[File:Citipati.png|frameless|center|200px|link=[[Citipati]]]] || style="width: 200px;" | [[File:Goaftrap.png|frameless|center|200px|link=[[Goaftrap]]]] || style="width: 200px;" | [[File:Intulo.png|frameless|center|200px|link=[[Intulo]]]] || style="width: 200px;" | [[File:Tempest Tigon.png|frameless|center|200px|link=[[Tempest Tigon]]]] || style="width: 200px;" | || style="width: 200px;" | |
| | |} |
| | |
| | {| class="wikitable mw-collapsible mw-collapsed" style="text-align: center"; width="1280px;" |
| | ! scope="row" colspan="7" style="text-align: left" | ANMs - Weapons |
| |- | | |- |
| | rowspan="2" | '''Namtar''' <br> [[File:Namtar.png|frameless|250px]] || rowspan="2" | 115 || rowspan="2" | Sea Serpent Grotto || rowspan="2" | (D-8) <br> Map 1 || rowspan="2" | 2 hours || '''Justiciar's Torque''' <br>[[File:Justiciar's Torque.png|frameless]] || 20% | | | '''[[Lord of Onzozo]]''' || '''[[Aiatar]]''' |
| |-
| |
| |'''Torero Torque''' <br> [[File:Torero Torque.png|frameless]] || 20%
| |
| |-
| |
| | colspan = "7" style="background-color:#000000;" |
| |
| |-
| |
| | rowspan="2" | '''Pahh the Gullcaller''' <br> [[File:Pahh the Gullcaller.png|frameless|250px]] || rowspan="2" | 115 || rowspan="2" | Sea Serpent Grotto || rowspan="2" | (K/L-8) <br> Map 3 || rowspan="2" | 2 hours ||'''Blood Ring''' <br> [[File:Blood Ring.png|frameless]] || 20%
| |
| |-
| |
| | '''Insect Ring''' <br>[[File:Insect Ring.png|frameless]] || 20%
| |
| |-
| |
| | colspan = "7" style="background-color:#000000;" |
| |
| |-
| |
| | rowspan="2" | '''Qull the Shellbuster''' <br> [[File:Qull the Shellbuster.png|frameless|250px]] || rowspan="2" | 115 || rowspan="2" | Sea Serpent Grotto || rowspan="2" | (J-10) <br> Map 2 || rowspan="2" | 2 hours || '''Excelsis Ring''' <br>[[File:Excelsis Ring.png|frameless]] || 20%
| |
| |-
| |
| | '''Griffon Ring''' <br>[[File:Griffon Ring.png|frameless]] || 20%
| |
| |-
| |
| | colspan = "7" style="background-color:#000000;" |
| |
| |-
| |
| | rowspan="2" | '''Seww the Squidlimbed''' <br> [[File:Seww the Squidlimbed.png|frameless|250px]] || rowspan="2" | 115 || rowspan="2" | Sea Serpent Grotto || rowspan="2" | (J-10) <br> Map 2 || rowspan="2" | 2 hours || '''Roller's Ring''' <br>[[File:Roller's Ring.png|frameless]] || 20%
| |
| |-
| |
| | '''Mujin Mantle''' <br>[[File:Mujin Mantle.png|frameless]] || 20%
| |
| |-
| |
| | colspan = "7" style="background-color:#000000;" |
| |
| |-
| |
| | rowspan="2" | '''Voll the Sharkfinned''' <br> [[File:Voll the Sharkfinned.png|frameless|250px]] || rowspan="2" | 115 || rowspan="2" | Sea Serpent Grotto || rowspan="2" | (J-10) <br> Map 2 || rowspan="2" | 2 hours || '''Mujin Necklace''' <br>[[File:Mujin Necklace.png|frameless]] || 20%
| |
| |-
| |
| |'''Mujin Stud''' <br> [[File:Mujin Stud.png|frameless]] || 20%
| |
| |-
| |
| | colspan = "7" style="background-color:#000000;" |
| |
| |-
| |
| | rowspan="2" | '''Wuur the Sandcomber''' <br> [[File:Wuur the Sandcomber.png|frameless|250px]] || rowspan="2" | 115 || rowspan="2" | Sea Serpent Grotto || rowspan="2" | (H-9) <br> Map 1 || rowspan="2" | 2 hours || '''Archon Ring''' <br>[[File:Archon Ring.png|frameless]] || 20%
| |
| |-
| |
| |'''Oneiros Annulet''' <br> [[File:Oneiros Annulet.png|frameless]] || 20%
| |
| |-
| |
| | colspan = "7" style="background-color:#000000;" |
| |
| |-
| |
| | rowspan="3" | '''Zuug the Shoreleaper''' <br> [[File:Zuug the Shoreleaper.png|frameless|250px]] || rowspan="3" | 115 || rowspan="3" | Sea Serpent Grotto || rowspan="3" | (F-10) <br> Map 4 || rowspan="3" | 2 hours || '''Lycopodium Earring''' <br>[[File:Lycopodium Earring.png|frameless]] || 20%
| |
| |-
| |
| | '''Succor Ring''' <br>[[File:Succor Ring.png|frameless]] || 20%
| |
| |-
| |
| | '''Archon Cape''' <br>[[File:Archon Cape.png|frameless]] || 20%
| |
| |-
| |
| | colspan = "7" style="background-color:#000000;" |
| |
| |-
| |
| | rowspan="2" | '''Gargantua''' <br> [[File:Gargantua.png|frameless|250px]] || rowspan="2" | 120 || rowspan="2" | Beaucedine Glacier || rowspan="2" | (J-8) || rowspan="2" | 1.5 hours || '''Phalaina Locket''' <br>[[File:Phalaina Locket.png|frameless]] || 10%
| |
| |-
| |
| | '''Rioter's Collar''' <br>[[File:Rioter's Collar.png|frameless]] || 10%
| |
| |-
| |
| | colspan = "7" style="background-color:#000000;" |
| |
| |-
| |
| | rowspan="2" | '''Humbaba''' <br> [[File:Humbaba.png|frameless|250px]] || rowspan="2" | 120 || rowspan="2" | Beaucedine Glacier || rowspan="2" | (I-7) <br> '''or''' <br> (I/J-9) <br> '''or''' <br> (G-9/10) <br> '''or''' <br> (H/I-8) || rowspan="2" | 1.5 hours || '''Solemnity Cape''' <br>[[File:Solemnity Cape.png|frameless]] || 10%
| |
| |-
| |
| | '''Audumbla Sash''' <br>[[File:Audumbla Sash.png|frameless]] || 10%
| |
| |-
| |
| | colspan = "7" style="background-color:#000000;" |
| |
| |-
| |
| | rowspan="2" | '''Nue''' <br> [[File:Nue.png|frameless|250px]] || rowspan="2" | 120 || rowspan="2" | Beaucedine Glacier || rowspan="2" | (F-7) || rowspan="2" | 1.5 hours || '''Erlene's Notebook''' <br>[[File:Erlene's Notebook.png|frameless]] || 10%
| |
| |-
| |
| | '''Ritter Gorget''' <br>[[File:Ritter Gorget.png|frameless]] || 10%
| |
| |-
| |
| | colspan = "7" style="background-color:#000000;" |
| |
| |-
| |
| | rowspan="2" | '''Capricious Cassie''' <br> [[File:Capricious Cassie.png|frameless|250px]] || rowspan="2" | 120 || rowspan="2" | Fei'yin || rowspan="2" | (G/H-6) Map 2 || rowspan="2" | 1.5 hours ||'''Orunmila's Torque''' <br> [[File:Orunmila's Torque.png|frameless]] || 10%
| |
| |-
| |
| |'''Fenian Ring''' <br> [[File:Fenian Ring.png|frameless]] || 10%
| |
| |-
| |
| | colspan = "7" style="background-color:#000000;" |
| |
| |-
| |
| | rowspan="4" | '''Stray Mary''' <br> [[File:Stray Mary.png|frameless|250px]] || rowspan="4" | 125 || rowspan="4" | Konschtat Highlands || rowspan="4" | (F-6/8)-(G-6/8) || rowspan="4" | 1 hour ||'''Damani Horn''' <br> [[File:Damani Horn.png|frameless]] || 25%
| |
| |-
| |
| |'''Mass Chalemie''' <br> [[File:Mass Chalemie.png|frameless]] || 25%
| |
| |-
| |
| | '''Mouflon Ring''' <br>[[File:Mouflon Ring.png|frameless]] || 25%
| |
| |-
| |
| | '''Acipayam Belt''' <br>[[File:Acipayam Belt.png|frameless]] || 25%
| |
| |-
| |
| | colspan = "7" style="background-color:#000000;" |
| |
| |-
| |
| | rowspan="3" | '''Lumbering Lambert''' <br> [[File:Lumbering Lambert.png|frameless|250px]] || rowspan="3" | 125 || rowspan="3" | La Theine Plateau || rowspan="3" | (G-9)-(I-9) || rowspan="3" | 1 hour || '''Baldurno's Horn''' <br>[[File:Baldurno's Horn.png|frameless]] || 100%
| |
| |-
| |
| | '''Grit Earring''' <br>[[File:Grit Earring.png|frameless]] || 25%
| |
| |-
| |
| | '''Bleating Mantle''' <br>[[File:Bleating Mantle.png|frameless]] || 25%
| |
| |-
| |
| | colspan = "7" style="background-color:#000000;" |
| |
| |-
| |
| | rowspan="2" | '''Rampaging Ram''' <br> [[File:Rampaging Ram.JPG|frameless|250px]] || rowspan="2" | 110 || rowspan="2" | Konschtat Highlands || rowspan="2" | (H-6)-(H-8) || rowspan="2" | 1 hour || '''Hearty Earring'''[[File:Hearty.JPG|frameless]] || 10%
| |
| |-
| |
| | '''Prolix Ring'''[[File:Prolix.JPG|frameless]] || 10%
| |
| |-
| |
| | colspan = "7" style="background-color:#000000;" |
| |
| |-
| |
| | rowspan="4" | '''Serpopard Ishtar''' <br> [[File:Serpopard Ishtar.png|frameless|250px]] || rowspan="4" | 125 || rowspan="4" | Tahrongi Canyon || rowspan="4" | (H-5)-(H-6) <br> '''or''' <br> (H-8)-(I-8) || rowspan="4" | 1 hour ||'''Serpopard Ninlil's Bone''' [[File:Serpopard Ninlil's Bone.png|frameless]] || 100%
| |
| |-
| |
| | '''Narmar Boomerang'''[[File:Narmar Boomerang.png|frameless]] || 25%
| |
| |-
| |
| | '''Cloud Hairpin'''[[File:Cloud Hairpin.png|frameless]] || 25%
| |
| |-
| |
| | '''Nekhen Ring'''[[File:Nekhen Ring.png|frameless]] || 25%
| |
| |-
| |
| | rowspan="4" | '''Observant Zekka''' <br> [[File:Observant Zekka.png|frameless|250px]] || rowspan="4" | 125 || rowspan="4" | Beadeaux (S) || rowspan="4" |(J-6)|| rowspan="4" | 2 hours ||
| |
| |-
| |
| | '''Eidolon Pendant +1'''[[File:Eidolon Pendant +1.png|frameless]] || 33%
| |
| |-
| |
| | '''Felictas Cape +1'''[[File:Felictas Cape +1.png|frameless]] || 33%
| |
| |-
| |
| |'''Austerity Belt +1''' [[File:Austerity Belt +1.png|frameless]] || 33%
| |
| |-
| |
| | rowspan="2" | '''Shen''' <br> [[File:Shen.png|frameless|250px]] || rowspan="2" | 125 || rowspan="2" | Bibiki Bay || rowspan="2" | (J-9) || rowspan="2" | 1 hour || '''Tempered Cape'''[[File:Tempered Cape.png|frameless]] || 10%
| |
| |-
| |
| | '''Tempered Cape +1'''[[File:Tempered Cape +1.png|frameless]] || 1%
| |
| |-
| |
| | rowspan="2" | '''Numbing Norman''' <br> [[File:Numbing Norman.png|frameless|250px]] || rowspan="2" | 115 || rowspan="2" | West Sarutabaruta || rowspan="2" | (F-5) || rowspan="2" | 2 hour || '''Dilletante Grip +1'''[[File:Dilletante Grip +1.png|frameless]] || 10%
| |
| |-
| |
| | '''Erudition Necklace''' <br>[[File:Erudition Necklace.png|frameless]] || 15%
| |
| |-
| |
| | colspan = "7" style="background-color:#000000;" |
| |
| |-
| |
| | rowspan="2" | '''Habergoass''' <br> [[File:Habergoass.png|frameless|250px]] || rowspan="2" | 125 || rowspan="2" | Batallia Downs (S)|| rowspan="2" | (I-10) || rowspan="2" | 2 hours || '''Oneiros Rope''' <br>[[File:Oneiros Rope.png|frameless]] || 8%
| |
| |-
| |
| | ''' Gaudryi Necklace''' <br>[[File: Gaudryi Necklace.png|frameless]] || 15%
| |
| |-
| |
| | rowspan="2" | '''Muq Shabeel''' <br> [[File:Muq Shabeel.png|frameless|250px]] || rowspan="2" | 130 || rowspan="2" | Meriphataud Mountains (S)|| rowspan="2" | (K-4) || rowspan="2" | 90 minutes || '''Salire Belt''' <br>[[File:Salire Belt.png|frameless]] || 10%
| |
| |-
| |
| | '''Genesis Locket''' <br>[[File:Genesis Locket.png|frameless]] || 15%
| |
| |-
| |
| | rowspan="2" | '''Nunyenunc''' <br> [[File:Nunyenunc.png|frameless|250px]] || rowspan="2" | 120 || rowspan="2" | West Sarutabaruta || rowspan="2" | (H-5) || rowspan="2" | 2 Hours || '''Duplus Grip''' <br>[[File:DuplusGrip.png|frameless]] || 10%
| |
| |-
| |
| | '''Iron Gobbet''' <br>[[File:Iron Gobbet.png|frameless]] || 17%
| |
| |-
| |
| | rowspan="2" | '''Taisaijin''' <br> [[File:Taisaijin.png|frameless|250px]] || rowspan="2" | 125 || rowspan="2" | Ranguemont Pass || rowspan="2" | (G-9) || rowspan="2" | 4 Hours || '''Maquette Ring''' <br>[[File:Maquette Ring.png|frameless]] || 20%
| |
| |-
| |
| | '''Chuparrosa Mantle''' <br>[[File:Chuparrosa Mantle.png|frameless]] || 37%
| |
| |-
| |
| | rowspan="2" | '''Dread Dealing Dredodak''' <br> [[File:Dread Dealing Dredodak.png|frameless|250px]] || rowspan="2" | 125 || rowspan="2" | Oldtown Movalpolos || rowspan="2" | (G-8) || rowspan="2" | 4 Hours || '''Grapevine Cape''' <br>[[File:Grapevine Cape.png|frameless]] || 7%
| |
| |-
| |
| | '''Moondoe Mantle''' <br>[[File:Moondoe Mantle.png|frameless]] || 15%
| |
| |-
| |
| | rowspan="2" | '''Swashstox Beadblinker''' <br> [[File:Swashstox Beadblinker.png|frameless|250px]] || rowspan="2" | 125 || rowspan="2" | Newtown Movalpolos|| rowspan="2" | (I-9) || rowspan="2" | 4 Hours || '''Volunteer's Earring''' <br>[[File:Volunteer's Earring.png|frameless]] || 22%
| |
| |-
| |
| | '''Matanki Earring''' <br>[[File:Matanki Earring.png|frameless]] || 14%
| |
| |-
| |
| | rowspan="3" | '''Skogs Fru''' <br> [[File:Skogs Fru.png|frameless|250px]] || rowspan="3" | 120 || rowspan="3" | East Ronfaure (S) || rowspan="3" | (H-10) || rowspan="3" | 2 Hours || '''Oneiros Knife''' <br>[[File:Oneiros Knife.png|frameless]] || 10%
| |
| |-
| |
| | '''Carrier's Sash''' <br>[[File:Carrier's Sash.png|frameless]] || 26%
| |
| |-
| |
| | '''Coalition Shield''' <br>[[File:Coalition Shield.png|frameless]] || 20%
| |
| |-
| |
| | rowspan="3" | '''Koropokkur''' <br> [[File:Koropokkur.png|frameless|250px]] || rowspan="3" | 125 || rowspan="3" | Yuhtunga Jungle || rowspan="3" | (G7) || rowspan="3" | 2 Hours || '''Atalanta''' <br>[[File:Atalanta.png|frameless]] || 5%
| |
| |-
| |
| | '''Zennaroi Earring''' <br>[[File:Zennaroi Earring.png|frameless]] || 10%
| |
| |-
| |
| | '''Sortiarius Earring''' <br>[[File:Sortiarius Earring.png|frameless]] || 7%
| |
| |-
| |
| | rowspan="3" | '''Bune''' <br> [[File:Bune.png|frameless|250px]] || rowspan="3" | 130 || rowspan="3" | Gustav Tunnel || rowspan="3" | (G-10) || rowspan="3" | 2 Hours || '''Esper Earring''' <br>[[File:Esper Earring.png|frameless]] || 12%
| |
| |-
| |
| | '''Beneficus''' <br>[[File:Beneficus.png|frameless]] || 50%
| |
| |-
| |
| | '''Hermetic Earring''' <br>[[File:Hermetic Earring.png|frameless]] || 25%
| |
| |-
| |
| | rowspan="3" | '''Suu Xicu the Cantabile''' <br> [[File:Suu Xicu the Cantabile.png|frameless|250px]] || rowspan="3" | 130 || rowspan="3" | Castle Oztroja (S) || rowspan="3" | (H-8) || rowspan="3" | 4 Hours || '''Requiem Flute''' <br>[[File:Requiem_flute.png|frameless]] || 20%
| |
| |- | | |- |
| | | style="width: 200px;" | [[File:Lord of Onzozo.png|frameless|center|200px|link=[[Lord of Onzozo]]]] || style="width: 200px;" | [[File:Aiatar.png|frameless|center|200px|link=[[Aiatar]]]] || style="width: 200px;" | || style="width: 200px;" | || style="width: 200px;" | || style="width: 200px;" | |
| |} | | |} |
|
| |
|
| === Quest Items ===
| | {| class="wikitable mw-collapsible mw-collapsed" style="text-align: center"; width="1280px;" |
| {| class="wikitable mw-collapsible mw-collapsed" style="text-align: center"; width="1000px;" | | ! scope="row" colspan="7" style="text-align: left" | ANMs - Feet |
| ! scope="row" colspan="7" | ANM's | |
| |- | | |- |
| | style="background-color:#cfcfcf;" | '''Notorious Monster''' || style="background-color:#cfcfcf;" | '''Level''' || style="background-color:#cfcfcf;" | '''Zone''' || style="background-color:#cfcfcf;" | '''Position''' || style="background-color:#cfcfcf;" | '''Respawn''' || style="background-color:#cfcfcf;" | '''Reward''' || style="background-color:#cfcfcf;" | '''Drop Chance''' | | | scope="row" colspan="1" | '''[[Cactrot Rapido]]''' |
| |- | | |- |
| | rowspan="2" | '''Ziphius''' <br> [[File:ziphius.png|frameless|250px]] || rowspan="2" | 120 - 155 <br> (Scaled based on fishing level) || rowspan="2" | Misareaux Coast || rowspan="2" | (H-5) || rowspan="2" | Trade a Slice of Carp to the six ??? at (H-5) between 22:00-0:00, then check them at 4:00-7:00 || '''Sand Charm'''[[File:sand_charm.png|frameless]] || 100% | | | style="width: 200px;" | [[File:Cactrot Rapido.png|frameless|center|200px|link=[[Cactrot Rapido]]]] || style="width: 200px;" | || style="width: 200px;" | || style="width: 200px;" | || style="width: 200px;" | || style="width: 200px;" | |
| |-
| |
| | '''Ebisu Fishing Rod'''[[File:ebisu_rod.png|frameless]] || 10% - 100% <br> (Scaled based on fishing level)
| |
| |} | | |} |
|
| |
|
| == Salvage & Nyzul Isle Armor (Level 99) ==
| | {| class="wikitable mw-collapsible mw-collapsed" style="text-align: center"; width="1280px;" |
| | | ! scope="row" colspan="7" style="text-align: left" | ANMs - Accessories (Neck/Earrings/Rings/Back/Waist/Instruments) |
| {| class="wikitable mw-collapsible mw-collapsed" style="text-align: center"; width="1000px;" | |
| ! scope="row" colspan="7" | FANM's | |
| |- | | |- |
| | style="background-color:#cfcfcf;" | '''Notorious Monster''' || style="background-color:#cfcfcf;" | '''Level''' || style="background-color:#cfcfcf;" | '''Zone''' || style="background-color:#cfcfcf;" | '''Position''' || style="background-color:#cfcfcf;" | '''Respawn''' || style="background-color:#cfcfcf;" | '''Reward''' || style="background-color:#cfcfcf;" | '''Drop Chance'''
| | | '''[[Bloodsucker]]''' || '''[[Geush Urvan]]''' || '''[[Jaggedy-Eared Jack]]''' || '''[[Spiny Spipi]]''' || '''[[Bubbly Bernie]]''' || '''[[Beet Leafhopper]]''' |
| |- | | |- |
| | rowspan="5" | '''Bloody Bones''' <br> [[File:Bloody_Bones.png|frameless|250px]] || rowspan="5" | 105 || rowspan="5" | Arrapago Reef || rowspan="5" | (I-6) <br> Map 2 || rowspan="5" | 1 hour || '''Morrigan's Coronal +1'''[[File:Morrigan's Coronal +1.png|frameless]] || 20% | | | style="width: 200px;" | [[File:Bloodsucker.png|frameless|center|200px|link=[[Bloodsucker]]]] || style="width: 200px;" | [[File:Geush Urvan.png|frameless|center|200px|link=[[Geush Urvan]]]] || style="width: 200px;" | [[File:Jaggedy-Eared Jack.png|frameless|center|200px|link=[[Jaggedy-Eared Jack]]]] || style="width: 200px;" | [[File:Spiny Spipi.png|frameless|center|200px|link=[[Spiny Spipi]]]] || style="width: 200px;" | [[File:Bubbly Bernie.png|frameless|center|200px|link=[[Bubbly Bernie]]]] || style="width: 200px;" | [[File:Beet Leafhopper.png|frameless|center|200px|link=[[Beet Leafhopper]]]] |
| |- | | |- |
| | '''Ares' Cuirass +1'''[[File:Ares' Cuirass +1.png|frameless]] || 20% | | | '''[[Garharlor the Unruly]]''' || '''[[Antican Praefectus]]''' || '''[[Centurio X-I]]''' || '''[[Proconsul XII]]''' || '''[[Fyuu the Seabellow]]''' || '''[[Mouu the Waverider]]''' |
| |- | | |- |
| | '''Skadi's Bazubands +1'''[[File:Skadi's Bazubands +1.png|frameless]] || 20% | | | style="width: 200px;" | [[File:Garharlor the Unruly.png|frameless|center|200px|link=[[Garharlor the Unruly]]]] || style="width: 200px;" | [[File:Antican Praefectus.png|frameless|center|200px|link=[[Antican Praefectus]]]] || style="width: 200px;" | [[File:Centurio X-I.png|frameless|center|200px|link=[[Centurio X-I]]]] || style="width: 200px;" | [[File:Proconsul XII.png|frameless|center|200px|link=[[Proconsul XII]]]] || style="width: 200px;" | [[File:Fyuu the Seabellow.png|frameless|center|200px|link=[[Fyuu the Seabellow]]]] || style="width: 200px;" | [[File:Mouu the Waverider.png|frameless|center|200px|link=[[Mouu the Waverider]]]] |
| |-
| |
| | '''Usukane Hizayoroi +1'''[[File:Usukane Hizayoroi +1.png|frameless]] || 20%
| |
| |-
| |
| | '''Marduk's Crackows +1'''[[File:Marduk's Crackows +1.png|frameless]] || 20%
| |
| |-
| |
| | colspan = "7" style="background-color:#000000;" |
| |
| |-
| |
| | rowspan="5" | '''Lamie No. 7''' <br> [[File:Lamie_No_7.png|frameless|250px]] || rowspan="5" | 105 || rowspan="5" | Arrapago Reef || rowspan="5" | (E-10) <br> Map 2 || rowspan="5" | 1 hour || '''Ares' Mask +1'''[[File:Ares' Mask +1.png|frameless]] || 20%
| |
| |-
| |
| | '''Skadi's Cuirie +1'''[[File:Skadi's Cuirie +1.png|frameless]] || 20%
| |
| |-
| |
| | '''Usukane Gote +1'''[[File:Usukane Gote +1.png|frameless]] || 20%
| |
| |-
| |
| |'''Marduk's Shalwar +1''' [[File:Marduk's Shalwar +1.png|frameless]] || 20%
| |
| |-
| |
| |'''Morrigan's Pigaches +1''' [[File:Morrigan's Pigaches +1.png|frameless]] || 20%
| |
| |-
| |
| | rowspan="5" | '''Energetic Eruca''' <br> [[File:Energetic_Eruca.png|frameless|250px]] || rowspan="5" | 105 || rowspan="5" | Mount Zhayolm || rowspan="5" | (H-9) || rowspan="5" | 1 hour || '''Marduk's Tiara +1'''[[File:Marduk's Tiara +1.png|frameless]] || 20%
| |
| |-
| |
| |'''Morrigan's Robe +1''' [[File:Morrigan's Robe +1.png|frameless]] || 20%
| |
| |-
| |
| |'''Usukane Sune-Ate +1''' [[File:Usukane Sune-Ate +1.png|frameless]] || 20%
| |
| |-
| |
| | '''Ares' Gauntlets +1'''[[File:Ares' Gauntlets +1.png|frameless]] || 20%
| |
| |-
| |
| | '''Skadi's Chausses +1'''[[File:Skadi's Chausses +1.png|frameless]] || 20%
| |
| |-
| |
| | colspan = "7" style="background-color:#000000;" |
| |
| |-
| |
| | rowspan="5" | '''Garfurlar the Rabid''' <br> [[File:Garfurlar_the_Rabid.png|frameless|250px]] || rowspan="5" | 105 || rowspan="5" | Mount Zhayolm || rowspan="5" | (H-8) || rowspan="5" | 1 hour || '''Usukane Somen +1'''[[File:Usukane Somen +1.png|frameless]] || 20%
| |
| |-
| |
| | '''Marduk's Jubbah +1'''[[File:Marduk's Jubbah +1.png|frameless]] || 20%
| |
| |-
| |
| | '''Morrigan's Cuffs +1'''[[File:Morrigan's Cuffs +1.png|frameless]] || 20%
| |
| |-
| |
| | '''Ares' Flanchard +1'''[[File:Ares' Flanchard +1.png|frameless]] || 20%
| |
| |-
| |
| |'''Skadi's Jambeaux +1''' [[File:Skadi's Jambeaux +1.png|frameless]] || 20%
| |
| |-
| |
| | colspan = "7" style="background-color:#000000;" |
| |
| |-
| |
| | rowspan="5" | '''Jaded Jody''' <br> [[File:Jaded_Jody.png|frameless|250px]] || rowspan="5" | 105 || rowspan="5" | Wajaom Woodlands || rowspan="5" | (E-11) || rowspan="5" | 1 hour || '''Skadi's Visor +1'''[[File:Skadi's Visor +1.png|frameless]] || 20%
| |
| |-
| |
| |'''Usukane Haramaki +1''' [[File:Usukane Haramaki +1.png|frameless]] || 20%
| |
| |-
| |
| | '''Marduk's Dastanas +1'''[[File:Marduk's Dastanas +1.png|frameless]] || 20%
| |
| |-
| |
| | '''Morrigan's Slops +1'''[[File:Morrigan's Slops +1.png|frameless]] || 20%
| |
| |-
| |
| | '''Ares' Sollerets +1'''[[File:Ares' Sollerets +1.png|frameless]] || 20%
| |
| |-
| |
| | colspan = "7" style="background-color:#000000;" |
| |
| |-
| |
| | rowspan="5" | '''Lamie No. 8''' <br> [[File:Lamie_No_8.png|frameless|250px]] || rowspan="5" | 105 || rowspan="5" | Arrapago Reef || rowspan="5" | (I-10) <br> Map 2 || rowspan="5" | 1 hour || '''Phorcys Salade'''[[File:Phorcys Salade.png|frameless]] || 20%
| |
| |-
| |
| | '''Nares Saio'''[[File:Nares Saio.png|frameless]] || 20%
| |
| |-
| |
| | '''Omodaka Haramaki'''[[File:Omodaka Haramaki.png|frameless]] || 20%
| |
| |-
| |
| |'''Nabu's Dastanas''' [[File:Nabu's Dastanas.png|frameless]] || 20%
| |
| |-
| |
| | '''Fea's Slops'''[[File:Fea's Slops.png|frameless]] || 20%
| |
| |-
| |
| | colspan = "7" style="background-color:#000000;" |
| |
| |-
| |
| | rowspan="5" | '''Bluestreak Gyugyuroon''' <br> [[File:Bluestreak_Gyugyuroon.png|frameless|250px]] || rowspan="5" | 105 || rowspan="5" | Aydeewa Subterrane || rowspan="5" | (I-9) <br> Map 3 || rowspan="5" | 1 hour || '''Ker's Mask'''[[File:Ker's Mask.png|frameless]] || 20%
| |
| |-
| |
| | '''Sigyn's Cuirie'''[[File:Sigyn's Cuirie.png|frameless]] || 20%
| |
| |-
| |
| | '''Omadaka Gote'''[[File:Omodaka Gote.png|frameless]] || 20%
| |
| |-
| |
| | '''Nabu's Shalwar'''[[File:Nabu's Shalwar.png|frameless]] || 20%
| |
| |-
| |
| |'''Fea's Pigaches''' [[File:Fea's Pigaches.png|frameless]] || 20%
| |
| |-
| |
| | colspan = "7" style="background-color:#000000;" |
| |
| |-
| |
| | rowspan="5" | '''Peallaidh''' <br> [[File:Peallaidh.png|frameless|250px]] || rowspan="5" | 105 || rowspan="5" | Caedarva Mire || rowspan="5" | (J-8) <br> Map 1 || rowspan="5" | 1 hour || '''Nares Cap'''[[File:Nares Cap.png|frameless]] || 20%
| |
| |-
| |
| | '''Fea's Robe'''[[File:Fea's Robe.png|frameless]] || 20%
| |
| |-
| |
| | '''Thaumas Kecks'''[[File:Thaumas Kecks.png|frameless]] || 20%
| |
| |-
| |
| | '''Ker's Sollerets'''[[File:Ker's Sollerets.png|frameless]] || 20%
| |
| |-
| |
| | '''Phorcys Schuhs'''[[File:Phorcys Schuhs.png|frameless]] || 20%
| |
| |-
| |
| | colspan = "7" style="background-color:#000000;" |
| |
| |-
| |
| | rowspan="5" | '''Zikko''' <br> [[File:Zikko.png|frameless|250px]] || rowspan="5" | 105 || rowspan="5" | Caedarva Mire || rowspan="5" | (G-10) <br> Map 2 || rowspan="5" | 1 hour || '''Omadaka Somen'''[[File:Omodaka Somen.png|frameless]] || 20%
| |
| |-
| |
| | '''Sigyn's Visor'''[[File:Sigyn's Visor.png|frameless]] || 20%
| |
| |-
| |
| | '''Nabu's Jubbah'''[[File:Nabu's Jubbah.png|frameless]] || 20%
| |
| |-
| |
| | '''Fea's Cuffs'''[[File:Fea's Cuffs.png|frameless]] || 20%
| |
| |-
| |
| | '''Thaumas Nails'''[[File:Thaumas Nails.png|frameless]] || 20%
| |
| |-
| |
| | colspan = "7" style="background-color:#000000;" |
| |
| |-
| |
| | rowspan="5" | '''Kirlirger the Abhorrent''' <br> [[File:Kirlirger_the_Abhorrent.png|frameless|250px]] || rowspan="5" | 105 || rowspan="5" | Halvung || rowspan="5" | (H-8) <br> Map 2 || rowspan="5" | 1 hour || '''Fea's Coronal'''[[File:Fea's Coronal.png|frameless]] || 20%
| |
| |-
| |
| |'''Ker's Gauntlets''' [[File:Ker's Gauntlets.png|frameless]] || 20%
| |
| |- | | |- |
| | '''Thaumas Gloves'''[[File:Thaumas Gloves.png|frameless]] || 20% | | | '''[[Namtar]]''' || '''[[Pahh the Gullcaller]]''' || '''[[Qull the Shellbuster]]''' || '''[[Seww the Squidlimbed]]''' || '''[[Voll the Sharkfinned]]''' || '''[[Wuur the Sandcomber]]''' |
| |- | | |- |
| | '''Sigyn's Chausses'''[[File:Sigyn's Chausses.png|frameless]] || 20% | | | style="width: 200px;" | [[File:Namtar.png|frameless|center|200px|link=[[Namtar]]]] || style="width: 200px;" | [[File:Pahh the Gullcaller.png|frameless|center|200px|link=[[Pahh the Gullcaller]]]] || style="width: 200px;" | [[File:Qull the Shellbuster.png|frameless|center|200px|link=[[Qull the Shellbuster]]]] || style="width: 200px;" | [[File:Seww the Squidlimbed.png|frameless|center|200px|link=[[Seww the Squidlimbed]]]] || style="width: 200px;" | [[File:Voll the Sharkfinned.png|frameless|center|200px|link=[[Voll the Sharkfinned]]]] || style="width: 200px;" | [[File:Wuur the Sandcomber.png|frameless|center|200px|link=[[Wuur the Sandcomber]]]] |
| |- | | |- |
| | '''Omadaka Sune-Ate'''[[File:Omodaka Sune-Ate.png|frameless]] || 20% | | | '''[[Lumbering Lambert]]''' || '''[[Rampaging Ram]]''' || '''[[Serpopard Ishtar]]''' || '''[[Observant Zekka]]''' || '''[[Shen]]''' || '''[[Numbing Norman]]''' |
| |- | | |- |
| | colspan = "7" style="background-color:#000000;" | | | | style="width: 200px;" | [[File:Lumbering Lambert.png|frameless|center|200px|link=[[Lumbering Lambert]]]] || style="width: 200px;" | [[File:Rampaging Ram.png|frameless|center|200px|link=[[Rampaging Ram]]]] || style="width: 200px;" | [[File:Serpopard Ishtar.png|frameless|center|200px|link=[[Serpopard Ishtar]]]] || style="width: 200px;" | [[File:Observant Zekka.png|frameless|center|200px|link=[[Observant Zekka]]]] || style="width: 200px;" | [[File:Shen.png|frameless|center|200px|link=[[Shen]]]] || style="width: 200px;" | [[File:Numbing Norman.png|frameless|center|200px|link=[[Numbing Norman]]]] |
| |- | | |- |
| | rowspan="5" | '''Mythril Mouth Monamaq''' <br> [[File:Mythril_Mouth_Monamaq.png|frameless|250px]] || rowspan="5" | 105 || rowspan="5" | Halvung || rowspan="5" | (H-9) <br> Map 2 || rowspan="5" | 1 hour || '''Nabu's Tiara'''[[File:Nabu's Tiara.png|frameless]] || 20% | | | '''[[Habergoass]]''' || '''[[Muq Shabeel]]''' || '''[[Nunyenunc]]''' || '''[[Taisaijin]]''' || '''[[Dread Dealing Dredodak]]''' || '''[[Swashstox Beadblinker]]''' |
| |- | | |- |
| | '''Ker's Flanchard'''[[File:Ker's Flanchard.png|frameless]] || 20% | | | style="width: 200px;" | [[File:Habergoass.png|frameless|center|200px|link=[[Habergoass]]]] || style="width: 200px;" | [[File:Muq Shabeel.png|frameless|center|200px|link=[[Muq Shabeel]]]] || style="width: 200px;" | [[File:Nunyenunc.png|frameless|center|200px|link=[[Nunyenunc]]]] || style="width: 200px;" | [[File:Taisaijin.png|frameless|center|200px|link=[[Taisaijin]]]] || style="width: 200px;" | [[File:Dread Dealing Dredodak.png|frameless|center|200px|link=[[Dread Dealing Dredodak]]]] || style="width: 200px;" | [[File:Swashstox Beadblinker.png|frameless|center|200px|link=[[Swashstox Beadblinker]]]] |
| |- | | |- |
| |'''Phorcys Dirs''' [[File:Phorcys Dirs.png|frameless]] || 20% | | | '''[[Skogs Fru]]''' || '''[[Koropokkur]]''' || '''[[Bune]]''' || '''[[Suu Xicu the Cantabile]]''' || || |
| |-
| |
| | '''Nares Clogs'''[[File:Nares Clogs.png|frameless]] || 20%
| |
| |-
| |
| | '''Sigyn's Jambeux'''[[File:Sigyn's Jambeaux.png|frameless]] || 20%
| |
| |-
| |
| | colspan = "7" style="background-color:#000000;" |
| |
| |-
| |
| | rowspan="5" | '''Dragonscaled Bugaal Ja''' <br> [[File:Dragonscaled_Bugaal_Ja.png|frameless|250px]] || rowspan="5" | 105 || rowspan="5" | Mamook || rowspan="5" | (D-7) <br> Map 1 || rowspan="5" | 1 hour || '''Thaumas Hat'''[[File:Thaumas Hat.png|frameless]] || 20%
| |
| |-
| |
| | '''Ker's Cuirass'''[[File:Ker's Cuirass.png|frameless]] || 20%
| |
| |-
| |
| | '''Phorcys Korazin'''[[File:Phorcys Korazin.png|frameless]] || 20%
| |
| |-
| |
| | '''Nares Cuffs'''[[File:Nares Cuffs.png|frameless]] || 20%
| |
| |-
| |
| | '''Sigyn's Bazubands'''[[File:Sigyn's Bazubands.png|frameless]] || 20% | |
| |-
| |
| | colspan = "7" style="background-color:#000000;" |
| |
| |-
| |
| | rowspan="5" | '''Zizzy Zillah''' <br> [[File:Zizzy_Zillah.png|frameless|250px]] || rowspan="5" | 105 || rowspan="5" | Mamook || rowspan="5" | (I-9) <br> Map 1 || rowspan="5" | 1 hour || '''Thaumas Coat'''[[File:Thaumas Coat.png|frameless]] || 20%
| |
| |-
| |
| |'''Phorcys Mitts''' [[File:Phorcys Mitts.png|frameless]] || 20%
| |
| |-
| |
| | '''Nares Trews'''[[File:Nares Trews.png|frameless]] || 20% | |
| |-
| |
| | '''Omodaka Hizayoroi'''[[File:Omodaka Hizayoroi.png|frameless]] || 20%
| |
| |-
| |
| | '''Nabu's Crackows'''[[File:Nabu's Crackows.png|frameless]] || 20%
| |
| |- | |
| | colspan = "7" style="background-color:#000000;" | | |
| |- | | |- |
| | | style="width: 200px;" | [[File:Skogs Fru.png|frameless|center|200px|link=[[Skogs Fru]]]] || style="width: 200px;" | [[File:Koropokkur.png|frameless|center|200px|link=[[Koropokkur]]]] || style="width: 200px;" | [[File:Bune.png|frameless|center|200px|link=[[Bune]]]] || style="width: 200px;" | [[File:Suu Xicu the Cantabile.png|frameless|center|200px|link=[[Suu Xicu the Cantabile]]]] || || |
| |} | | |} |
|
| |
|
| == Limbus/Ultima/Omega Armor (Level 99) ==
| | {| class="wikitable mw-collapsible mw-collapsed" style="text-align: center"; width="1280px;" |
| | | ! scope="row" colspan="7" style="text-align: left" | ANMs - Quest Items |
| {| class="wikitable mw-collapsible mw-collapsed" style="text-align: center"; width="1000px;" | |
| ! scope="row" colspan="7" | FANM's | |
| |-
| |
| | style="background-color:#cfcfcf;" | '''Notorious Monster''' || style="background-color:#cfcfcf;" | '''Level''' || style="background-color:#cfcfcf;" | '''Zone''' || style="background-color:#cfcfcf;" | '''Position''' || style="background-color:#cfcfcf;" | '''Respawn''' || style="background-color:#cfcfcf;" | '''Reward''' || style="background-color:#cfcfcf;" | '''Drop Chance'''
| |
| |-
| |
| | rowspan="5" | '''Citipati''' <br> [[File:Citipati.png|frameless|250px]] || rowspan="5" | 105 || rowspan="5" | Attohwa Chasm || rowspan="5" | (F-8) || rowspan="5" | 1 hour || '''Murzim Zucchetto'''[[File:Murzim_Zucchetto.png|frameless]] || 20%
| |
| |-
| |
| |'''Shedir Manteel''' [[File:Shedir_Manteel.png|frameless]] || 20%
| |
| |-
| |
| | '''Enif Manopolas'''[[File:Enif_Manopolas.png|frameless]] || 20%
| |
| |-
| |
| | '''Adhara Seraweels'''[[File:Adhara_Seraweels.png|frameless]] || 20%
| |
| |-
| |
| | '''Murzim Gambieras'''[[File:Murzim_Gambieras.png|frameless]] || 20%
| |
| |-
| |
| | colspan = "7" style="background-color:#000000;" |
| |
| |-
| |
| | rowspan="5" | '''Goaftrap''' <br> [[File:Goaftrap.png|frameless|250px]] || rowspan="5" | 105 || rowspan="5" | Misareaux Coast || rowspan="5" | (L-11) || rowspan="5" | 1 hour || '''Enif Zucchetto'''[[File:Enif_Zucchetto.png|frameless]] || 20%
| |
| |-
| |
| | '''Shedir Turban'''[[File:Shedir_Turban.png|frameless]] || 20%
| |
| |-
| |
| | '''Adhara Manteel'''[[File:Adhara_Manteel.png|frameless]] || 20%
| |
| |-
| |
| | '''Murzim Cosciales'''[[File:Murzim_Cosciales.png|frameless]] || 20%
| |
| |-
| |
| | '''Shedir Crackows'''[[File:Shedir_Crackows.png|frameless]] || 20%
| |
| |-
| |
| | colspan = "7" style="background-color:#000000;" |
| |
| |-
| |
| | rowspan="5" | '''Intulo''' <br> [[File:Intulo.png|frameless|250px]] || rowspan="5" | 105 || rowspan="5" | Bibiki Bay || rowspan="5" | (I-7) <br> Map 1 || rowspan="5" | 1 hour || '''Enif Corazza'''[[File:Enif_Corazza.png|frameless]] || 20%
| |
| |-
| |
| | '''Murzim Corazza'''[[File:Murzim_Corazza.png|frameless]] || 20%
| |
| |-
| |
| |'''Shedir Gages''' [[File:Shedir_Gages.png|frameless]] || 20%
| |
| |-
| |
| |'''Enif Cosciales''' [[File:Enif_Cosciales.png|frameless]] || 20%
| |
| |-
| |
| | '''Adhara Crackows'''[[File:Adhara_Crackows.png|frameless]] || 20%
| |
| |- | | |- |
| | colspan = "7" style="background-color:#000000;" | | | | '''[[Ziphius]]''' || |
| |- | | |- |
| | rowspan="5" | '''Tempest Tigon''' <br> [[File:Tempest Tigon.png|frameless|250px]] || rowspan="5" | 105 || rowspan="5" | Carpenter's Landing || rowspan="5" | (G-9) <br> Map 1 || rowspan="5" | 1 hour || '''Adhara Turban'''[[File:Adhara_Turban.png|frameless]] || 20% | | | style="width: 200px;" | [[File:Ziphius.png|frameless|center|200px|link=[[Ziphius]]]] || || || || || |
| |-
| |
| | '''Adhara Gages'''[[File:Adhara_Gages.png|frameless]] || 20%
| |
| |-
| |
| |'''Murzim Manopolas''' [[File:Murzim_Manopolas.png|frameless]] || 20%
| |
| |- | |
| | '''Shedir Seraweels'''[[File:Shedir_Seraweels.png|frameless]] || 20% | |
| |- | |
| | '''Enif Gambieras'''[[File:Enif_Gambieras.png|frameless]] || 20%
| |
| |} | | |} |
|
| |
|
| == Skirmish Weapons (Level 105) & Coalition Armor (Level 106) == | | == Skirmish Weapons (Level 105) & Coalition Armor (Level 106) == |
|
| |
|
| {| class="wikitable mw-collapsible mw-collapsed" style="text-align: center"; width="1000px;" | | {| class="wikitable mw-collapsible mw-collapsed" style="text-align: center"; width="1280px;" |
| ! scope="row" colspan="7" | FANM's | | ! scope="row" colspan="7" style="text-align: left" | FANMs |
| |- | | |- |
| | style="background-color:#cfcfcf;" | '''Notorious Monster''' || style="background-color:#cfcfcf;" | '''Level''' || style="background-color:#cfcfcf;" | '''Zone''' || style="background-color:#cfcfcf;" | '''Position''' || style="background-color:#cfcfcf;" | '''Respawn''' || style="background-color:#cfcfcf;" | '''Reward''' || style="background-color:#cfcfcf;" | '''Drop Chance'''
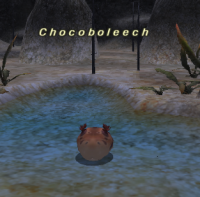
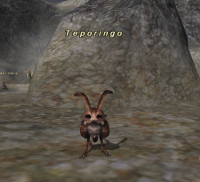
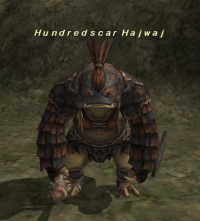
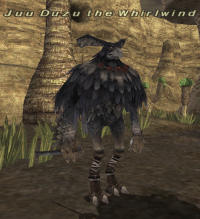
| | | '''[[Chocoboleech]]''' || '''[[Teporingo]]''' || '''[[Hundredscar Hajwaj]]''' || '''[[Thousandarm Deshglesh]]''' || '''[[Hoo Mjuu the Torrent]]''' || '''[[Juu Duzu the Whirlwind]]''' |
| |- | | |- |
| | rowspan="3" | '''Chocoboleech''' <br> [[File:Chocoboleech.png|frameless|250px]] || rowspan="3" | 105 || rowspan="3" | Dangruf Wadi || rowspan="3" | (F-9) || rowspan="3" | 1 hour || '''Lehbrailg'''[[File:Lehbrailg.png|frameless]] || 33% | | | style="width: 200px;" | [[File:Chocoboleech.png|frameless|center|200px|link=[[Chocoboleech]]]] || style="width: 200px;" | [[File:Teporingo.png|frameless|center|200px|link=[[Teporingo]]]] || style="width: 200px;" | [[File:Hundredscar Hajwaj.png|frameless|center|200px|link=[[Hundredscar Hajwaj]]]] || style="width: 200px;" | [[File:Thousandarm Deshglesh.png|frameless|center|200px|link=[[Thousandarm Deshglesh]]]] || style="width: 200px;" | [[File:Hoo Mjuu the Torrent.png|frameless|center|200px|link=[[Hoo Mjuu the Torrent]]]] || style="width: 200px;" | [[File:Juu Duzu the Whirlwind.png|frameless|center|200px|link=[[Juu Duzu the Whirlwind]]]] |
| |- | | |- |
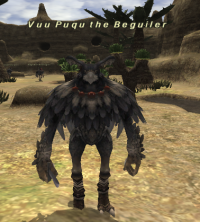
| | '''Uffrat'''[[File:Uffrat.png|frameless]] || 33% | | | '''[[Vuu Puqu the Beguiler]]''' || '''[[Bu'Ghi Howlblade]]''' || '''[[No'Mho Crimsonarmor]]''' || '''[[Zi'Ghi Boneeater]]''' || || |
| |- | | |- |
| |'''Gorney Brayettes''' [[File:Gorney Brayettes.png|frameless]] || 33% | | | style="width: 200px;" | [[File:Vuu Puqu the Beguiler.png|frameless|center|200px|link=[[Vuu Puqu the Beguiler]]]] || style="width: 200px;" | [[File:Bu'Ghi Howlblade.png|frameless|center|200px|link=[[Bu'Ghi Howlblade]]]] || style="width: 200px;" | [[File:No'Mho Crimsonarmor.png|frameless|center|200px|link=[[No'Mho Crimsonarmor]]]] || style="width: 200px;" | [[File:Zi'Ghi Boneeater.png|frameless|center|200px|link=[[Zi'Ghi Boneeater]]]] || style="width: 200px;" | || style="width: 200px;" | |
| |-
| |
| | colspan = "7" style="background-color:#000000;" |
| |
| |-
| |
| | rowspan="3" | '''Teporingo''' <br> [[File:Teporingo.png|frameless|250px]] || rowspan="3" | 105 || rowspan="3" | Dangruf Wadi || rowspan="3" | (I-9) || rowspan="3" | 1 hour || '''Bocluamni'''[[File:Bocluamni.png|frameless]] || 33%
| |
| |-
| |
| | '''Hgafircian'''[[File:Hgafircian.png|frameless]] || 33%
| |
| |-
| |
| |'''Shneddick Tights''' [[File:Shneddick Tights.png|frameless]] || 33%
| |
| |-
| |
| | colspan = "7" style="background-color:#000000;" |
| |
| |-
| |
| | rowspan="3" | '''Hundredscar Hajwaj''' <br> [[File:Hundredscar_Hajwaj.png|frameless|250px]] || rowspan="3" | 105 || rowspan="3" | Fort Ghelsba || rowspan="3" | (H-9) || rowspan="3" | 1 hour || '''Iztaasu'''[[File:Iztaasu.png|frameless]] || 33%
| |
| |-
| |
| | '''Weatherspoon Corona'''[[File:Weatherspoon Corona.png|frameless]] || 33%
| |
| |-
| |
| | '''Gorney Haubert'''[[File:Gorney Haubert.png|frameless]] || 33%
| |
| |- | |
| | colspan = "7" style="background-color:#000000;" |
| |
| |-
| |
| | rowspan="3" | '''Thousandarm Deshglesh''' <br> [[File:Thousandarm_Deshglesh.png|frameless|250px]] || rowspan="3" | 105 || rowspan="3" | Ghelsba Outpost || rowspan="3" | (J-6) || rowspan="3" | 1 hour || '''Schichishito'''[[File:Shichishito.png|frameless]] || 33%
| |
| |-
| |
| | '''Weatherspoon Pants'''[[File:Weatherspoon Pants.png|frameless]] || 33%
| |
| |-
| |
| | '''Shneddick Boots'''[[File:Shneddick Boots.png|frameless]] || 33%
| |
| |-
| |
| | colspan = "7" style="background-color:#000000;" |
| |
| |-
| |
| | rowspan="3" | '''Hoo Mjuu the Torrent''' <br> [[File:Hoo_Mjuu_the_Torrent.png|frameless|250px]] || rowspan="3" | 105 || rowspan="3" | Giddeus || rowspan="3" | (H-9) || rowspan="3" | 1 hour || '''Leisilonu'''[[File:Leisilonu.png|frameless]] || 33%
| |
| |-
| |
| | '''Shneddick Tabard'''[[File:Shneddick Tabard.png|frameless]] || 33%
| |
| |-
| |
| | '''Weatherspoon Cuffs'''[[File:Weatherspoon Cuffs.png|frameless]] || 33%
| |
| |-
| |
| | colspan = "7" style="background-color:#000000;" |
| |
| |- | |
| | rowspan="3" | '''Juu Duzu the Whirlwind''' <br> [[File:Juu_Duzu_the_Whirlwind.png|frameless|250px]] || rowspan="3" | 105 || rowspan="3" | Giddeus || rowspan="3" | (J-11) || rowspan="3" | 1 hour || '''Qatsunoci'''[[File:Qatsunoci.png|frameless]] || 33% | |
| |-
| |
| | '''Shneddick Gloves'''[[File:Shneddick Gloves.png|frameless]] || 33%
| |
| |-
| |
| |'''Gorney Sollerets''' [[File:Gorney Sollerets.png|frameless]] || 33%
| |
| |-
| |
| | colspan = "7" style="background-color:#000000;" |
| |
| |-
| |
| | rowspan="3" | '''Vuu Puqu the Beguiler''' <br> [[File:Vuu_Puqu_the_Beguiler.png|frameless|250px]] || rowspan="3" | 105 || rowspan="3" | Giddeus || rowspan="3" | (H-14) || rowspan="3" | 1 hour ||'''Aedold''' [[File:Aedold.png|frameless]] || 33%
| |
| |-
| |
| | '''Crobaci'''[[File:Crobaci.png|frameless]] || 33%
| |
| |-
| |
| |'''Weatherspoon Souliers''' [[File:Weatherspoon Souliers.png|frameless]] || 33%
| |
| |-
| |
| | colspan = "7" style="background-color:#000000;" |
| |
| |-
| |
| | rowspan="3" | '''Bu'Ghi Howlblade''' <br> [[File:BuGhi_Howlblade.png|frameless|250px]] || rowspan="3" | 105 || rowspan="3" | Palborough Mines || rowspan="3" | (I-7) || rowspan="3" | 1 hour || '''Ninzas'''[[File:Ninzas.png|frameless]] || 33%
| |
| |-
| |
| |'''Gorney Morion''' [[File:Gorney Morion.png|frameless]] || 33%
| |
| |-
| |
| | '''Shneddick Chapeau'''[[File:Shneddick Chapeau.png|frameless]] || 33%
| |
| |-
| |
| | colspan = "7" style="background-color:#000000;" |
| |
| |-
| |
| | rowspan="3" | '''No'Mho Crimsonarmor''' <br> [[File:NoMho_Crimsonarmor.png|frameless|250px]] || rowspan="3" | 105 || rowspan="3" | Palborough Mines || rowspan="3" | (G-10) || rowspan="3" | 1 hour || '''Iizamal'''[[File:Iizamal.png|frameless]] || 33%
| |
| |-
| |
| | '''Weatherspoon Robe'''[[File:Weatherspoon Robe.png|frameless]] || 33%
| |
| |-
| |
| |'''Gorney Moufles''' [[File:Gorney Moufles.png|frameless]] || 33%
| |
| |-
| |
| | colspan = "7" style="background-color:#000000;" |
| |
| |-
| |
| | rowspan="3" | '''Zi'Ghi Boneater''' <br> [[File:ZiGhi_Boneater.png|frameless|250px]] || rowspan="3" | 105 || rowspan="3" | Palborough Mines || rowspan="3" | (H-8) || rowspan="3" | 1 hour || '''Faizzeer'''[[File:Faizzeer.png|frameless]] || 33%
| |
| |- | |
| |'''Iclamar''' [[File:Iclamar.png|frameless]] || 33% | |
| |-
| |
| | '''Kannakiri'''[[File:Kannakiri.png|frameless]] || 33%
| |
| |-
| |
| | colspan = "7" style="background-color:#000000;" |
| |
| |} | | |} |
|
| |
|
| Line 547: |
Line 103: |
| * '''All Skirmish Armor (Level 113) can be upgraded to 119 via [[Vesca]].''' | | * '''All Skirmish Armor (Level 113) can be upgraded to 119 via [[Vesca]].''' |
|
| |
|
| {| class="wikitable mw-collapsible mw-collapsed" style="text-align: center"; width="1000px;" | | {| class="wikitable mw-collapsible mw-collapsed" style="text-align: center"; width="1280px;" |
| ! scope="row" colspan="7" | ANM's | | ! scope="row" colspan="7" style="text-align: left" | ANMs |
| |- | | |- |
| | style="background-color:#cfcfcf;" | '''Notorious Monster''' || style="background-color:#cfcfcf;" | '''Level''' || style="background-color:#cfcfcf;" | '''Zone''' || style="background-color:#cfcfcf;" | '''Position''' || style="background-color:#cfcfcf;" | '''Respawn''' || style="background-color:#cfcfcf;" | '''Reward''' || style="background-color:#cfcfcf;" | '''Drop Chance''' | | | '''[[Bi'Gho Headtaker]]''' || '''[[Da'Dha Hundredmask]]''' || '''[[Ga'Bhu Unvanquished]]''' || '''[[Ge'Dha Evileye]]''' || '''[[Zo'Khu Blackcloud]]''' || '''[[Mee Deggi the Punisher]]''' |
| |- | | |- |
| | rowspan="1" | '''Bi'Gho Headtaker''' <br> [[File:Bi'Gho Headtaker.png|frameless|250px]] || rowspan="1" | 115 || rowspan="1" | Beadeaux || rowspan="1" | (G-7) <br> Map 1 || rowspan="1" | 1 hour || '''Otronif Harness'''[[File:Otronif Harness.png|frameless]] || 25% | | | style="width: 200px;" | [[File:Bi'Gho Headtaker.png|frameless|center|200px|link=[[Bi'Gho Headtaker]]]] || style="width: 200px;" | [[File:Da'Dha Hundredmask.png|frameless|center|200px|link=[[Da'Dha Hundredmask]]]] || style="width: 200px;" | [[File:Ga'Bhu Unvanquished.png|frameless|center|200px|link=[[Ga'Bhu Unvanquished]]]] || style="width: 200px;" | [[File:Ge'Dha Evileye.png|frameless|center|200px|link=[[Ge'Dha Evileye]]]] || style="width: 200px;" | [[File:Zo'Khu Blackcloud.png|frameless|center|200px|link=[[Zo'Khu Blackcloud]]]] || style="width: 200px;" | [[File:Mee Deggi the Punisher.png|frameless|center|200px|link=[[Mee Deggi the Punisher]]]] |
| |- | | |- |
| | colspan = "7" style="background-color:#000000;" | | | | '''[[Moo Ouzi the Swiftblade]]''' || '''[[Quu Domi the Gallant]]''' || '''[[Yaa Haqa the Profane]]''' || '''[[Duke Haborym]]''' || '''[[Grand Duke Batym]]''' || '''[[Marquis Allocen]]''' |
| |- | | |- |
| | rowspan="1" | '''Da'Dha Hundredmask''' <br> [[File:Da'Dha Hundredmask.png|frameless|250px]] || rowspan="1" | 115 || rowspan="1" | Beadeaux || rowspan="1" | (G-9) <br> Map 1 || rowspan="1" | 1 hour || '''Otronif Gloves'''[[File:Otronif Gloves.png|frameless]] || 25% | | | style="width: 200px;" | [[File:Moo Ouzi the Swiftblade.png|frameless|center|200px|link=[[Moo Ouzi the Swiftblade]]]] || style="width: 200px;" | [[File:Quu Domi the Gallant.png|frameless|center|200px|link=[[Quu Domi the Gallant]]]] || style="width: 200px;" | [[File:Yaa Haqa the Profane.png|frameless|center|200px|link=[[Yaa Haqa the Profane]]]] || style="width: 200px;" | [[File:Duke Haborym.png|frameless|center|200px|link=[[Duke Haborym]]]] || style="width: 200px;" | [[File:Grand Duke Batym.png|frameless|center|200px|link=[[Grand Duke Batym]]]] || style="width: 200px;" | [[File:Marquis Allocen.png|frameless|center|200px|link=[[Marquis Allocen]]]] |
| |- | | |- |
| | colspan = "7" style="background-color:#000000;" | | | | '''[[Marquis Amon]]''' || '''[[Marquis Andrealphus]]''' || '''[[Marquis Naberius]]''' || '''[[Baron Vapula]]''' || '''[[Baronet Romwe]]''' || '''[[Count Bifrons]]''' |
| |- | | |- |
| | rowspan="1" | '''Ga'Bhu Unvanquished''' <br> [[File:Ga'Bhu Unvanquished.png|frameless|250px]] || rowspan="1" | 115 || rowspan="1" | Beadeaux|| rowspan="1" | (J-5) <br> Map 1 || rowspan="1" | 1 hour || '''Iuitl Tights'''[[File:Iuitl Tights.png|frameless]] || 25% | | | style="width: 200px;" | [[File:Marquis Amon.png|frameless|center|200px|link=[[Marquis Amon]]]] || style="width: 200px;" | [[File:Marquis Andrealphus.png|frameless|center|200px|link=[[Marquis Andrealphus]]]] || style="width: 200px;" | [[File:Marquis Naberius.png|frameless|center|200px|link=[[Marquis Naberius]]]] || style="width: 200px;" | [[File:Baron Vapula.png|frameless|center|200px|link=[[Baron Vapula]]]] || style="width: 200px;" | [[File:Baronet Romwe.png|frameless|center|200px|link=[[Baronet Romwe]]]] || style="width: 200px;" | [[File:Count Bifrons.png|frameless|center|200px|link=[[Count Bifrons]]]] |
| |- | | |- |
| | colspan = "7" style="background-color:#000000;" | | | | '''[[Viscount Morax]]''' || '''[[Blubbery Bulge]]''' || '''[[Dirtyhanded Gochakzuk]]''' || '''[[Hawkeyed Dnatbat]]''' || '''[[Poisonhand Gnadgad]]''' || '''[[Steelbiter Gudrud]]''' |
| |- | | |- |
| | rowspan="1" | '''Ge'Dha Evileye''' <br> [[File:Ge'Dha Evileye.png|frameless|250px]] || rowspan="1" | 115 || rowspan="1" | Beadeaux || rowspan="1" | (E/F-10/11) <br> Map 1 || rowspan="1" | 1 hour || '''Otronif Brais'''[[File:Otronif Brais.png|frameless]] || 25% | | | style="width: 200px;" | [[File:Viscount Morax.png|frameless|center|200px|link=[[Viscount Morax]]]] || style="width: 200px;" | [[File:Blubbery Bulge.png|frameless|center|200px|link=[[Blubbery Bulge]]]] || style="width: 200px;" | [[File:Dirtyhanded Gochakzuk.png|frameless|center|200px|link=[[Dirtyhanded Gochakzuk]]]] || style="width: 200px;" | [[File:Hawkeyed Dnatbat.png|frameless|center|200px|link=[[Hawkeyed Dnatbat]]]] || style="width: 200px;" | [[File:Poisonhand Gnadgad.png|frameless|center|200px|link=[[Poisonhand Gnadgad]]]] || style="width: 200px;" | [[File:Steelbiter Gudrud.png|frameless|center|200px|link=[[Steelbiter Gudrud]]]] |
| |- | | |- |
| | colspan = "7" style="background-color:#000000;" | | | | '''[[Tigerbane Bakdak]]''' || || || || || |
| |- | | |- |
| | rowspan="1" | '''Zo'Khu Blackcloud''' <br> [[File:Zo'Khu Blackcloud.png|frameless|250px]] || rowspan="1" | 115 || rowspan="1" | Beadeaux|| rowspan="1" | (E-11) <br> Map 1 || rowspan="1" | 1 hour || '''Iuitl Wristbands''' [[File:Iuitl Wristbands.png|frameless]] || 25% | | | style="width: 200px;" | [[File:Tigerbane Bakdak.png|frameless|center|200px|link=[[Tigerbane Bakdak]]]] || style="width: 200px;" | || style="width: 200px;" | || style="width: 200px;" | || style="width: 200px;" | || style="width: 200px;" | |
| |-
| | |
| | colspan = "7" style="background-color:#000000;" |
| |
| |-
| |
| | rowspan="1" | '''Mee Deggi the Punisher''' <br> [[File:Mee Deggi the Punisher.png|frameless|250px]] || rowspan="1" | 115 || rowspan="1" | Castle Oztroja || rowspan="1" | (H-8) <br> Map 7 || rowspan="1" | 1 hour || '''Gendewitha Galoshes'''[[File:Gendewitha Galoshes.png|frameless]] || 25%
| |
| |-
| |
| | colspan = "7" style="background-color:#000000;" |
| |
| |-
| |
| | rowspan="1" | '''Moo Ouzi the Swiftblade''' <br> [[File:Moo Ouzi the Swiftblade.png|frameless|250px]] || rowspan="1" | 115 || rowspan="1" | Castle Oztroja || rowspan="1" | (G-7) <br> Map 1 || rowspan="1" | 1 hour || '''Gendewitha Spats'''[[File:Gendewitha Spats.png|frameless]] || 25%
| |
| |-
| |
| | colspan = "7" style="background-color:#000000;" |
| |
| |-
| |
| | rowspan="1" | '''Quu Domi the Gallant''' <br> [[File:Quu Domi the Gallant.png|frameless|250px]] || rowspan="1" | 115 || rowspan="1" | Castle Oztroja || rowspan="1" | (H-8) <br> Map 6 || rowspan="1" | 1 hour || '''Hagondes Hat'''[[File:Hagondes Hat.png|frameless]] || 25%
| |
| |-
| |
| | colspan = "7" style="background-color:#000000;" |
| |
| |-
| |
| | rowspan="1" | '''Yaa Haqa the Profane''' <br> [[File:Yaa Haqa the Profane.png|frameless|250px]] || rowspan="1" | 115 || rowspan="1" | Castle Oztroja || rowspan="1" | (I-10) <br> Map 2 || rowspan="1" | 1 hour || '''Hagondes Coat'''[[File:Hagondes Coat.png|frameless]] || 25%
| |
| |-
| |
| | colspan = "7" style="background-color:#000000;" |
| |
| |-
| |
| | rowspan="1" | '''Duke Haborym''' <br> [[File:Duke Haborym.png|frameless|250px]] || rowspan="1" | 115 || rowspan="1" | Castle Zvahl Baileys || rowspan="1" | (G-7) || rowspan="1" | 1 hour || '''Cizin Breeches'''[[File:Cizin Breeches.png|frameless]] || 25%
| |
| |-
| |
| | colspan = "7" style="background-color:#000000;" |
| |
| |-
| |
| | rowspan="1" | '''Grand Duke Batym''' <br> [[File:Grand Duke Batym.png|frameless|250px]] || rowspan="1" | 115 || rowspan="1" | Castle Zvahl Baileys || rowspan="1" | (G-8) || rowspan="1" | 1 hour || '''Gendewitha Caubeen''' [[File:Gendewitha Caubeen.png|frameless]] || 25%
| |
| |-
| |
| | colspan = "7" style="background-color:#000000;" |
| |
| |-
| |
| | rowspan="1" | '''Marquis Allocen''' <br> [[File:Marquis Allocen.png|frameless|250px]] || rowspan="1" | 115 || rowspan="1" | Castle Zvahl Baileys || rowspan="1" | (H-7) || rowspan="1" | 1 hour || '''Gendewitha Bliaut'''[[File:Gendewitha Bliaut.png|frameless]] || 25%
| |
| |-
| |
| | colspan = "7" style="background-color:#000000;" |
| |
| |-
| |
| | rowspan="1" | '''Marquis Amon''' <br> [[File:Marquis Amon.png|frameless|250px]] || rowspan="1" | 115 || rowspan="1" | Castle Zvahl Baileys || rowspan="1" | (G-7) || rowspan="1" | 1 hour || '''Gendewitha Gages'''[[File:Gendewitha Gages.png|frameless]] || 25%
| |
| |-
| |
| | colspan = "7" style="background-color:#000000;" |
| |
| |-
| |
| | rowspan="1" | '''Marquis Andrealphus''' <br> [[File:Marquis Andrealphus.png|frameless|250px]] || rowspan="1" | 115 || rowspan="1" | Castle Zvahl Baileys || rowspan="1" | (I-8) <br> Map 2 || rowspan="1" | 1 hour || '''Otronif Boots'''[[File:Otronif Boots.png|frameless]] || 25%
| |
| |-
| |
| | colspan = "7" style="background-color:#000000;" |
| |
| |-
| |
| | rowspan="1" | '''Marquis Naberius''' <br> [[File:Marquis Naberius.png|frameless|250px]] || rowspan="1" | 115 || rowspan="1" | Castle Zvahl Baileys || rowspan="1" | (I-6) || rowspan="1" | 1 hour || '''Cizin Greaves'''[[File:Cizin Greaves.png|frameless]] || 25%
| |
| |-
| |
| | colspan = "7" style="background-color:#000000;" |
| |
| |-
| |
| | rowspan="1" | '''Baron Vapula''' <br> [[File:Baron Vapula.png|frameless|250px]] || rowspan="1" | 115 || rowspan="1" | Castle Zvahl Keep || rowspan="1" | (G-8) || rowspan="1" | 1 hour || '''Cizin Helm'''[[File:Cizin Helm.png|frameless]] || 25%
| |
| |-
| |
| | colspan = "7" style="background-color:#000000;" |
| |
| |- | |
| | rowspan="2" | '''Baronet Romwe''' <br> [[File:Baronet Romwe.png|frameless|250px]] || rowspan="2" | 115 || rowspan="2" | Castle Zvahl Keep || rowspan="2" | (I-7) || rowspan="2" | 1 hour || '''Beatific Shield'''[[File:Beatific Shield.png|frameless]] || 25% | |
| |-
| |
| | '''Iuitl Gaiters'''[[File:Iuitl Gaiters.png|frameless]] || 25%
| |
| |-
| |
| | colspan = "7" style="background-color:#000000;" |
| |
| |-
| |
| | rowspan="1" | '''Count Bifrons''' <br> [[File:Count Bifrons.png|frameless|250px]] || rowspan="1" | 115 || rowspan="1" | Castle Zvahl Keep || rowspan="1" | (I-9) || rowspan="1" | 1 hour || '''Cizin Mail'''[[File:Cizin Mail.png|frameless]] || 25% | |
| |-
| |
| | colspan = "7" style="background-color:#000000;" |
| |
| |-
| |
| | rowspan="1" | '''Viscount Morax''' <br> [[File:Viscount Morax.png|frameless|250px]] || rowspan="1" | 115 || rowspan="1" | Castle Zvahl Keep || rowspan="1" | (G-10) || rowspan="1" | 1 hour || '''Cizin Mufflers'''[[File:Cizin Mufflers.png|frameless]] || 25%
| |
| |-
| |
| | colspan = "7" style="background-color:#000000;" |
| |
| |- | |
| | rowspan="1" | '''Blubbery Bulge''' <br> [[File:Blubbery Bulge.png|frameless|250px]] || rowspan="1" | 115 || rowspan="1" | Davoi || rowspan="1" | (E-10) || rowspan="1" | 1 hour || '''Iuitl Headgear'''[[File:Iuitl Headgear.png|frameless]] || 25% | |
| |-
| |
| | colspan = "7" style="background-color:#000000;" |
| |
| |-
| |
| | rowspan="1" | '''Dirtyhanded Gochakzuk''' <br> [[File:Dirtyhanded Gochakzuk.png|frameless|250px]] || rowspan="1" | 115 || rowspan="1" | Davoi || rowspan="1" | (H-8) || rowspan="1" | 1 hour || '''Iuitl Vest'''[[File:Iuitl Vest.png|frameless]] || 25%
| |
| |-
| |
| | colspan = "7" style="background-color:#000000;" |
| |
| |-
| |
| | rowspan="1" | '''Hawkeyed Dnatbat''' <br> [[File:Hawkeyed Dnatbat.png|frameless|250px]] || rowspan="1" | 115 || rowspan="1" | Davoi || rowspan="1" | (L-9) || rowspan="1" | 1 hour || '''Hagondes Cuffs'''[[File:Hagondes Cuffs.png|frameless]] || 25%
| |
| |-
| |
| | colspan = "7" style="background-color:#000000;" |
| |
| |-
| |
| | rowspan="1" | '''Poisonhand Gnadgad''' <br> [[File:Poisonhand Gnadgad.png|frameless|250px]] || rowspan="1" | 115 || rowspan="1" | Davoi || rowspan="1" | (G-6) || rowspan="1" | 1 hour || '''Hagondes Pants'''[[File:Hagondes Pants.png|frameless]] || 25%
| |
| |-
| |
| | colspan = "7" style="background-color:#000000;" |
| |
| |-
| |
| | rowspan="1" | '''Steelbiter Gudrud''' <br> [[File:Steelbiter Gudrud.png|frameless|250px]] || rowspan="1" | 115 || rowspan="1" | Davoi || rowspan="1" | (K-10) || rowspan="1" | 1 hour || '''Hagondes Sabots'''[[File:Hagondes Sabots.png|frameless]] || 25%
| |
| |-
| |
| | colspan = "7" style="background-color:#000000;" |
| |
| |-
| |
| | rowspan="1" | '''Tigerbane Bakdak''' <br> [[File:Tigerbane Bakdak.png|frameless|250px]] || rowspan="1" | 115 || rowspan="1" | Davoi || rowspan="1" | (J-7) || rowspan="1" | 1 hour || '''Otronif Mask'''[[File:Otronif Mask.png|frameless]] || 25%
| |
| |} | | |} |
|
| |
|