|
|
| (17 intermediate revisions by the same user not shown) |
| Line 8: |
Line 8: |
| DNANM - Definitely Not Arbitrary Notorious Monster <br> | | DNANM - Definitely Not Arbitrary Notorious Monster <br> |
|
| |
|
| <!--
| | == Non Item Level Equipment == |
| == FANMs == | | {| class="wikitable mw-collapsible mw-collapsed" style="text-align: center"; width="1280px;" |
| | ! scope="row" colspan="7" style="text-align: left" | FANMs - Salvage & Nyzul Isle Armor (Level 99) |
| | |- |
| | | '''[[Bloody Bones]]''' || '''[[Lamie No. 7]]''' || '''[[Energetic Eruca]]''' || '''[[Garfurlar the Rabid]]''' || '''[[Jaded Jody]]''' || '''[[Lamie No. 8]]''' |
| | |- |
| | | style="width: 200px;" | [[File:Bloody Bones.png|frameless|center|200px|link=[[Bloody Bones]]]] || style="width: 200px;" | [[File:Lamie No. 7.png|frameless|center|200px|link=[[Lamie No. 7]]]] || style="width: 200px;" | [[File:Energetic Eruca.png|frameless|center|200px|link=[[Energetic Eruca]]]] || style="width: 200px;" | [[File:Garfurlar the Rabid.png|frameless|center|200px|link=[[Garfurlar the Rabid]]]] || style="width: 200px;" | [[File:Jaded Jody.png|frameless|center|200px|link=[[Jaded Jody]]]] || style="width: 200px;" | [[File:Lamie No. 8.png|frameless|center|200px|link=[[Lamie No. 8]]]] |
| | |- |
| | | '''[[Bluestreak Gyugyuroon]]''' || '''[[Peallaidh]]''' || '''[[Zikko]]''' || '''[[Kirlirger the Abhorrent]]''' || '''[[Mythril Mouth Monamaq]]''' || '''[[Dragonscaled Bugaal Ja]]''' |
| | |- |
| | | style="width: 200px;" | [[File:Bluestreak Gyugyuroon.png|frameless|center|200px|link=[[Bluestreak Gyugyuroon]]]] || style="width: 200px;" | [[File:Peallaidh.png|frameless|center|200px|link=[[Peallaidh]]]] || style="width: 200px;" | [[File:Zikko.png|frameless|center|200px|link=[[Zikko]]]] || style="width: 200px;" | [[File:Kirlirger the Abhorrent.png|frameless|center|200px|link=[[Kirlirger the Abhorrent]]]] || style="width: 200px;" | [[File:Mythril Mouth Monamaq.png|frameless|center|200px|link=[[Mythril Mouth Monamaq]]]] || style="width: 200px;" | [[File:Dragonscaled Bugaal Ja.png|frameless|center|200px|link=[[Dragonscaled Bugaal Ja]]]] |
| | |- |
| | | scope="row" colspan="1" | '''[[Zizzy Zillah]]''' |
| | |- |
| | | style="width: 200px;" | [[File:Zizzy Zillah.png|frameless|center|200px|link=[[Zizzy Zillah]]]] || style="width: 200px;" | || style="width: 200px;" | || style="width: 200px;" | || style="width: 200px;" | || style="width: 200px;" | |
| | |} |
|
| |
|
| {| class="wikitable mw-collapsible mw-collapsed" style="text-align: center"; width="1280px;" | | {| class="wikitable mw-collapsible mw-collapsed" style="text-align: center"; width="1280px;" |
| ! scope="row" colspan="7" | Non-Item Level Gear and Accessories | | ! scope="row" colspan="7" style="text-align: left" | FANMs - Limbus/Ultima/Omega Armor (Level 99) |
| |- style="vertical-align: bottom;"
| | |- |
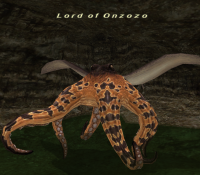
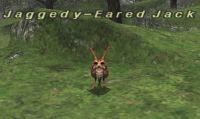
| | scope="row" colspan="1" | [[File:Lord of Onzozo.png|frameless|150px|link=[[Lord of Onzozo]]]] <br> '''[[Lord of Onzozo]]''' || ! scope="row" colspan="1" | [[File:Aiatar.png|frameless|150px|link=[[Aiatar]]]] <br> '''[[Aiatar]]''' || ! scope="row" colspan="1" | [[File:Cactrot Rapido.png|frameless|150px|link=[[Cactrot Rapido]]]] <br> '''[[Cactrot Rapido]]''' || ! scope="row" colspan="1" | [[File:Bloodsucker.png|frameless|150px|link=[[Bloodsucker]]]] <br> '''[[Bloodsucker]]''' || ! scope="row" colspan="1" | [[File:Jaggedy-Eared Jack.png|frameless|150px|link=[[Jaggedy-Eared Jack]]]] <br> '''[[Jaggedy-Eared Jack]]''' || ! scope="row" colspan="1" | [[File:Spiny Spipi.png|frameless|150px|link=[[Spiny Spipi]]]] <br> '''[[Spiny Spipi]]''' || ! scope="row" colspan="1" | [[File:Bubbly Bernie.png|frameless|150px|link=[[Bubbly Bernie]]]] <br> '''[[Bubbly Bernie]]'''
| | | '''[[Citipati]]''' || '''[[Goaftrap]]''' || '''[[Intulo]]''' || '''[[Tempest Tigon]]''' |
| |- style="vertical-align: bottom;" | | |- |
| | scope="row" colspan="1" | [[File:Beet Leafhopper.png|frameless|150px|link=[[Beet Leafhopper]]]] <br> '''[[Beet Leafhopper]]''' || ! scope="row" colspan="1" | [[File:Garharlor the Unruly.png|frameless|150px|link=[[Garharlor the Unruly]]]] <br> '''[[Garharlor the Unruly]]''' || ! scope="row" colspan="1" | [[File:Antican Praefectus.png|frameless|150px|link=[[Antican Praefectus]]]] <br> '''[[Antican Praefectus]]''' || ! scope="row" colspan="1" | [[File:Centurio X-I.png|frameless|150px|link=[[Centurio X-I]]]] <br> '''[[Centurio X-I]]''' || ! scope="row" colspan="1" | [[File:Proconsul XII.png|frameless|150px|link=[[Proconsul XII]]]] <br> '''[[Proconsul XII]]''' || ! scope="row" colspan="1" | [[File:Fyuu the Seabellow.png|frameless|150px|link=[[Fyuu the Seabellow]]]] <br> '''[[Fyuu the Seabellow]]''' || ! scope="row" colspan="1" | [[File:Mouu the Waverider.png|frameless|150px|link=[[Mouu the Waverider]]]] <br> '''[[Mouu the Waverider]]''' | | | style="width: 200px;" | [[File:Citipati.png|frameless|center|200px|link=[[Citipati]]]] || style="width: 200px;" | [[File:Goaftrap.png|frameless|center|200px|link=[[Goaftrap]]]] || style="width: 200px;" | [[File:Intulo.png|frameless|center|200px|link=[[Intulo]]]] || style="width: 200px;" | [[File:Tempest Tigon.png|frameless|center|200px|link=[[Tempest Tigon]]]] || style="width: 200px;" | || style="width: 200px;" | |
| |- style="vertical-align: bottom;" | |
| | scope="row" colspan="1" | [[File:Namtar.png|frameless|150px|link=[[Namtar]]]] <br> '''[[Namtar]]''' || ! scope="row" colspan="1" | [[File:Pahh the Gullcaller.png|frameless|150px|link=[[Pahh the Gullcaller]]]] <br> '''[[Pahh the Gullcaller]]''' || ! scope="row" colspan="1" | [[File:Qull the Shellbuster.png|frameless|150px|link=[[Qull the Shellbuster]]]] <br> '''[[Qull the Shellbuster]]''' || ! scope="row" colspan="1" | [[File:Seww the Squidlimbed.png|frameless|150px|link=[[Seww the Squidlimbed]]]] <br> '''[[Seww the Squidlimbed]]''' || ! scope="row" colspan="1" | [[File:Voll the Sharkfinned.png|frameless|150px|link=[[Voll the Sharkfinned]]]] <br> '''[[Voll the Sharkfinned]]''' || ! scope="row" colspan="1" | [[File:Wuur the Sandcomber.png|frameless|150px|link=[[Wuur the Sandcomber]]]] <br> '''[[Wuur the Sandcomber]]''' || ! scope="row" colspan="1" | [[File:Zuug the Shoreleaper.png|frameless|150px|link=[[Zuug the Shoreleaper]]]] <br> '''[[Zuug the Shoreleaper]]'''
| |
| |- style="vertical-align: bottom;"
| |
| | scope="row" colspan="1" | [[File:Gargantua.png|frameless|150px|link=[[Gargantua]]]] <br> '''[[Gargantua]]''' || ! scope="row" colspan="1" | [[File:Humbaba.png|frameless|150px|link=[[Humbaba]]]] <br> '''[[Humbaba]]''' || ! scope="row" colspan="1" | [[File:Nue.png|frameless|150px|link=[[Nue]]]] <br> '''[[Nue]]''' || ! scope="row" colspan="1" | [[File:Capricious Cassie.png|frameless|150px|link=[[Capricious Cassie]]]] <br> '''[[Capricious Cassie]]''' || ! scope="row" colspan="1" | [[File:Stray Mary.png|frameless|150px|link=[[Stray Mary]]]] <br> '''[[Stray Mary]]''' || ! scope="row" colspan="1" | [[File:Lumbering Lambert.png|frameless|150px|link=[[Lumbering Lambert]]]] <br> '''[[Lumbering Lambert]]''' || ! scope="row" colspan="1" | [[File:Rampaging Ram.JPG|frameless|150px|link=[[Rampaging Ram]]]] <br> '''[[Rampaging Ram]]'''
| |
| |- style="vertical-align: bottom;"
| |
| | scope="row" colspan="1" | [[File:Serpopard Ishtar.png|frameless|150px|link=[[Serpopard Ishtar]]]] <br> '''[[Serpopard Ishtar]]''' || ! scope="row" colspan="1" | [[File:Observant Zekka.png|frameless|150px|link=[[Observant Zekka]]]] <br> '''[[Observant Zekka]]''' || ! scope="row" colspan="1" | [[File:Shen.png|frameless|150px|link=[[Shen]]]] <br> '''[[Shen]]''' || ! scope="row" colspan="1" | [[File:Numbing Norman.png|frameless|150px|link=[[Numbing Norman]]]] <br> '''[[Numbing Norman]]''' || ! scope="row" colspan="1" | [[File:Habergoass.png|frameless|150px|link=[[Habergoass]]]] <br> '''[[Habergoass]]''' || ! scope="row" colspan="1" | [[File:Muq Shabeel.png|frameless|150px|link=[[Muq Shabeel]]]] <br> '''[[Muq Shabeel]]''' || ! scope="row" colspan="1" | [[File:Nunyenunc.png|frameless|150px|link=[[Nunyenunc]]]] <br> '''[[Nunyenunc]]'''
| |
| |- style="vertical-align: bottom;"
| |
| | scope="row" colspan="1" | [[File:Taisaijin.png|frameless|150px|link=[[Taisaijin]]]] <br> '''[[Taisaijin]]''' || ! scope="row" colspan="1" | [[File:Dread Dealing Dredodak.png|frameless|150px|link=[[Dread Dealing Dredodak]]]] <br> '''[[Dread Dealing Dredodak]]''' || ! scope="row" colspan="1" | [[File:Swashstox Beadblinker.png|frameless|150px|link=[[Swashtox Beadblinker]]]] <br> '''[[Swashstox Beadblinker]]''' || ! scope="row" colspan="1" | [[File:Skogs Fru.png|frameless|150px|link=[[Skogs Fru]]]] <br> '''[[Skogs Fru]]''' || ! scope="row" colspan="1" | [[File:Koropokkur.png|frameless|150px|link=[[Koropokkur]]]] <br> '''[[Koropokkur]]''' || ! scope="row" colspan="1" | [[File:Bune.png|frameless|150px|link=[[Bune]]]] <br> '''[[Bune]]''' || ! scope="row" colspan="1" | [[File:Suu Xicu the Cantabile.png|frameless|150px|link=[[Suu Xicu the Cantabile]]]] <br> '''[[Suu Xicu the Cantabile]]'''
| |
| |} | | |} |
| -->
| |
| == Non Item Level Equipment ==
| |
|
| |
|
| {| class="wikitable mw-collapsible mw-collapsed" style="text-align: center"; width="1280px;" | | {| class="wikitable mw-collapsible mw-collapsed" style="text-align: center"; width="1280px;" |
| ! scope="row" colspan="7" style="text-align: left" | ANM's - Weapons | | ! scope="row" colspan="7" style="text-align: left" | ANMs - Weapons |
| |- | | |- |
| | '''[[Lord of Onzozo]]''' || '''[[Aiatar]]''' | | | '''[[Lord of Onzozo]]''' || '''[[Aiatar]]''' |
| Line 38: |
Line 42: |
|
| |
|
| {| class="wikitable mw-collapsible mw-collapsed" style="text-align: center"; width="1280px;" | | {| class="wikitable mw-collapsible mw-collapsed" style="text-align: center"; width="1280px;" |
| ! scope="row" colspan="7" style="text-align: left" | ANM's - Feet | | ! scope="row" colspan="7" style="text-align: left" | ANMs - Feet |
| |- | | |- |
| | scope="row" colspan="1" | '''[[Cactrot Rapido]]''' | | | scope="row" colspan="1" | '''[[Cactrot Rapido]]''' |
| Line 46: |
Line 50: |
|
| |
|
| {| class="wikitable mw-collapsible mw-collapsed" style="text-align: center"; width="1280px;" | | {| class="wikitable mw-collapsible mw-collapsed" style="text-align: center"; width="1280px;" |
| ! scope="row" colspan="7" style="text-align: left" | ANM's - Accessories (Neck/Earrings/Rings/Back/Waist/Instruments) | | ! scope="row" colspan="7" style="text-align: left" | ANMs - Accessories (Neck/Earrings/Rings/Back/Waist/Instruments) |
| |- | | |- |
| | '''[[Bloodsucker]]''' || '''[[Geush Urvan]]''' || '''[[Jaggedy-Eared Jack]]''' || '''[[Spiny Spipi]]''' || '''[[Bubbly Bernie]]''' || '''[[Beet Leafhopper]]''' | | | '''[[Bloodsucker]]''' || '''[[Geush Urvan]]''' || '''[[Jaggedy-Eared Jack]]''' || '''[[Spiny Spipi]]''' || '''[[Bubbly Bernie]]''' || '''[[Beet Leafhopper]]''' |
| Line 74: |
Line 78: |
|
| |
|
| {| class="wikitable mw-collapsible mw-collapsed" style="text-align: center"; width="1280px;" | | {| class="wikitable mw-collapsible mw-collapsed" style="text-align: center"; width="1280px;" |
| ! scope="row" colspan="7" style="text-align: left" | ANM's - Quest Items | | ! scope="row" colspan="7" style="text-align: left" | ANMs - Quest Items |
| |- | | |- |
| | '''[[Ziphius]]''' || | | | '''[[Ziphius]]''' || |
| Line 81: |
Line 85: |
| |} | | |} |
|
| |
|
| == Salvage & Nyzul Isle Armor (Level 99) == | | == Skirmish Weapons (Level 105) & Coalition Armor (Level 106) == |
|
| |
|
| {| class="wikitable mw-collapsible mw-collapsed" style="text-align: center"; width="1280px;" | | {| class="wikitable mw-collapsible mw-collapsed" style="text-align: center"; width="1280px;" |
| ! scope="row" colspan="7" style="text-align: left" | FANM's - Salvage & Nyzul Isle Armor (Level 99) | | ! scope="row" colspan="7" style="text-align: left" | FANMs |
| |-
| |
| | '''[[Bloody Bones]]''' || '''[[Lamie No. 7]]''' || '''[[Energetic Eruca]]''' || '''[[Garfurlar the Rabid]]''' || '''[[Jaded Jody]]''' || '''[[Lamie No. 8]]'''
| |
| |-
| |
| | style="width: 200px;" | [[File:Bloody Bones.png|frameless|center|200px|link=[[Bloody Bones]]]] || style="width: 200px;" | [[File:Lamie No. 7.png|frameless|center|200px|link=[[Lamie No. 7]]]] || style="width: 200px;" | [[File:Energetic Eruca.png|frameless|center|200px|link=[[Energetic Eruca]]]] || style="width: 200px;" | [[File:Garfurlar the Rabid.png|frameless|center|200px|link=[[Garfurlar the Rabid]]]] || style="width: 200px;" | [[File:Jaded Jody.png|frameless|center|200px|link=[[Jaded Jody]]]] || style="width: 200px;" | [[File:Lamie No. 8.png|frameless|center|200px|link=[[Lamie No. 8]]]]
| |
| |-
| |
| | '''[[Bluestreak Gyugyuroon]]''' || '''[[Peallaidh]]''' || '''[[Zikko]]''' || '''[[Kirlirger the Abhorrent]]''' || '''[[Mythril Mouth Monamaq]]''' || '''[[Dragonscaled Bugaal Ja]]'''
| |
| |-
| |
| | style="width: 200px;" | [[File:Bluestreak Gyugyuroon.png|frameless|center|200px|link=[[Bluestreak Gyugyuroon]]]] || style="width: 200px;" | [[File:Peallaidh.png|frameless|center|200px|link=[[Peallaidh]]]] || style="width: 200px;" | [[File:Zikko.png|frameless|center|200px|link=[[Zikko]]]] || style="width: 200px;" | [[File:Kirlirger the Abhorrent.png|frameless|center|200px|link=[[Kirlirger the Abhorrent]]]] || style="width: 200px;" | [[File:Mythril Mouth Monamaq.png|frameless|center|200px|link=[[Mythril Mouth Monamaq]]]] || style="width: 200px;" | [[File:Dragonscaled Bugaal Ja.png|frameless|center|200px|link=[[Dragonscaled Bugaal Ja]]]]
| |
| |-
| |
| | scope="row" colspan="1" | '''[[Zizzy Zillah]]'''
| |
| |-
| |
| | style="width: 200px;" | [[File:Zizzy Zillah.png|frameless|center|200px|link=[[Zizzy Zillah]]]] || style="width: 200px;" | || style="width: 200px;" | || style="width: 200px;" | || style="width: 200px;" | || style="width: 200px;" |
| |
| |}
| |
| | |
| == Limbus/Ultima/Omega Armor (Level 99) ==
| |
| | |
| {| class="wikitable mw-collapsible mw-collapsed" style="text-align: center"; width="1000px;"
| |
| ! scope="row" colspan="7" | FANM's
| |
| |-
| |
| | style="background-color:#cfcfcf;" | '''Notorious Monster''' || style="background-color:#cfcfcf;" | '''Level''' || style="background-color:#cfcfcf;" | '''Zone''' || style="background-color:#cfcfcf;" | '''Position''' || style="background-color:#cfcfcf;" | '''Respawn''' || style="background-color:#cfcfcf;" | '''Reward''' || style="background-color:#cfcfcf;" | '''Drop Chance'''
| |
| |-
| |
| | rowspan="5" | '''Citipati''' <br> [[File:Citipati.png|frameless|250px]] || rowspan="5" | 105 || rowspan="5" | Attohwa Chasm || rowspan="5" | (F-8) || rowspan="5" | 1 hour || '''Murzim Zucchetto'''[[File:Murzim_Zucchetto.png|frameless]] || 20%
| |
| |-
| |
| |'''Shedir Manteel''' [[File:Shedir_Manteel.png|frameless]] || 20%
| |
| |-
| |
| | '''Enif Manopolas'''[[File:Enif_Manopolas.png|frameless]] || 20%
| |
| |-
| |
| | '''Adhara Seraweels'''[[File:Adhara_Seraweels.png|frameless]] || 20%
| |
| |-
| |
| | '''Murzim Gambieras'''[[File:Murzim_Gambieras.png|frameless]] || 20%
| |
| |-
| |
| | colspan = "7" style="background-color:#000000;" |
| |
| |-
| |
| | rowspan="5" | '''Goaftrap''' <br> [[File:Goaftrap.png|frameless|250px]] || rowspan="5" | 105 || rowspan="5" | Misareaux Coast || rowspan="5" | (L-11) || rowspan="5" | 1 hour || '''Enif Zucchetto'''[[File:Enif_Zucchetto.png|frameless]] || 20%
| |
| |-
| |
| | '''Shedir Turban'''[[File:Shedir_Turban.png|frameless]] || 20%
| |
| |-
| |
| | '''Adhara Manteel'''[[File:Adhara_Manteel.png|frameless]] || 20%
| |
| |-
| |
| | '''Murzim Cosciales'''[[File:Murzim_Cosciales.png|frameless]] || 20%
| |
| |-
| |
| | '''Shedir Crackows'''[[File:Shedir_Crackows.png|frameless]] || 20%
| |
| |-
| |
| | colspan = "7" style="background-color:#000000;" |
| |
| |-
| |
| | rowspan="5" | '''Intulo''' <br> [[File:Intulo.png|frameless|250px]] || rowspan="5" | 105 || rowspan="5" | Bibiki Bay || rowspan="5" | (I-7) <br> Map 1 || rowspan="5" | 1 hour || '''Enif Corazza'''[[File:Enif_Corazza.png|frameless]] || 20%
| |
| |-
| |
| | '''Murzim Corazza'''[[File:Murzim_Corazza.png|frameless]] || 20%
| |
| |-
| |
| |'''Shedir Gages''' [[File:Shedir_Gages.png|frameless]] || 20%
| |
| |-
| |
| |'''Enif Cosciales''' [[File:Enif_Cosciales.png|frameless]] || 20%
| |
| |-
| |
| | '''Adhara Crackows'''[[File:Adhara_Crackows.png|frameless]] || 20%
| |
| |-
| |
| | colspan = "7" style="background-color:#000000;" |
| |
| |-
| |
| | rowspan="5" | '''Tempest Tigon''' <br> [[File:Tempest Tigon.png|frameless|250px]] || rowspan="5" | 105 || rowspan="5" | Carpenter's Landing || rowspan="5" | (G-9) <br> Map 1 || rowspan="5" | 1 hour || '''Adhara Turban'''[[File:Adhara_Turban.png|frameless]] || 20%
| |
| |- | | |- |
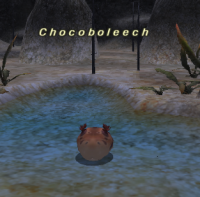
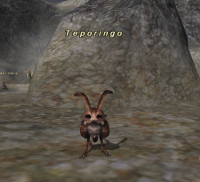
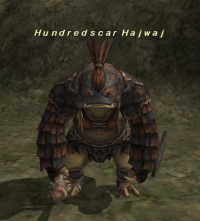
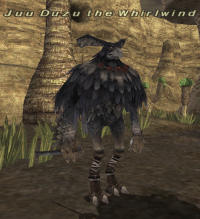
| | '''Adhara Gages'''[[File:Adhara_Gages.png|frameless]] || 20% | | | '''[[Chocoboleech]]''' || '''[[Teporingo]]''' || '''[[Hundredscar Hajwaj]]''' || '''[[Thousandarm Deshglesh]]''' || '''[[Hoo Mjuu the Torrent]]''' || '''[[Juu Duzu the Whirlwind]]''' |
| |- | | |- |
| |'''Murzim Manopolas''' [[File:Murzim_Manopolas.png|frameless]] || 20% | | | style="width: 200px;" | [[File:Chocoboleech.png|frameless|center|200px|link=[[Chocoboleech]]]] || style="width: 200px;" | [[File:Teporingo.png|frameless|center|200px|link=[[Teporingo]]]] || style="width: 200px;" | [[File:Hundredscar Hajwaj.png|frameless|center|200px|link=[[Hundredscar Hajwaj]]]] || style="width: 200px;" | [[File:Thousandarm Deshglesh.png|frameless|center|200px|link=[[Thousandarm Deshglesh]]]] || style="width: 200px;" | [[File:Hoo Mjuu the Torrent.png|frameless|center|200px|link=[[Hoo Mjuu the Torrent]]]] || style="width: 200px;" | [[File:Juu Duzu the Whirlwind.png|frameless|center|200px|link=[[Juu Duzu the Whirlwind]]]] |
| |- | | |- |
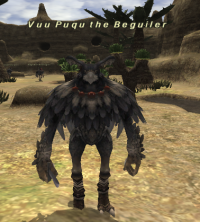
| | '''Shedir Seraweels'''[[File:Shedir_Seraweels.png|frameless]] || 20% | | | '''[[Vuu Puqu the Beguiler]]''' || '''[[Bu'Ghi Howlblade]]''' || '''[[No'Mho Crimsonarmor]]''' || '''[[Zi'Ghi Boneeater]]''' || || |
| |- | | |- |
| | '''Enif Gambieras'''[[File:Enif_Gambieras.png|frameless]] || 20% | | | style="width: 200px;" | [[File:Vuu Puqu the Beguiler.png|frameless|center|200px|link=[[Vuu Puqu the Beguiler]]]] || style="width: 200px;" | [[File:Bu'Ghi Howlblade.png|frameless|center|200px|link=[[Bu'Ghi Howlblade]]]] || style="width: 200px;" | [[File:No'Mho Crimsonarmor.png|frameless|center|200px|link=[[No'Mho Crimsonarmor]]]] || style="width: 200px;" | [[File:Zi'Ghi Boneeater.png|frameless|center|200px|link=[[Zi'Ghi Boneeater]]]] || style="width: 200px;" | || style="width: 200px;" | |
| |}
| |
| | |
| == Skirmish Weapons (Level 105) & Coalition Armor (Level 106) ==
| |
| | |
| {| class="wikitable mw-collapsible mw-collapsed" style="text-align: center"; width="1000px;"
| |
| ! scope="row" colspan="7" | FANM's
| |
| |-
| |
| | style="background-color:#cfcfcf;" | '''Notorious Monster''' || style="background-color:#cfcfcf;" | '''Level''' || style="background-color:#cfcfcf;" | '''Zone''' || style="background-color:#cfcfcf;" | '''Position''' || style="background-color:#cfcfcf;" | '''Respawn''' || style="background-color:#cfcfcf;" | '''Reward''' || style="background-color:#cfcfcf;" | '''Drop Chance'''
| |
| |-
| |
| | rowspan="3" | '''Chocoboleech''' <br> [[File:Chocoboleech.png|frameless|250px]] || rowspan="3" | 105 || rowspan="3" | Dangruf Wadi || rowspan="3" | (F-9) || rowspan="3" | 1 hour || '''Lehbrailg'''[[File:Lehbrailg.png|frameless]] || 33%
| |
| |-
| |
| | '''Uffrat'''[[File:Uffrat.png|frameless]] || 33%
| |
| |-
| |
| |'''Gorney Brayettes''' [[File:Gorney Brayettes.png|frameless]] || 33%
| |
| |-
| |
| | colspan = "7" style="background-color:#000000;" |
| |
| |-
| |
| | rowspan="3" | '''Teporingo''' <br> [[File:Teporingo.png|frameless|250px]] || rowspan="3" | 105 || rowspan="3" | Dangruf Wadi || rowspan="3" | (I-9) || rowspan="3" | 1 hour || '''Bocluamni'''[[File:Bocluamni.png|frameless]] || 33%
| |
| |-
| |
| | '''Hgafircian'''[[File:Hgafircian.png|frameless]] || 33%
| |
| |-
| |
| |'''Shneddick Tights''' [[File:Shneddick Tights.png|frameless]] || 33%
| |
| |- | |
| | colspan = "7" style="background-color:#000000;" |
| |
| |-
| |
| | rowspan="3" | '''Hundredscar Hajwaj''' <br> [[File:Hundredscar_Hajwaj.png|frameless|250px]] || rowspan="3" | 105 || rowspan="3" | Fort Ghelsba || rowspan="3" | (H-9) || rowspan="3" | 1 hour || '''Iztaasu'''[[File:Iztaasu.png|frameless]] || 33%
| |
| |-
| |
| | '''Weatherspoon Corona'''[[File:Weatherspoon Corona.png|frameless]] || 33%
| |
| |-
| |
| | '''Gorney Haubert'''[[File:Gorney Haubert.png|frameless]] || 33%
| |
| |-
| |
| | colspan = "7" style="background-color:#000000;" |
| |
| |-
| |
| | rowspan="3" | '''Thousandarm Deshglesh''' <br> [[File:Thousandarm_Deshglesh.png|frameless|250px]] || rowspan="3" | 105 || rowspan="3" | Ghelsba Outpost || rowspan="3" | (J-6) || rowspan="3" | 1 hour || '''Schichishito'''[[File:Shichishito.png|frameless]] || 33%
| |
| |-
| |
| | '''Weatherspoon Pants'''[[File:Weatherspoon Pants.png|frameless]] || 33% | |
| |-
| |
| | '''Shneddick Boots'''[[File:Shneddick Boots.png|frameless]] || 33%
| |
| |-
| |
| | colspan = "7" style="background-color:#000000;" |
| |
| |-
| |
| | rowspan="3" | '''Hoo Mjuu the Torrent''' <br> [[File:Hoo_Mjuu_the_Torrent.png|frameless|250px]] || rowspan="3" | 105 || rowspan="3" | Giddeus || rowspan="3" | (H-9) || rowspan="3" | 1 hour || '''Leisilonu'''[[File:Leisilonu.png|frameless]] || 33%
| |
| |-
| |
| | '''Shneddick Tabard'''[[File:Shneddick Tabard.png|frameless]] || 33%
| |
| |-
| |
| | '''Weatherspoon Cuffs'''[[File:Weatherspoon Cuffs.png|frameless]] || 33%
| |
| |-
| |
| | colspan = "7" style="background-color:#000000;" |
| |
| |-
| |
| | rowspan="3" | '''Juu Duzu the Whirlwind''' <br> [[File:Juu_Duzu_the_Whirlwind.png|frameless|250px]] || rowspan="3" | 105 || rowspan="3" | Giddeus || rowspan="3" | (J-11) || rowspan="3" | 1 hour || '''Qatsunoci'''[[File:Qatsunoci.png|frameless]] || 33%
| |
| |- | |
| | '''Shneddick Gloves'''[[File:Shneddick Gloves.png|frameless]] || 33%
| |
| |-
| |
| |'''Gorney Sollerets''' [[File:Gorney Sollerets.png|frameless]] || 33%
| |
| |-
| |
| | colspan = "7" style="background-color:#000000;" |
| |
| |-
| |
| | rowspan="3" | '''Vuu Puqu the Beguiler''' <br> [[File:Vuu_Puqu_the_Beguiler.png|frameless|250px]] || rowspan="3" | 105 || rowspan="3" | Giddeus || rowspan="3" | (H-14) || rowspan="3" | 1 hour ||'''Aedold''' [[File:Aedold.png|frameless]] || 33%
| |
| |-
| |
| | '''Crobaci'''[[File:Crobaci.png|frameless]] || 33%
| |
| |-
| |
| |'''Weatherspoon Souliers''' [[File:Weatherspoon Souliers.png|frameless]] || 33%
| |
| |-
| |
| | colspan = "7" style="background-color:#000000;" |
| |
| |-
| |
| | rowspan="3" | '''Bu'Ghi Howlblade''' <br> [[File:BuGhi_Howlblade.png|frameless|250px]] || rowspan="3" | 105 || rowspan="3" | Palborough Mines || rowspan="3" | (I-7) || rowspan="3" | 1 hour || '''Ninzas'''[[File:Ninzas.png|frameless]] || 33%
| |
| |-
| |
| |'''Gorney Morion''' [[File:Gorney Morion.png|frameless]] || 33%
| |
| |-
| |
| | '''Shneddick Chapeau'''[[File:Shneddick Chapeau.png|frameless]] || 33%
| |
| |-
| |
| | colspan = "7" style="background-color:#000000;" |
| |
| |-
| |
| | rowspan="3" | '''No'Mho Crimsonarmor''' <br> [[File:NoMho_Crimsonarmor.png|frameless|250px]] || rowspan="3" | 105 || rowspan="3" | Palborough Mines || rowspan="3" | (G-10) || rowspan="3" | 1 hour || '''Iizamal'''[[File:Iizamal.png|frameless]] || 33%
| |
| |-
| |
| | '''Weatherspoon Robe'''[[File:Weatherspoon Robe.png|frameless]] || 33%
| |
| |-
| |
| |'''Gorney Moufles''' [[File:Gorney Moufles.png|frameless]] || 33%
| |
| |-
| |
| | colspan = "7" style="background-color:#000000;" |
| |
| |- | |
| | rowspan="3" | '''Zi'Ghi Boneater''' <br> [[File:ZiGhi_Boneater.png|frameless|250px]] || rowspan="3" | 105 || rowspan="3" | Palborough Mines || rowspan="3" | (H-8) || rowspan="3" | 1 hour || '''Faizzeer'''[[File:Faizzeer.png|frameless]] || 33%
| |
| |-
| |
| |'''Iclamar''' [[File:Iclamar.png|frameless]] || 33%
| |
| |-
| |
| | '''Kannakiri'''[[File:Kannakiri.png|frameless]] || 33%
| |
| |-
| |
| | colspan = "7" style="background-color:#000000;" |
| |
| |} | | |} |
|
| |
|
| Line 245: |
Line 103: |
| * '''All Skirmish Armor (Level 113) can be upgraded to 119 via [[Vesca]].''' | | * '''All Skirmish Armor (Level 113) can be upgraded to 119 via [[Vesca]].''' |
|
| |
|
| {| class="wikitable mw-collapsible mw-collapsed" style="text-align: center"; width="1000px;" | | {| class="wikitable mw-collapsible mw-collapsed" style="text-align: center"; width="1280px;" |
| ! scope="row" colspan="7" | ANM's | | ! scope="row" colspan="7" style="text-align: left" | ANMs |
| |- | | |- |
| | style="background-color:#cfcfcf;" | '''Notorious Monster''' || style="background-color:#cfcfcf;" | '''Level''' || style="background-color:#cfcfcf;" | '''Zone''' || style="background-color:#cfcfcf;" | '''Position''' || style="background-color:#cfcfcf;" | '''Respawn''' || style="background-color:#cfcfcf;" | '''Reward''' || style="background-color:#cfcfcf;" | '''Drop Chance''' | | | '''[[Bi'Gho Headtaker]]''' || '''[[Da'Dha Hundredmask]]''' || '''[[Ga'Bhu Unvanquished]]''' || '''[[Ge'Dha Evileye]]''' || '''[[Zo'Khu Blackcloud]]''' || '''[[Mee Deggi the Punisher]]''' |
| |- | | |- |
| | rowspan="1" | '''Bi'Gho Headtaker''' <br> [[File:Bi'Gho Headtaker.png|frameless|250px]] || rowspan="1" | 115 || rowspan="1" | Beadeaux || rowspan="1" | (G-7) <br> Map 1 || rowspan="1" | 1 hour || '''Otronif Harness'''[[File:Otronif Harness.png|frameless]] || 25% | | | style="width: 200px;" | [[File:Bi'Gho Headtaker.png|frameless|center|200px|link=[[Bi'Gho Headtaker]]]] || style="width: 200px;" | [[File:Da'Dha Hundredmask.png|frameless|center|200px|link=[[Da'Dha Hundredmask]]]] || style="width: 200px;" | [[File:Ga'Bhu Unvanquished.png|frameless|center|200px|link=[[Ga'Bhu Unvanquished]]]] || style="width: 200px;" | [[File:Ge'Dha Evileye.png|frameless|center|200px|link=[[Ge'Dha Evileye]]]] || style="width: 200px;" | [[File:Zo'Khu Blackcloud.png|frameless|center|200px|link=[[Zo'Khu Blackcloud]]]] || style="width: 200px;" | [[File:Mee Deggi the Punisher.png|frameless|center|200px|link=[[Mee Deggi the Punisher]]]] |
| |- | | |- |
| | colspan = "7" style="background-color:#000000;" | | | | '''[[Moo Ouzi the Swiftblade]]''' || '''[[Quu Domi the Gallant]]''' || '''[[Yaa Haqa the Profane]]''' || '''[[Duke Haborym]]''' || '''[[Grand Duke Batym]]''' || '''[[Marquis Allocen]]''' |
| |- | | |- |
| | rowspan="1" | '''Da'Dha Hundredmask''' <br> [[File:Da'Dha Hundredmask.png|frameless|250px]] || rowspan="1" | 115 || rowspan="1" | Beadeaux || rowspan="1" | (G-9) <br> Map 1 || rowspan="1" | 1 hour || '''Otronif Gloves'''[[File:Otronif Gloves.png|frameless]] || 25% | | | style="width: 200px;" | [[File:Moo Ouzi the Swiftblade.png|frameless|center|200px|link=[[Moo Ouzi the Swiftblade]]]] || style="width: 200px;" | [[File:Quu Domi the Gallant.png|frameless|center|200px|link=[[Quu Domi the Gallant]]]] || style="width: 200px;" | [[File:Yaa Haqa the Profane.png|frameless|center|200px|link=[[Yaa Haqa the Profane]]]] || style="width: 200px;" | [[File:Duke Haborym.png|frameless|center|200px|link=[[Duke Haborym]]]] || style="width: 200px;" | [[File:Grand Duke Batym.png|frameless|center|200px|link=[[Grand Duke Batym]]]] || style="width: 200px;" | [[File:Marquis Allocen.png|frameless|center|200px|link=[[Marquis Allocen]]]] |
| |- | | |- |
| | colspan = "7" style="background-color:#000000;" | | | | '''[[Marquis Amon]]''' || '''[[Marquis Andrealphus]]''' || '''[[Marquis Naberius]]''' || '''[[Baron Vapula]]''' || '''[[Baronet Romwe]]''' || '''[[Count Bifrons]]''' |
| |- | | |- |
| | rowspan="1" | '''Ga'Bhu Unvanquished''' <br> [[File:Ga'Bhu Unvanquished.png|frameless|250px]] || rowspan="1" | 115 || rowspan="1" | Beadeaux|| rowspan="1" | (J-5) <br> Map 1 || rowspan="1" | 1 hour || '''Iuitl Tights'''[[File:Iuitl Tights.png|frameless]] || 25% | | | style="width: 200px;" | [[File:Marquis Amon.png|frameless|center|200px|link=[[Marquis Amon]]]] || style="width: 200px;" | [[File:Marquis Andrealphus.png|frameless|center|200px|link=[[Marquis Andrealphus]]]] || style="width: 200px;" | [[File:Marquis Naberius.png|frameless|center|200px|link=[[Marquis Naberius]]]] || style="width: 200px;" | [[File:Baron Vapula.png|frameless|center|200px|link=[[Baron Vapula]]]] || style="width: 200px;" | [[File:Baronet Romwe.png|frameless|center|200px|link=[[Baronet Romwe]]]] || style="width: 200px;" | [[File:Count Bifrons.png|frameless|center|200px|link=[[Count Bifrons]]]] |
| |- | | |- |
| | colspan = "7" style="background-color:#000000;" | | | | '''[[Viscount Morax]]''' || '''[[Blubbery Bulge]]''' || '''[[Dirtyhanded Gochakzuk]]''' || '''[[Hawkeyed Dnatbat]]''' || '''[[Poisonhand Gnadgad]]''' || '''[[Steelbiter Gudrud]]''' |
| |- | | |- |
| | rowspan="1" | '''Ge'Dha Evileye''' <br> [[File:Ge'Dha Evileye.png|frameless|250px]] || rowspan="1" | 115 || rowspan="1" | Beadeaux || rowspan="1" | (E/F-10/11) <br> Map 1 || rowspan="1" | 1 hour || '''Otronif Brais'''[[File:Otronif Brais.png|frameless]] || 25% | | | style="width: 200px;" | [[File:Viscount Morax.png|frameless|center|200px|link=[[Viscount Morax]]]] || style="width: 200px;" | [[File:Blubbery Bulge.png|frameless|center|200px|link=[[Blubbery Bulge]]]] || style="width: 200px;" | [[File:Dirtyhanded Gochakzuk.png|frameless|center|200px|link=[[Dirtyhanded Gochakzuk]]]] || style="width: 200px;" | [[File:Hawkeyed Dnatbat.png|frameless|center|200px|link=[[Hawkeyed Dnatbat]]]] || style="width: 200px;" | [[File:Poisonhand Gnadgad.png|frameless|center|200px|link=[[Poisonhand Gnadgad]]]] || style="width: 200px;" | [[File:Steelbiter Gudrud.png|frameless|center|200px|link=[[Steelbiter Gudrud]]]] |
| |- | | |- |
| | colspan = "7" style="background-color:#000000;" | | | | '''[[Tigerbane Bakdak]]''' || || || || || |
| |- | | |- |
| | rowspan="1" | '''Zo'Khu Blackcloud''' <br> [[File:Zo'Khu Blackcloud.png|frameless|250px]] || rowspan="1" | 115 || rowspan="1" | Beadeaux|| rowspan="1" | (E-11) <br> Map 1 || rowspan="1" | 1 hour || '''Iuitl Wristbands''' [[File:Iuitl Wristbands.png|frameless]] || 25% | | | style="width: 200px;" | [[File:Tigerbane Bakdak.png|frameless|center|200px|link=[[Tigerbane Bakdak]]]] || style="width: 200px;" | || style="width: 200px;" | || style="width: 200px;" | || style="width: 200px;" | || style="width: 200px;" | |
| |-
| | |
| | colspan = "7" style="background-color:#000000;" |
| |
| |-
| |
| | rowspan="1" | '''Mee Deggi the Punisher''' <br> [[File:Mee Deggi the Punisher.png|frameless|250px]] || rowspan="1" | 115 || rowspan="1" | Castle Oztroja || rowspan="1" | (H-8) <br> Map 7 || rowspan="1" | 1 hour || '''Gendewitha Galoshes'''[[File:Gendewitha Galoshes.png|frameless]] || 25%
| |
| |-
| |
| | colspan = "7" style="background-color:#000000;" |
| |
| |-
| |
| | rowspan="1" | '''Moo Ouzi the Swiftblade''' <br> [[File:Moo Ouzi the Swiftblade.png|frameless|250px]] || rowspan="1" | 115 || rowspan="1" | Castle Oztroja || rowspan="1" | (G-7) <br> Map 1 || rowspan="1" | 1 hour || '''Gendewitha Spats'''[[File:Gendewitha Spats.png|frameless]] || 25%
| |
| |-
| |
| | colspan = "7" style="background-color:#000000;" |
| |
| |-
| |
| | rowspan="1" | '''Quu Domi the Gallant''' <br> [[File:Quu Domi the Gallant.png|frameless|250px]] || rowspan="1" | 115 || rowspan="1" | Castle Oztroja || rowspan="1" | (H-8) <br> Map 6 || rowspan="1" | 1 hour || '''Hagondes Hat'''[[File:Hagondes Hat.png|frameless]] || 25%
| |
| |-
| |
| | colspan = "7" style="background-color:#000000;" |
| |
| |-
| |
| | rowspan="1" | '''Yaa Haqa the Profane''' <br> [[File:Yaa Haqa the Profane.png|frameless|250px]] || rowspan="1" | 115 || rowspan="1" | Castle Oztroja || rowspan="1" | (I-10) <br> Map 2 || rowspan="1" | 1 hour || '''Hagondes Coat'''[[File:Hagondes Coat.png|frameless]] || 25%
| |
| |-
| |
| | colspan = "7" style="background-color:#000000;" |
| |
| |-
| |
| | rowspan="1" | '''Duke Haborym''' <br> [[File:Duke Haborym.png|frameless|250px]] || rowspan="1" | 115 || rowspan="1" | Castle Zvahl Baileys || rowspan="1" | (G-7) || rowspan="1" | 1 hour || '''Cizin Breeches'''[[File:Cizin Breeches.png|frameless]] || 25%
| |
| |-
| |
| | colspan = "7" style="background-color:#000000;" |
| |
| |-
| |
| | rowspan="1" | '''Grand Duke Batym''' <br> [[File:Grand Duke Batym.png|frameless|250px]] || rowspan="1" | 115 || rowspan="1" | Castle Zvahl Baileys || rowspan="1" | (G-8) || rowspan="1" | 1 hour || '''Gendewitha Caubeen''' [[File:Gendewitha Caubeen.png|frameless]] || 25%
| |
| |-
| |
| | colspan = "7" style="background-color:#000000;" |
| |
| |-
| |
| | rowspan="1" | '''Marquis Allocen''' <br> [[File:Marquis Allocen.png|frameless|250px]] || rowspan="1" | 115 || rowspan="1" | Castle Zvahl Baileys || rowspan="1" | (H-7) || rowspan="1" | 1 hour || '''Gendewitha Bliaut'''[[File:Gendewitha Bliaut.png|frameless]] || 25%
| |
| |-
| |
| | colspan = "7" style="background-color:#000000;" |
| |
| |-
| |
| | rowspan="1" | '''Marquis Amon''' <br> [[File:Marquis Amon.png|frameless|250px]] || rowspan="1" | 115 || rowspan="1" | Castle Zvahl Baileys || rowspan="1" | (G-7) || rowspan="1" | 1 hour || '''Gendewitha Gages'''[[File:Gendewitha Gages.png|frameless]] || 25%
| |
| |-
| |
| | colspan = "7" style="background-color:#000000;" |
| |
| |-
| |
| | rowspan="1" | '''Marquis Andrealphus''' <br> [[File:Marquis Andrealphus.png|frameless|250px]] || rowspan="1" | 115 || rowspan="1" | Castle Zvahl Baileys || rowspan="1" | (I-8) <br> Map 2 || rowspan="1" | 1 hour || '''Otronif Boots'''[[File:Otronif Boots.png|frameless]] || 25%
| |
| |-
| |
| | colspan = "7" style="background-color:#000000;" |
| |
| |-
| |
| | rowspan="1" | '''Marquis Naberius''' <br> [[File:Marquis Naberius.png|frameless|250px]] || rowspan="1" | 115 || rowspan="1" | Castle Zvahl Baileys || rowspan="1" | (I-6) || rowspan="1" | 1 hour || '''Cizin Greaves'''[[File:Cizin Greaves.png|frameless]] || 25%
| |
| |-
| |
| | colspan = "7" style="background-color:#000000;" |
| |
| |-
| |
| | rowspan="1" | '''Baron Vapula''' <br> [[File:Baron Vapula.png|frameless|250px]] || rowspan="1" | 115 || rowspan="1" | Castle Zvahl Keep || rowspan="1" | (G-8) || rowspan="1" | 1 hour || '''Cizin Helm'''[[File:Cizin Helm.png|frameless]] || 25%
| |
| |-
| |
| | colspan = "7" style="background-color:#000000;" |
| |
| |- | |
| | rowspan="2" | '''Baronet Romwe''' <br> [[File:Baronet Romwe.png|frameless|250px]] || rowspan="2" | 115 || rowspan="2" | Castle Zvahl Keep || rowspan="2" | (I-7) || rowspan="2" | 1 hour || '''Beatific Shield'''[[File:Beatific Shield.png|frameless]] || 25% | |
| |-
| |
| | '''Iuitl Gaiters'''[[File:Iuitl Gaiters.png|frameless]] || 25%
| |
| |-
| |
| | colspan = "7" style="background-color:#000000;" |
| |
| |-
| |
| | rowspan="1" | '''Count Bifrons''' <br> [[File:Count Bifrons.png|frameless|250px]] || rowspan="1" | 115 || rowspan="1" | Castle Zvahl Keep || rowspan="1" | (I-9) || rowspan="1" | 1 hour || '''Cizin Mail'''[[File:Cizin Mail.png|frameless]] || 25% | |
| |-
| |
| | colspan = "7" style="background-color:#000000;" |
| |
| |-
| |
| | rowspan="1" | '''Viscount Morax''' <br> [[File:Viscount Morax.png|frameless|250px]] || rowspan="1" | 115 || rowspan="1" | Castle Zvahl Keep || rowspan="1" | (G-10) || rowspan="1" | 1 hour || '''Cizin Mufflers'''[[File:Cizin Mufflers.png|frameless]] || 25%
| |
| |-
| |
| | colspan = "7" style="background-color:#000000;" |
| |
| |- | |
| | rowspan="1" | '''Blubbery Bulge''' <br> [[File:Blubbery Bulge.png|frameless|250px]] || rowspan="1" | 115 || rowspan="1" | Davoi || rowspan="1" | (E-10) || rowspan="1" | 1 hour || '''Iuitl Headgear'''[[File:Iuitl Headgear.png|frameless]] || 25% | |
| |-
| |
| | colspan = "7" style="background-color:#000000;" |
| |
| |-
| |
| | rowspan="1" | '''Dirtyhanded Gochakzuk''' <br> [[File:Dirtyhanded Gochakzuk.png|frameless|250px]] || rowspan="1" | 115 || rowspan="1" | Davoi || rowspan="1" | (H-8) || rowspan="1" | 1 hour || '''Iuitl Vest'''[[File:Iuitl Vest.png|frameless]] || 25%
| |
| |-
| |
| | colspan = "7" style="background-color:#000000;" |
| |
| |-
| |
| | rowspan="1" | '''Hawkeyed Dnatbat''' <br> [[File:Hawkeyed Dnatbat.png|frameless|250px]] || rowspan="1" | 115 || rowspan="1" | Davoi || rowspan="1" | (L-9) || rowspan="1" | 1 hour || '''Hagondes Cuffs'''[[File:Hagondes Cuffs.png|frameless]] || 25%
| |
| |-
| |
| | colspan = "7" style="background-color:#000000;" |
| |
| |-
| |
| | rowspan="1" | '''Poisonhand Gnadgad''' <br> [[File:Poisonhand Gnadgad.png|frameless|250px]] || rowspan="1" | 115 || rowspan="1" | Davoi || rowspan="1" | (G-6) || rowspan="1" | 1 hour || '''Hagondes Pants'''[[File:Hagondes Pants.png|frameless]] || 25%
| |
| |-
| |
| | colspan = "7" style="background-color:#000000;" |
| |
| |-
| |
| | rowspan="1" | '''Steelbiter Gudrud''' <br> [[File:Steelbiter Gudrud.png|frameless|250px]] || rowspan="1" | 115 || rowspan="1" | Davoi || rowspan="1" | (K-10) || rowspan="1" | 1 hour || '''Hagondes Sabots'''[[File:Hagondes Sabots.png|frameless]] || 25%
| |
| |-
| |
| | colspan = "7" style="background-color:#000000;" |
| |
| |-
| |
| | rowspan="1" | '''Tigerbane Bakdak''' <br> [[File:Tigerbane Bakdak.png|frameless|250px]] || rowspan="1" | 115 || rowspan="1" | Davoi || rowspan="1" | (J-7) || rowspan="1" | 1 hour || '''Otronif Mask'''[[File:Otronif Mask.png|frameless]] || 25%
| |
| |} | | |} |
|
| |
|
| == Delve Weapons (Level 113) == | | == Delve Weapons (Level 113) == |
|
| |
|
| {| class="wikitable mw-collapsible mw-collapsed" style="text-align: center"; width="1000px;" | | {| class="wikitable mw-collapsible mw-collapsed" style="text-align: center"; width="1280px;" |
| ! scope="row" colspan="7" | ANM's | | ! scope="row" colspan="7" style="text-align: left" | ANMs |
| |-
| |
| | style="background-color:#cfcfcf;" | '''Notorious Monster''' || style="background-color:#cfcfcf;" | '''Level''' || style="background-color:#cfcfcf;" | '''Zone''' || style="background-color:#cfcfcf;" | '''Position''' || style="background-color:#cfcfcf;" | '''Respawn''' || style="background-color:#cfcfcf;" | '''Reward''' || style="background-color:#cfcfcf;" | '''Drop Chance'''
| |
| |-
| |
| | rowspan="2" | '''La Velue''' <br> [[File:La Velue.png|frameless|250px]] || rowspan="2" | 118 || rowspan="2" | Batallia Downs (S) || rowspan="2" | (G/H-7/8) || rowspan="2" | 1 hour || '''Surefire Arquebus'''[[File:Surefire Arquebus.png|frameless]] || 20%
| |
| |-
| |
| | '''Soothsayer Staff'''[[File:Soothsayer Staff.png|frameless]] || 20%
| |
| |-
| |
| | colspan = "7" style="background-color:#000000;" |
| |
| |-
| |
| | rowspan="2" | '''Came-cruse''' <br> [[File:Came-cruse.png|frameless|250px]] || rowspan="2" | 118 || rowspan="2" | Beaucedine Glacier (S) || rowspan="2" | (H-8) || rowspan="2" | 1 hour || '''Uguisumari'''[[File:Uguisumari.png|frameless]] || 20%
| |
| |-
| |
| | '''Transluscent Broth'''[[File:Transluscent Broth.png|frameless]] || 20%
| |
| |-
| |
| | colspan = "7" style="background-color:#000000;" |
| |
| |-
| |
| | rowspan="2" | '''Scylla''' <br> [[File:Scylla.png|frameless|250px]] || rowspan="2" | 118 || rowspan="2" | Beaucedine Glacier (S) || rowspan="2" | (J-7) || rowspan="2" | 1 hour || '''Yaskomo's Pole'''[[File:Yaskomo's Pole.png|frameless]] || 20%
| |
| |-
| |
| | '''Bereaver'''[[File:Bereaver.png|frameless]] || 20%
| |
| |-
| |
| | colspan = "7" style="background-color:#000000;" |
| |
| |-
| |
| | rowspan="2" | '''Vulkodlac''' <br> [[File:Vulkodlac.png|frameless|250px]] || rowspan="2" | 118 || rowspan="2" | Jugner Forest (S) || rowspan="2" | (H-11) || rowspan="2" | 1 hour || '''Halachuinic Sword'''[[File:Halachuinic Sword.png|frameless]] || 20%
| |
| |-
| |
| | '''Kiji'''[[File:Kiji.png|frameless]] || 20%
| |
| |-
| |
| | colspan = "7" style="background-color:#000000;" |
| |
| |-
| |
| | rowspan="2" | '''Bloodlapper''' <br> [[File:Bloodlapper.png|frameless|250px]] || rowspan="2" | 118 || rowspan="2" | Meriphataud Mountains (S) || rowspan="2" | (L-11) || rowspan="2" | 1 hour || '''Rigor Baghnakhs'''[[File:Rigor Baghnakhs.png|frameless]] || 20%
| |
| |-
| |
| | '''Dimmet Scythe'''[[File:Dimmet Scythe.png|frameless]] || 20%
| |
| |-
| |
| | colspan = "7" style="background-color:#000000;" |
| |
| |-
| |
| | rowspan="2" | '''Kinepikwa''' <br> [[File:Kinepikwa.png|frameless|250px]] || rowspan="2" | 118 || rowspan="2" | Pashhow Marshlands (S) || rowspan="2" | (G-10) || rowspan="2" | 1 hour || '''Ophidian Trident'''[[File:Ophidian Trident.png|frameless]] || 20%
| |
| |-
| |
| | '''Speleogen Bow'''[[File:Speleogen Bow.png|frameless]] || 20%
| |
| |- | | |- |
| | colspan = "7" style="background-color:#000000;" | | | | '''[[La Velue]]''' || '''[[Came-cruse]]''' || '''[[Scylla]]''' || '''[[Vulkodlac]]''' || '''[[Bloodlapper]]''' || '''[[Kinepikwa]]''' |
| |- | | |- |
| | rowspan="2" | '''Dyinyinga''' <br> [[File:Dyinyinga.png|frameless|250px]] || rowspan="2" | 118 || rowspan="2" | Rolanberry Fields (S) || rowspan="2" | (J-9) || rowspan="2" | 1 hour || '''Bloodbath Axe'''[[File:Bloodbath Axe.png|frameless]] || 20% | | | style="width: 200px;" | [[File:La Velue.png|frameless|center|200px|link=[[La Velue]]]] || style="width: 200px;" | [[File:Came-cruse.png|frameless|center|200px|link=[[Came-cruse]]]] || style="width: 200px;" | [[File:Scylla.png|frameless|center|200px|link=[[Scylla]]]] || style="width: 200px;" | [[File:Vulkodlac.png|frameless|center|200px|link=[[Vulkodlac]]]] || style="width: 200px;" | [[File:Bloodlapper.png|frameless|center|200px|link=[[Bloodlapper]]]] || style="width: 200px;" | [[File:Kinepikwa.png|frameless|center|200px|link=[[Kinepikwa]]]] |
| |- | | |- |
| | '''Aphotic Kukri'''[[File:Aphotic Kukri.png|frameless]] || 20% | | | '''[[Dyinyinga]]''' || '''[[Balam-Quitz]]''' || || || || |
| |- | | |- |
| | colspan = "7" style="background-color:#000000;" | | | | style="width: 200px;" | [[File:Dyinyinga.png|frameless|center|200px|link=[[Dyinyinga]]]] || style="width: 200px;" | [[File:Balam-Quitz.png|frameless|center|200px|link=[[Balam-Quitz]]]] || style="width: 200px;" | || style="width: 200px;" | || style="width: 200px;" | || style="width: 200px;" | |
| |- | |
| | rowspan="2" | '''Balam-Quitz''' <br> [[File:Balam-Quitz.png|frameless|250px]] || rowspan="2" | 118 || rowspan="2" | Sauromugue Champaign (S) || rowspan="2" | (K-7) || rowspan="2" | 1 hour || '''Mondaha Cudgel'''[[File:Mondaha Cudgel.png|frameless]] || 20% | |
| |-
| |
| | '''Brethren Axe'''[[File:Brethren Axe.png|frameless]] || 20%
| |
| |} | | |} |
|
| |
|
| Line 409: |
Line 146: |
| * '''All Wildskeeper Weapons (Level 115) can be augmented via [[Ceciliotte]].''' | | * '''All Wildskeeper Weapons (Level 115) can be augmented via [[Ceciliotte]].''' |
|
| |
|
| {| class="wikitable mw-collapsible mw-collapsed" style="text-align: center"; width="1000px;" | | {| class="wikitable mw-collapsible mw-collapsed" style="text-align: center"; width="1280px;" |
| ! scope="row" colspan="7" | ANM's | | ! scope="row" colspan="7" style="text-align: left" | ANMs |
| |-
| |
| | style="background-color:#cfcfcf;" | '''Notorious Monster''' || style="background-color:#cfcfcf;" | '''Level''' || style="background-color:#cfcfcf;" | '''Zone''' || style="background-color:#cfcfcf;" | '''Position''' || style="background-color:#cfcfcf;" | '''Respawn''' || style="background-color:#cfcfcf;" | '''Reward''' || style="background-color:#cfcfcf;" | '''Drop Chance'''
| |
| |-
| |
| | rowspan="2" | '''Friar Rush''' <br> [[File:Friar Rush.png|frameless|250px]] || rowspan="2" | 118 || rowspan="2" | Den of Rancor || rowspan="2" | (D-5) - (E-5) || rowspan="2" | 1 hour || '''Kuakuakait'''[[File:Kuakuakait.png|frameless]] || 20%
| |
| |-
| |
| | '''Xbalanque'''[[File:Xbalanque.png|frameless]] || 20%
| |
| |-
| |
| | colspan = "7" style="background-color:#000000;" |
| |
| |-
| |
| | rowspan="2" | '''Hakutaku''' <br> [[File:Hakutaku.png|frameless|250px]] || rowspan="2" | 118 || rowspan="2" | Den of Rancor || rowspan="2" | (H-8) || rowspan="2" | 1 hour || '''Taikogane'''[[File:Taikogane.png|frameless]] || 20%
| |
| |-
| |
| | '''Azukinagamitsu'''[[File:Azukinagamitsu.png|frameless]] || 20%
| |
| |-
| |
| | colspan = "7" style="background-color:#000000;" |
| |
| |-
| |
| | rowspan="1" | '''Ogama''' <br> [[File:Ogama.png|frameless|250px]] || rowspan="1" | 118 || rowspan="1" | Den of Rancor || rowspan="1" | (F-9) || rowspan="1" | 1 hour || '''Kaquljaan'''[[File:Kaquljaan.png|frameless]] || 20%
| |
| |- | | |- |
| | colspan = "7" style="background-color:#000000;" | | | | '''[[Friar Rush]]''' || '''[[Hakutaku]]''' || '''[[Ogama]]''' || '''[[Sozu Bliberry]]''' || '''[[Tonberry Pontifex]]''' || '''[[Triarius X-XV]]''' |
| |- | | |- |
| | rowspan="3" | '''Sozu Bliberry''' <br> [[File:Sozu Bilberry.png|frameless|250px]] || rowspan="3" | 118 || rowspan="3" | Den of Rancor || rowspan="3" | (I-6) || rowspan="3" | 1 hour || '''Tamaxchi'''[[File:Tamaxchi.png|frameless]] || 20% | | | style="width: 200px;" | [[File:Friar Rush.png|frameless|center|200px|link=[[Friar Rush]]]] || style="width: 200px;" | [[File:Hakutaku.png|frameless|center|200px|link=[[Hakutaku]]]] || style="width: 200px;" | [[File:Ogama.png|frameless|center|200px|link=[[Ogama]]]] || style="width: 200px;" | [[File:Sozu Bliberry.png|frameless|center|200px|link=[[Sozu Bliberry]]]] || style="width: 200px;" | [[File:Tonberry Pontifex.png|frameless|center|200px|link=[[Tonberry Pontifex]]]] || style="width: 200px;" | [[File:Triarius X-XV.png|frameless|center|200px|link=[[Triarius X-XV]]]] |
| |- | | |- |
| | '''Baqil Staff'''[[File:Baqil Staff.png|frameless]] || 20% | | | '''[[Alkyoneus]]''' || '''[[Ixtab]]''' || '''[[Pallas]]''' || || || |
| |- | | |- |
| | '''Rancor Collar'''[[File:Rancor Collar.png|frameless]] || 20% | | | style="width: 200px;" | [[File:Alkyoneus.png|frameless|center|200px|link=[[Alkyoneus]]]] || style="width: 200px;" | [[File:Ixtab.png|frameless|center|200px|link=[[Ixtab]]]] || style="width: 200px;" | [[File:Pallas.png|frameless|center|200px|link=[[Pallas]]]] || style="width: 200px;" | || style="width: 200px;" | || style="width: 200px;" | |
| |-
| |
| | colspan = "7" style="background-color:#000000;" |
| |
| |-
| |
| | rowspan="2" | '''Tonberry Pontifex''' <br> [[File:Tonberry Pontifex.png|frameless|250px]] || rowspan="2" | 118 || rowspan="2" | Den of Rancor || rowspan="2" | (H-8) || rowspan="2" | 1 hour || '''Ajjub Bow'''[[File:Ajjub Bow.png|frameless]] || 20%
| |
| |-
| |
| |'''Atetepeyorg''' [[File:Atetepeyorg.png|frameless]] || 20%
| |
| |-
| |
| | colspan = "7" style="background-color:#000000;" |
| |
| |-
| |
| | rowspan="2" | '''Triarius X-XV''' <br> [[File:Triarius X-XV.png|frameless|250px]] || rowspan="2" | 118 || rowspan="2" | Quicksand Caves || rowspan="2" | (I-7) <br> Map 4 || rowspan="2" | 1 hour ||'''Steadfast Shield''' [[File:Steadfast Shield.png|frameless]] || 20%
| |
| |-
| |
| | '''Pyf Harp'''[[File:Pyf_Harp.png|frameless]] || 20%
| |
| |-
| |
| | colspan = "7" style="background-color:#000000;" |
| |
| |-
| |
| | rowspan="2" | '''Alkyoneus''' <br> [[File:Alkyoneus.png|frameless|250px]] || rowspan="2" | 118 || rowspan="2" | Upper Delkfutt's Tower || rowspan="2" | (H-8) <br> Map 3 || rowspan="2" | 1 hour || '''Ixtab (Great Axe)'''[[File:Ixtab (Great Axe).png|frameless]] || 20%
| |
| |-
| |
| |'''Xiutleato''' [[File:Xiutleato.png|frameless]] || 20%
| |
| |-
| |
| | colspan = "7" style="background-color:#000000;" |
| |
| |- | |
| | rowspan="2" | '''Ixtab''' <br> [[File:Ixtab(Monster).png|frameless|250px]] || rowspan="2" | 118 || rowspan="2" | Upper Delkfutt's Tower || rowspan="2" | (H-8) <br> Map 3 || rowspan="2" | 1 hour ||'''Atoyac'''[[File:Atoyac.png|frameless]] || 20% | |
| |-
| |
| | '''Maochinoli'''[[File:Maochinoli.png|frameless]] || 20%
| |
| |-
| |
| | colspan = "7" style="background-color:#000000;" |
| |
| |-
| |
| | rowspan="2" | '''Pallas''' <br> [[File:Pallas.png|frameless|250px]] || rowspan="2" | 118 || rowspan="2" | Upper Delkfutt's Tower || rowspan="2" | (H-8) <br> Map 2 || rowspan="2" | 1 hour || '''Hatxiik'''[[File:Hatxiik.png|frameless]] || 20%
| |
| |-
| |
| | '''Hunahpu'''[[File:Hunahpu.png|frameless]] || 20%
| |
| |} | | |} |
|
| |
|
| Line 471: |
Line 162: |
| * '''All Wildskeeper Armor (Level 115) can be augmented via [[Ceciliotte]].''' | | * '''All Wildskeeper Armor (Level 115) can be augmented via [[Ceciliotte]].''' |
|
| |
|
| {| class="wikitable mw-collapsible mw-collapsed" style="text-align: center"; width="1000px;" | | {| class="wikitable mw-collapsible mw-collapsed" style="text-align: center"; width="1280px;" |
| ! scope="row" colspan="7" | ANM's | | ! scope="row" colspan="7" style="text-align: left" | ANMs |
| |-
| |
| | style="background-color:#cfcfcf;" | '''Notorious Monster''' || style="background-color:#cfcfcf;" | '''Level''' || style="background-color:#cfcfcf;" | '''Zone''' || style="background-color:#cfcfcf;" | '''Position''' || style="background-color:#cfcfcf;" | '''Respawn''' || style="background-color:#cfcfcf;" | '''Reward''' || style="background-color:#cfcfcf;" | '''Drop Chance'''
| |
| |- | | |- |
| | rowspan="2" | '''Lamie No. 9''' <br> [[File:Lamie No 9.png|frameless|250px]] || rowspan="2" | 118 || rowspan="2" | Arrapago Reef || rowspan="2" | (I-6) <br> Map 3 || rowspan="2" | 1 hour || '''Ejekamal Mask'''[[File:Ejekamal Mask.png|frameless]] || 25%
| | | '''[[Lamie No. 9]]''' || '''[[Merrow No. 5]]''' || '''[[Dorgerwor the Astute]]''' || '''[[Farlarder the Shrewd]]''' || '''[[Darting Kachaal Ja]]''' || '''[[Devout Radol Ja]]''' |
| |- | | |- |
| | '''Ejekamal Boots'''[[File:Ejekamal Boots.png|frameless]] || 25% | | | style="width: 200px;" | [[File:Lamie No. 9.png|frameless|center|200px|link=[[Lamie No. 9]]]] || style="width: 200px;" | [[File:Merrow No. 5.png|frameless|center|200px|link=[[Merrow No. 5]]]] || style="width: 200px;" | [[File:Dorgerwor the Astute.png|frameless|center|200px|link=[[Dorgerwor the Astute]]]] || style="width: 200px;" | [[File:Farlarder the Shrewd.png|frameless|center|200px|link=[[Farlarder the Shrewd]]]] || style="width: 200px;" | [[File:Darting Kachaal Ja.png|frameless|center|200px|link=[[Darting Kachaal Ja]]]] || style="width: 200px;" | [[File:Devout Radol Ja.png|frameless|center|200px|link=[[Devout Radol Ja]]]] |
| |-
| |
| | colspan = "7" style="background-color:#000000;" |
| |
| |-
| |
| | rowspan="2" | '''Merrow No 5''' <br> [[File:Merrow No 5.png|frameless|250px]] || rowspan="3" | 118 || rowspan="3" | Arrapago Reef || rowspan="3" | (F-6) <br> Map 2 || rowspan="3" | 1 hour || '''Quiahuiz Helm'''[[File:Quiahuiz Helm.png|frameless]] || 25%
| |
| |- | |
| | '''Quiahuiz Trousers'''[[File:Quiahuiz Trousers.png|frameless]] || 25%
| |
| |-
| |
| | colspan = "7" style="background-color:#000000;" |
| |
| |-
| |
| | rowspan="2" | '''Dorgerwor the Astute''' <br> [[File:Dorgerwor the Astute.png|frameless|250px]] || rowspan="2" | 118 || rowspan="2" | Halvung || rowspan="2" | (I-6) <br> Map 1 || rowspan="2" | 1 hour || '''Otomi Helm'''[[File:Otomi Helm.png|frameless]] || 25%
| |
| |-
| |
| | '''Otomi Gloves'''[[File:Otomi Gloves.png|frameless]] || 25%
| |
| |-
| |
| | colspan = "7" style="background-color:#000000;" |
| |
| |-
| |
| | rowspan="2" | '''Farlarder the Shrewd''' <br> [[File:Farlarder the Shrewd.png|frameless|250px]] || rowspan="2" | 118 || rowspan="2" | Halvung || rowspan="2" | (D-8) <br> Map 1 || rowspan="2" | 1 hour || '''Kaabnax Hat'''[[File:Kaabnax Hat.png|frameless]] || 25%
| |
| |-
| |
| |'''Kaabnax Trousers''' [[File:Kaabnax Trousers.png|frameless]] || 25%
| |
| |-
| |
| | colspan = "7" style="background-color:#000000;" |
| |
| |-
| |
| | rowspan="2" | '''Darting Kachaal Ja''' <br> [[File:Darting Kachaal Ja.png|frameless|250px]] || rowspan="2" | 118 || rowspan="2" | Mamook || rowspan="2" | (I-8) <br> Map 2 || rowspan="2" | 1 hour || '''Uk'uxkaj Cape'''[[File:Uk'uxkaj Cap.png|frameless]] || 25%
| |
| |-
| |
| | '''Uk'uxkaj Boots'''[[File:Uk'uxkaj Boots.png|frameless]] || 25%
| |
| |-
| |
| | colspan = "7" style="background-color:#000000;" |
| |
| |-
| |
| | rowspan="2" | '''Devout Radol Ja''' <br> [[File:Devout Radol Ja.png|frameless|250px]] || rowspan="2" | 118 || rowspan="2" | Mamook || rowspan="2" | (I-7) <br> Map 1 || rowspan="2" | 1 hour || '''Buremte Hat'''[[File:Buremte Hat.png|frameless]] || 25%
| |
| |-
| |
| | '''Buremte Gloves'''[[File:Buremte Gloves.png|frameless]] || 25%
| |
| |} | | |} |
|
| |
|
| Line 517: |
Line 176: |
| * '''All Homestead Weapon ANM's have a 100% and 7.5% chance to drop an [[Vesca | Aged Box (Bayld)]].''' | | * '''All Homestead Weapon ANM's have a 100% and 7.5% chance to drop an [[Vesca | Aged Box (Bayld)]].''' |
|
| |
|
| {| class="wikitable mw-collapsible mw-collapsed" style="text-align: center"; width="1000px;" | | {| class="wikitable mw-collapsible mw-collapsed" style="text-align: center"; width="1280px;" |
| ! scope="row" colspan="7" | ANM's | | ! scope="row" colspan="7" style="text-align: left" | ANMs |
| |-
| |
| | style="background-color:#cfcfcf;" | '''Notorious Monster''' || style="background-color:#cfcfcf;" | '''Level''' || style="background-color:#cfcfcf;" | '''Zone''' || style="background-color:#cfcfcf;" | '''Position''' || style="background-color:#cfcfcf;" | '''Respawn''' || style="background-color:#cfcfcf;" | '''Reward''' || style="background-color:#cfcfcf;" | '''Drop Chance'''
| |
| |-
| |
| | rowspan="2" | '''Ambusher Antlion''' <br> [[File:Ambusher Antlion.png|frameless|250px]] || rowspan="2" | 130 || rowspan="2" | Attohwa Chasm || rowspan="2" | (E-8) || rowspan="2" | 5 hours || '''Homestead Axe'''[[File:Homestead Axe.png|frameless]] || 20%
| |
| |-
| |
| | '''Homestead Labrys'''[[File:Homestead Labrys.png|frameless]] || 20%
| |
| |-
| |
| | colspan = "7" style="background-color:#000000;" |
| |
| |-
| |
| | rowspan="2" | '''Sekhmet''' <br> [[File:Sekhmet.png|frameless|250px]] || rowspan="2" | 130 || rowspan="2" | Attohwa Chasm || rowspan="2" | (I/J-9) || rowspan="2" | 5 hours ||'''Homestead Blade''' [[File:Homestead Blade.png|frameless]] || 20%
| |
| |-
| |
| | '''Homestead Claymore'''[[File:Homestead Claymore.png|frameless]] || 20%
| |
| |-
| |
| | colspan = "7" style="background-color:#000000;" |
| |
| |-
| |
| | rowspan="2" | '''Splacknuck''' <br> [[File:Splacknuck.png|frameless|250px]] || rowspan="2" | 130 || rowspan="2" | Bibiki Bay || rowspan="2" | (F-6) || rowspan="2" | 5 hours || '''Senkutanto'''[[File:Senkutanto.png|frameless]] || 20%
| |
| |-
| |
| | '''Senkuto'''[[File:Senkuto.png|frameless]] || 20%
| |
| |-
| |
| | colspan = "7" style="background-color:#000000;" |
| |
| |-
| |
| | rowspan="2" | '''Mycophile''' <br> [[File:Mycophile.png|frameless|250px]] || rowspan="2" | 130 || rowspan="2" | Carpenter's Landing || rowspan="2" | (I-11) || rowspan="2" | 5 hours || '''Homestead Wand'''[[File:Homestead Wand.png|frameless]] || 20%
| |
| |-
| |
| | '''Homestead Staff'''[[File:Homestead Staff.png|frameless]] || 20%
| |
| |- | | |- |
| | colspan = "7" style="background-color:#000000;" | | | | '''[[Ambusher Antlion]]''' || '''[[Sekhmet]]''' || '''[[Splacknuck]]''' || '''[[Mycophile]]''' || '''[[Sengann]]''' || '''[[Megalobugard]]''' |
| |- | | |- |
| | rowspan="2" | '''Sengann''' <br> [[File:Sengann.png|frameless|250px]] || rowspan="2" | 130 || rowspan="2" | Lufaise Meadows || rowspan="2" | (F-8) || rowspan="2" | 5 hours || '''Homestead Cesti'''[[File:Homestead Cesti.png|frameless]] || 20% | | | style="width: 200px;" | [[File:Ambusher Antlion.png|frameless|center|200px|link=[[Ambusher Antlion]]]] || style="width: 200px;" | [[File:Sekhmet.png|frameless|center|200px|link=[[Sekhmet]]]] || style="width: 200px;" | [[File:Splacknuck.png|frameless|center|200px|link=[[Splacknuck]]]] || style="width: 200px;" | [[File:Mycophile.png|frameless|center|200px|link=[[Mycophile]]]] || style="width: 200px;" | [[File:Sengann.png|frameless|center|200px|link=[[Sengann]]]] || style="width: 200px;" | [[File:Megalobugard.png|frameless|center|200px|link=[[Megalobugard]]]] |
| |- | | |- |
| | '''Homestead Dagger'''[[File:Homestead Dagger.png|frameless]] || 20% | | | '''[[Gration]]''' || '''[[Upyri]]''' || '''[[Bomb King]]''' || '''[[Boroka]]''' || || |
| |-
| |
| | colspan = "7" style="background-color:#000000;" |
| |
| |-
| |
| | rowspan="2" | '''Megalobugard''' <br> [[File:Megalobugard.png|frameless|250px]] || rowspan="2" | 130 || rowspan="2" | Lufaise Meadows || rowspan="2" | (G-7) || rowspan="2" | 5 hours || '''Homestead Scythe'''[[File:Homestead Scythe.png|frameless]] || 20%
| |
| |-
| |
| | '''Homestead Lance'''[[File:Homestead Lance.png|frameless]] || 20%
| |
| |-
| |
| | colspan = "7" style="background-color:#000000;" |
| |
| |-
| |
| | rowspan="2" | '''Gration''' <br> [[File:Gration.png|frameless|250px]] || rowspan="2" | 130 || rowspan="2" | Misareaux Coast || rowspan="2" | (H-8) || rowspan="2" | 5 hours || '''Homestead Scepter'''[[File:Homestead Scepter.png|frameless]] || 20%
| |
| |- | |
| |'''Homestead Bowgun''' [[File:Homestead Bowgun.png|frameless]] || 20% | |
| |-
| |
| | colspan = "7" style="background-color:#000000;" |
| |
| |-
| |
| | rowspan="2" | '''Upyri''' <br> [[File:Upyri.png|frameless|250px]] || rowspan="2" | 130 || rowspan="2" | Misareaux Coast || rowspan="2" | (E-7)/(F-8) || rowspan="2" | 5 hours || '''Homestead Gun'''[[File:Homestead Gun.png|frameless]] || 20%
| |
| |-
| |
| | '''Homestead Flute'''[[File:Homestead Flute.png|frameless]] || 20%
| |
| |-
| |
| | rowspan="2" | '''Bomb King''' <br> [[File:Bomb King.PNG|frameless|250px]] || rowspan="2" | 130 || rowspan="2" | Outer Horutoto Ruins || rowspan="2" | (G-7), (I-7), (J-6) || rowspan="2" | 5 hours || '''Homestead Bow'''[[File:Homestead Bow.PNG|frameless]] || 20%
| |
| |-
| |
| | '''Homestead Shield'''[[File:Homestead Shield.PNG|frameless]] || 20%
| |
| |-
| |
| | rowspan="2" | '''Boroka''' <br> [[File:Boroka.PNG|frameless|250px]] || rowspan="1" | 130 || rowspan="1" | Riverne - Site B01 || rowspan="1" | (F-8) || rowspan="1" | 5 hours || '''Camaraderie Harp'''[[File:Camaraderie Harp.PNG|frameless]] || 10% | |
| |- | | |- |
| | | style="width: 200px;" | [[File:Gration.png|frameless|center|200px|link=[[Gration]]]] || style="width: 200px;" | [[File:Upyri.png|frameless|center|200px|link=[[Upyri]]]] || style="width: 200px;" | [[File:Bomb King.png|frameless|center|200px|link=[[Bomb King]]]] || style="width: 200px;" | [[File:Boroka.png|frameless|center|200px|link=[[Boroka]]]] || style="width: 200px;" | || style="width: 200px;" | |
| |} | | |} |
|
| |
|
| Line 580: |
Line 192: |
| * '''These NMs are level 130-135 and carry considerably more valuable rewards than lesser ANMs.''' | | * '''These NMs are level 130-135 and carry considerably more valuable rewards than lesser ANMs.''' |
|
| |
|
| {| class="wikitable mw-collapsible mw-collapsed" style="text-align: center"; width="1000px;" | | {| class="wikitable mw-collapsible mw-collapsed" style="text-align: center"; width="1280px;" |
| ! scope="row" colspan="7" | NSANM's | | ! scope="row" colspan="7" style="text-align: left" | NSANMs |
| |-
| |
| | style="background-color:#cfcfcf;" | '''Notorious Monster''' || style="background-color:#cfcfcf;" | '''Level''' || style="background-color:#cfcfcf;" | '''Zone''' || style="background-color:#cfcfcf;" | '''Position''' || style="background-color:#cfcfcf;" | '''Respawn''' || style="background-color:#cfcfcf;" | '''Reward''' || style="background-color:#cfcfcf;" | '''Drop Chance'''
| |
| |-
| |
| | rowspan="2" | '''Marchelute'''<br> Rages after 20 minutes. <br> [[File:Marchelute.png|frameless|250px]] || rowspan="3" | 130 || rowspan="3" | Valkurm Dunes || rowspan="3" | (B-8) || rowspan="3" | 3-5 hours or 0-2 hours after restart|| '''Argochampsa Mantle'''[[File:Argochampsa Mantle.png|frameless]] || 5%
| |
| |-
| |
| |'''Pluton Box''' [[File:Pluton Box.png|frameless]] || 5%
| |
| |-
| |
| | colspan = "7" style="background-color:#000000;" |
| |
| |-
| |
| | rowspan="2" | '''Eastern Shadow'''<br> Rages after 20 minutes. <br> [[File:Eastern Shadow.png|frameless|250px]] || rowspan="3" | 130 || rowspan="3" | Fei'Yin || rowspan="3" | (G-6/7) <br> Map 1 || rowspan="3" | 3-5 hours or 0-2 hours after restart|| '''Kappa Necklace'''[[File:Kappa Necklace.png|frameless]] || 5%
| |
| |-
| |
| |'''Pluton Box''' [[File:Pluton Box.png|frameless]] || 5%
| |
| |-
| |
| | colspan = "7" style="background-color:#000000;" |
| |
| |-
| |
| | rowspan="2" | '''Northern Shadow'''<br> Rages after 20 minutes. <br> [[File:Northern Shadow.png|frameless|250px]] || rowspan="2" | 130 || rowspan="2" | Fei'Yin || rowspan="2" | (F-6) <br> Map 1 || rowspan="2" | 3-5 hours or 0-2 hours after restart || '''Homiliary'''[[File:Homiliary.png|frameless]] || 5%
| |
| |-
| |
| | '''Pluton Box'''[[File:Pluton Box.png|frameless]] || 5%
| |
| |-
| |
| | colspan = "7" style="background-color:#000000;" |
| |
| |-
| |
| | rowspan="2" | '''Southern Shadow'''<br> Rages after 20 minutes. <br> [[File:Southern Shadow.png|frameless|250px]] || rowspan="2" | 130 || rowspan="2" | Fei'Yin || rowspan="2" | (F-7/8) <br> Map 1 || rowspan="2" | 3-5 hours or 0-2 hours after restart || '''Epaminondas's Ring'''[[File:Epaminondas's Ring.png|frameless]] || 5%
| |
| |-
| |
| |'''Pluton Box''' [[File:Pluton Box.png|frameless]] || 5%
| |
| |-
| |
| | colspan = "7" style="background-color:#000000;" |
| |
| |-
| |
| | rowspan="3" | '''Western Shadow''' <br> [[File:Western Shadow.png|frameless|250px]] || rowspan="3" | 130 || rowspan="3" | Fei'Yin || rowspan="3" | (E/F-7) <br> Map 1 || rowspan="3" | 3-5 hours or 0-2 hours after restart||'''Gishdubar Sash''' [[File:Gishdubar Sash.png|frameless]] || 5%
| |
| |-
| |
| |'''Letalis Mantle''' [[File:Letalis Mantle.png|frameless]] || 5%
| |
| |-
| |
| |'''Pluton Box''' [[File:Pluton Box.png|frameless]] || 5%
| |
| |-
| |
| | colspan = "7" style="background-color:#000000;" |
| |
| |-
| |
| | rowspan="2" | '''Tonberry Kinq''' <br> Rages after 20 minutes.<br> [[File:Tonberry Kinq.png|frameless|250px]] || rowspan="2" | 142 || rowspan="2" | Temple of Uggalepih || rowspan="2" | (I-8) <br> Map 2 || rowspan="2" | 21-24 hours or 0-2 hours after restart|| '''Tartarus Platemail'''[[File:Tartarus Platemail.png|frameless]] <br> '''OR''' <br> '''Gyve Doublet'''[[File:Gyve Doublet.png|frameless]] || 7.5%
| |
| |-
| |
| |'''Pluton Case''' [[File:Pluton Case.png|frameless]] || (Up to 3) <br> 40%/16%/4%
| |
| |-
| |
| | rowspan="2" | '''Khadem Quemquoma'''<br> Rages after 20 minutes. <br> [[File:Khadem Quemquoma.png|frameless|250px]] || rowspan="2" | 135 || rowspan="2" | Garlaige Citadel (S) || rowspan="2" | (G-8) <br> Map 1 || rowspan="2" | 3-5 hours or 0-2 hours after restart|| '''Pixie Hairpin +1'''[[File:Pixie Hairpin +1.png|frameless]] || 15%
| |
| |-
| |
| |'''Pluton Box''' [[File:Pluton Box.png|frameless]] || 5%
| |
| |-
| |
| | rowspan="2" | '''King Vinegarroon''' <br> Rages after 20 minutes.<br> [[File:King Vingarroon.png|frameless|250px]] || rowspan="2" | 135 || rowspan="2" | Western Altepa Desert || rowspan="2" | (G-11) || rowspan="2" | 3-5 hours or 0-2 hours after restart|| '''Sanctity Necklace'''[[file:Sanctity Necklace.png|frameless]] || 8%
| |
| |-
| |
| | '''Loop of Abdhaljs Fiber'''[[File:Loop of Abdhaljs Fiber.png|frameless]] || (Up to 3) <br> 80%/30%/5%
| |
| |-
| |
| | rowspan="2" | '''Serket''' <br> Rages after 20 minutes.<br> [[File:Serket.png|frameless|250px]] || rowspan="2" | 135 || rowspan="2" | Garlaige Citadel || rowspan="2" | (F-7)<br>(I-7) || rowspan="2" | 3-5 hours or 0-2 hours after restart ||'''Eabani Earring''' [[file:Eabani Earring.png|frameless]] || 8%
| |
| |-
| |
| | '''Loop of Abdhaljs Fiber'''[[File:Loop of Abdhaljs Fiber.png|frameless]] || (Up to 3) <br> 80%/30%/5%
| |
| |-
| |
| | rowspan="2" | '''Tyrannic Tunnok''' <br> Rages after 20 minutes.<br> [[File:Tyrannic Tunnok.png|frameless|250px]] || rowspan="2" | 135 || rowspan="2" | Ifrit's Cauldron || rowspan="2" | (E-10) || rowspan="2" | 3-5 hours or 0-2 hours after restart|| '''Izdubar Mantle'''[[file:Izdubar Mantle.png|frameless]] || 8%
| |
| |-
| |
| |'''Loop of Abdhaljs Fiber''' [[File:Loop of Abdhaljs Fiber.png|frameless]] || (Up to 3) <br> 80%/30%/5%
| |
| |-
| |
| | rowspan="2" | '''Amikiri''' <br> Rages after 20 minutes.<br> [[File:Amikiri.png|frameless|250px]] || rowspan="2" | 135 || rowspan="2" | Gustav Tunnel || rowspan="2" | (F-7) || rowspan="2" | 3-5 hours or 0-2 hours after restart||'''Respite Cloak''' [[file:Respite Cloak.png|frameless]] || 8%
| |
| |-
| |
| | '''Loop of Abdhaljs Fiber'''[[File:Loop of Abdhaljs Fiber.png|frameless]] || (Up to 3) <br> 80%/30%/5%
| |
| |-
| |
| | '''Sargas''' <br> Rages after 20 minutes.<br> [[File:Sargas.png|frameless|250px]] || 135 || Attohwa Chasm || (G-9) || 3-5 hours or 0-2 hours after restart|| '''Loop of Abdhaljs Fiber'''[[File:Loop of Abdhaljs Fiber.png|frameless]] || (Up to 3) <br> 80%/30%/5%
| |
| |-
| |
| | '''Lesath''' <br> Rages after 20 minutes.<br> [[File:Lesath.png|frameless|250px]] || 135 || Maze of Shakhrami || (H-9) || 3-5 hours or 0-2 hours after restart|| '''Loop of Abdhaljs Fiber'''[[File:Loop of Abdhaljs Fiber.png|frameless]] || (Up to 3) <br> 80%/30%/5%
| |
| |-
| |
| | '''Calchas''' <br> Rages after 20 minutes.<br> [[File:Calchas.png|frameless|250px]] || 135 || Western Altepa Desert || (F-9) || 3-5 hours or 0-2 hours after restart|| '''Loop of Abdhaljs Fiber'''[[File:Loop of Abdhaljs Fiber.png|frameless]] || (Up to 3) <br> 80%/30%/5%
| |
| |-
| |
| | '''Aqrabuamelu''' <br> Rages after 20 minutes.<br> [[File:Aqrabuamelu.png|frameless|250px]] || 135 || Crawler's Nest || (F-7) || 3-5 hours or 0-2 hours after restart|| '''Loop of Abdhaljs Fiber'''[[File:Loop of Abdhaljs Fiber.png|frameless]] || (Up to 3) <br> 80%/30%/5%
| |
| |-
| |
| | rowspan="2" | '''All-Seeing Onyx Eye''' <br> Rages after 20 minutes.<br> [[File:All-Seeing Onyx Eye.png|frameless|250px]] || rowspan="2" | 135 || rowspan="2" | La Vaule (S) || rowspan="2" | (J-11) || rowspan="2" | 3-5 hours or 0-2 hours after restart|| '''Tokko Axe'''[[file:Tokko Axe.png|frameless]] <br> '''Tokko Chopper'''[[file:Tokko Chopper.png|frameless]] || 15%
| |
| |-
| |
| | '''Pluton Box''' [[File:Pluton Box.png|frameless]] || 5%
| |
| |-
| |
| | rowspan="2" | '''Amaranth'''<br> Rages after 20 minutes.<br> [[File:Amaranth.png|frameless|250px]] || rowspan="2" | 135 || rowspan="2" | Fort Karugo-Narugo (S) || rowspan="2" | (E-9) || rowspan="2" | 3-5 hours or 0-2 hours after restart || '''Tokko Claymore'''[[file:Tokko Claymore.png|frameless]] <br> '''Tokko Katana''' [[file:Tokko Katana.png|frameless]] || 15%
| |
| |-
| |
| |'''Pluton Box''' [[File:Pluton Box.png|frameless]] || 5%
| |
| |-
| |
| | rowspan="2" | '''Kirtimukha''' <br> Rages after 20 minutes. <br> [[File:Kirtimukha.png|frameless|250px]] || rowspan="2" | 135 || rowspan="2" | Fort Karugo-Narugo (S) || rowspan="2" | (I-10) || rowspan="2" | 3-5 hours or 0-2 hours after restart||'''Tokko Knife''' [[file:Tokko Knife.png|frameless]] <br> '''Tokko Knuckles'''[[file:Tokko Knuckles.png|frameless]] || 15%
| |
| |-
| |
| | '''Pluton Box''' [[File:Pluton Box.png|frameless]] || 5%
| |
| |-
| |
| | rowspan="2" | '''Judgmental Julika '''<br> Rages after 20 minutes. <br> [[File:Judgmental Julika.png|frameless|250px]] || rowspan="2" | 135 || rowspan="2" | Vunkerl Inlet (S) || rowspan="2" | (G-13) || rowspan="2" | 3-5 hours or 0-2 hours after restart || '''Tokko Scythe'''[[file:Tokko Scythe.png|frameless]] <br> '''Tokko Staff''' [[file:Tokko Staff.png|frameless]] || 15%
| |
| |-
| |
| |'''Pluton Box'''[[File:Pluton Box.png|frameless]] || 5%
| |
| |-
| |
| | rowspan="2" | '''Big Bang '''<br> Rages after 20 minutes. <br> [[File:Big Bang.png|frameless|250px]] || rowspan="2" | 135 || rowspan="2" | Vunkerl Inlet (S) || rowspan="2" | (E/F-10) || rowspan="2" | 3-5 hours or 0-2 hours after restart||'''Tokko Sword''' [[file:Tokko Sword.png|frameless]] <br> '''Tokko Tachi''' [[file:Tokko Tachi.png|frameless]] || 15%
| |
| |-
| |
| | '''Pluton Box'''[[File:Pluton Box.png|frameless]] || 5%
| |
| |-
| |
| | rowspan="2" | '''Scitalis'''<br> Rages after 20 minutes. <br> [[File:Scitalis.png|frameless|250px]] || rowspan="2" | 135 || rowspan="2" | Grauberg (S) || rowspan="2" | (F-9) || rowspan="2" | 3-5 hours or 0-2 hours after restart ||'''Tokko Lance''' [[file:Tokko Lance.png|frameless]] <br> '''Tokko Rod''' [[file:Tokko Rod.png|frameless]] || 15%
| |
| |-
| |
| | '''Pluton Box'''[[File:Pluton Box.png|frameless]] || 5%
| |
| |-
| |
| | rowspan="2" | '''Simorg'''<br> Rages after 20 minutes. <br> [[File:Simorg.png|frameless|250px]] || rowspan="2" | 135 || rowspan="2" | Grauberg (S) || rowspan="2" | (D-8) || rowspan="2" | 3-5 hours or 0-2 hours after restart||'''Tokko Grip''' [[file:Tokko Grip.png|frameless]] <br> '''Tokko Bow''' [[file:Tokko Bow.png|frameless]] || 15%
| |
| |-
| |
| | '''Pluton Box'''[[File:Pluton Box.png|frameless]] || 5%
| |
| |-
| |
| | rowspan="3" | '''Drooling Daisy'''<br> Rages after 20 minutes. <br> [[File:Drooling Daisy.png|frameless|250px]] || rowspan="3" | 130 || rowspan="3" | Rolanberry Fields || rowspan="3" | (D-11) || rowspan="3" | 3-5 hours or 0-2 hours after restart||'''Barkarole Earring''' [[file:Barkarole Earring.png|frameless]] || 5%
| |
| |- | | |- |
| |'''Wyrm Ash''' [[file:Pile of Wyrm Ash.png|frameless]] || 10% | | | '''[[Marchelute]]''' || '''[[Eastern Shadow]]''' || '''[[Northern Shadow]]''' || '''[[Southern Shadow]]''' || '''[[Western Shadow]]''' || '''[[Tonberry Kinq]]''' |
| |- | | |- |
| |'''Pluton Box''' [[File:Pluton Box.png|frameless]] || 5% | | | style="width: 200px;" | [[File:Marchelute.png|frameless|center|200px|link=[[Marchelute]]]] || style="width: 200px;" | [[File:Eastern Shadow.png|frameless|center|200px|link=[[Eastern Shadow]]]] || style="width: 200px;" | [[File:Northern Shadow.png|frameless|center|200px|link=[[Northern Shadow]]]] || style="width: 200px;" | [[File:Southern Shadow.png|frameless|center|200px|link=[[Southern Shadow]]]] || style="width: 200px;" | [[File:Western Shadow.png|frameless|center|200px|link=[[Western Shadow]]]] || style="width: 200px;" | [[File:Tonberry Kinq.png|frameless|center|200px|link=[[Tonberry Kinq]]]] |
| |- | | |- |
| | rowspan="3" | '''Noble Mold'''<br> Rages after 20 minutes. <br> [[File:Noble Mold.png|frameless|250px]] || rowspan="3" | 130 || rowspan="3" | The Sanctuary of Zi'Tah || rowspan="3" | (E-9) || rowspan="3" | 3-5 hours or 0-2 hours after restart|| '''Crematio Earring'''[[File:Crematio Earring.png|frameless]] || 5% | | | '''[[Khadem Quemquoma]]''' || '''[[King Vinegarroon]]''' || '''[[Serket]]''' || '''[[Tyrannic Tunnok]]''' || '''[[Amikiri]]''' || '''[[Sargas]]''' |
| |- | | |- |
| | '''Wyrm Blood'''[[File:Vial of Wyrm Blood.png|frameless]] || 10% | | | style="width: 200px;" | [[File:Khadem Quemquoma.png|frameless|center|200px|link=[[Khadem Quemquoma]]]] || style="width: 200px;" | [[File:King Vinegarroon.png|frameless|center|200px|link=[[King Vinegarroon]]]] || style="width: 200px;" | [[File:Serket.png|frameless|center|200px|link=[[Serket]]]] || style="width: 200px;" | [[File:Tyrannic Tunnok.png|frameless|center|200px|link=[[Tyrannic Tunnok]]]] || style="width: 200px;" | [[File:Amikiri.png|frameless|center|200px|link=[[Amikiri]]]] || style="width: 200px;" | [[File:Sargas.png|frameless|center|200px|link=[[Sargas]]]] |
| |- | | |- |
| | '''Pluton Box'''[[File:Pluton Box.png|frameless]] || 5% | | | '''[[Lesath]]''' || '''[[Calchas]]''' || '''[[Aqrabuamelu]]''' || '''[[All-Seeing Onyx Eye]]''' || '''[[Amaranth]]''' || '''[[Kirtimukha]]''' |
| |- | | |- |
| | rowspan="3" | '''Morbolger'''<br> Rages after 20 minutes. <br> [[File:Morbolger.png|frameless|250px]] || rowspan="3" | 130 || rowspan="3" | Ordelle's Caves || rowspan="3" | (H-10) || rowspan="3" | 3-5 hours or 0-2 hours after restart||'''Trux Earring''' [[File:Trux Earring.png|frameless]] || 5% | | | style="width: 200px;" | [[File:Lesath.png|frameless|center|200px|link=[[Lesath]]]] || style="width: 200px;" | [[File:Calchas.png|frameless|center|200px|link=[[Calchas]]]] || style="width: 200px;" | [[File:Aqrabuamelu.png|frameless|center|200px|link=[[Aqrabuamelu]]]] || style="width: 200px;" | [[File:All-Seeing Onyx Eye.png|frameless|center|200px|link=[[All-Seeing Onyx Eye]]]] || style="width: 200px;" | [[File:Amaranth.png|frameless|center|200px|link=[[Amaranth]]]] || style="width: 200px;" | [[File:Kirtimukha.png|frameless|center|200px|link=[[Kirtimukha]]]] |
| |- | | |- |
| | '''Macuil Horn'''[[File:Macuil Horn.png|frameless]] || 10% | | | '''[[Judgmental Julika]]''' || '''[[Big Bang]]''' || '''[[Scitalis]]''' || '''[[Simorg]]''' || '''[[Drooling Daisy]]''' || '''[[Noble Mold]]''' |
| |- | | |- |
| |'''Pluton Box''' [[File:Pluton Box.png|frameless]] || 5% | | | style="width: 200px;" | [[File:Judgmental Julika.png|frameless|center|200px|link=[[Judgmental Julika]]]] || style="width: 200px;" | [[File:Big Bang.png|frameless|center|200px|link=[[Big Bang]]]] || style="width: 200px;" | [[File:Scitalis.png|frameless|center|200px|link=[[Scitalis]]]] || style="width: 200px;" | [[File:Simorg.png|frameless|center|200px|link=[[Simorg]]]] || style="width: 200px;" | [[File:Drooling Daisy.png|frameless|center|200px|link=[[Drooling Daisy]]]] || style="width: 200px;" | [[File:Noble Mold.png|frameless|center|200px|link=[[Noble Mold]]]] |
| |- | | |- |
| | rowspan="3" | '''Rose Garden'''<br> Rages after 20 minutes. <br> [[File:Rose Garden.png|frameless|250px]] || rowspan="3" | 130 || rowspan="3" | Yuhtunga Jungle || rowspan="3" | (I-7) || rowspan="3" | 3-5 hours or 0-2 hours after restart||'''Tripudio Earring''' [[File:Tripudio Earring.png|frameless]] || 5% | | | '''[[Morbolger]]''' || '''[[Rose Garden]]''' || '''[[Voluptuous Vivian]]''' || '''[[Voluptuous Vilma]]''' || '''[[Buarainech]]''' || '''[[Balor]]''' |
| |- | | |- |
| | '''Plovid Effluvium'''[[File:Vial of Plovid Effluvium.png|frameless]] || 10% | | | style="width: 200px;" | [[File:Morbolger.png|frameless|center|200px|link=[[Morbolger]]]] || style="width: 200px;" | [[File:Rose Garden.png|frameless|center|200px|link=[[Rose Garden]]]] || style="width: 200px;" | [[File:Voluptuous Vivian.png|frameless|center|200px|link=[[Voluptuous Vivian]]]] || style="width: 200px;" | [[File:Voluptuous Vilma.png|frameless|center|200px|link=[[Voluptuous Vilma]]]] || style="width: 200px;" | [[File:Buarainech.png|frameless|center|200px|link=[[Buarainech]]]] || style="width: 200px;" | [[File:Balor.png|frameless|center|200px|link=[[Balor]]]] |
| |- | | |- |
| | '''Pluton Box'''[[File:Pluton Box.png|frameless]] || 5% | | | '''[[Caithlean]]''' || '''[[Lobais]]''' || '''[[Luaith]]''' || '''[[Indich]]''' || '''[[Elel]]''' || '''[[Keremet]]''' |
| |- | | |- |
| | rowspan="3" | '''Voluptuous Vivian'''<br> Rages after 20 minutes. <br> [[File:Voluptuous Vivian.png|frameless|250px]] || rowspan="3" | 130 || rowspan="3" | The Boyahda Tree || rowspan="3" | (G-5/H-6) || rowspan="3" | 3-5 hours or 0-2 hours after restart||'''Sanare Earring''' [[File:Sanare Earring.png|frameless]] || 5% | | | style="width: 200px;" | [[File:Caithlean.png|frameless|center|200px|link=[[Caithlean]]]] || style="width: 200px;" | [[File:Lobais.png|frameless|center|200px|link=[[Lobais]]]] || style="width: 200px;" | [[File:Luaith.png|frameless|center|200px|link=[[Luaith]]]] || style="width: 200px;" | [[File:Indich.png|frameless|center|200px|link=[[Indich]]]] || style="width: 200px;" | [[File:Elel.png|frameless|center|200px|link=[[Elel]]]] || style="width: 200px;" | [[File:Keremet.png|frameless|center|200px|link=[[Keremet]]]] |
| |- | | |- |
| | '''Defiant Sweat'''[[File:Vial of Defiant Sweat.png|frameless]] || 10% | | | '''[[Taxim]]''' || '''[[Ah Puch]]''' || '''[[Oupire]]''' || '''[[Wounded Wurfel]]''' || '''[[Smothered Schmidt]]''' || '''[[Aynu-kaysey]]''' |
| |- | | |- |
| |'''Pluton Box''' [[File:Pluton Box.png|frameless]] || 5% | | | style="width: 200px;" | [[File:Taxim.png|frameless|center|200px|link=[[Taxim]]]] || style="width: 200px;" | [[File:Ah Puch.png|frameless|center|200px|link=[[Ah Puch]]]] || style="width: 200px;" | [[File:Oupire.png|frameless|center|200px|link=[[Oupire]]]] || style="width: 200px;" | [[File:Wounded Wurfel.png|frameless|center|200px|link=[[Wounded Wurfel]]]] || style="width: 200px;" | [[File:Smothered Schmidt.png|frameless|center|200px|link=[[Smothered Schmidt]]]] || style="width: 200px;" | [[File:Aynu-kaysey.png|frameless|center|200px|link=[[Aynu-kaysey]]]] |
| |- | | |- |
| | rowspan="3" | '''Voluptuous Vilma'''<br> Rages after 20 minutes. <br> [[File:Voluptuous Vilma.png|frameless|250px]] || rowspan="3" | 130 || rowspan="3" | Yuhtunga Jungle || rowspan="3" | (I-7) || rowspan="3" | 3-5 hours or 0-2 hours after restart|| '''Gelai Earring'''[[File:Gelai Earring.png|frameless]] || 5% | | | '''[[Hellion]]''' || '''[[Ereshkigal]]''' || '''[[Mahishasura]]''' || || || |
| |- | | |- |
| |'''Tartarian Chain''' [[File:Tartarian Chain.png|frameless]] || 10% | | | style="width: 200px;" | [[File:Hellion.png|frameless|center|200px|link=[[Hellion]]]] || style="width: 200px;" | [[File:Ereshkigal.png|frameless|center|200px|link=[[Ereshkigal]]]] || style="width: 200px;" | [[File:Mahishasura.png|frameless|center|200px|link=[[Mahishasura]]]] || style="width: 200px;" | || style="width: 200px;" | || style="width: 200px;" | |
| |-
| |
| | '''Pluton Box'''[[File:Pluton Box.png|frameless]] || 5%
| |
| |-
| |
| | rowspan="4" | '''Buarainech''' <br> Rages after 20 minutes. <br> [[File:Buarainech.png|frameless|250px]] || rowspan="4" | 130 || rowspan="4" | Garlaige Citadel (S) || rowspan="4" | (H-7) || rowspan="4" | 3-5 hours or 0-2 hours after restart || '''Balarama Grip''' [[File:Balarama Grip.png|frameless]] || 20%
| |
| |-
| |
| | '''Bztavian Wing'''[[File:Bztavian Wing.png|frameless]] || 5%
| |
| |-
| |
| | '''Macuil Horn'''[[File:Macuil Horn.png|frameless]] || 5%
| |
| |- | |
| | '''Ruthenium Ore'''[[File:Ruthenium Ore.png|frameless]] || 5% | |
| |-
| |
| | rowspan="5" | '''Balor'''<br> Rages after 20 minutes. <br> [[File:Balor.png|frameless|250px]] || rowspan="5" | 130 || rowspan="5" | Sacrarium || rowspan="5" | (L-8) || rowspan="5" | 3-5 hours or 0-2 hours after restart|| '''Ajax''' <br> [[File:Ajax.png|frameless]] || 3%
| |
| |-
| |
| | '''Ajax +1''' <br> [[File:Ajax +1.png|frameless]] || 0.3%
| |
| |-
| |
| | '''Beitetsu Parcel'''[[File:Beitetsu Parcel.png|frameless]] || 10%
| |
| |-
| |
| | '''Empress Board'''[[File:Empress Board.png|frameless]] || 5%
| |
| |-
| |
| | '''Princess Board'''[[File:Princess Board.png|frameless]] || 5%
| |
| |-
| |
| | rowspan="5" | '''Caithlean'''<br> Rages after 20 minutes. <br> [[File:Caithlean.png|frameless|250px]] || rowspan="5" | 130 || rowspan="5" | Sacrarium || rowspan="5" | (L-8) || rowspan="5" | 3-5 hours or 0-2 hours after restart || '''Contemplator''' [[File:Contemplator.png|frameless]] || 3%
| |
| |- | |
| | '''Contemplator +1''' [[File:Contemplator +1.png|frameless]] || 0.3%
| |
| |-
| |
| | '''Beitetsu Parcel''' [[File:Beitetsu Parcel.png|frameless]] || 10%
| |
| |-
| |
| | '''Empress Board'''[[File:Empress Board.png|frameless]] || 5%
| |
| |-
| |
| | '''Princess Board'''[[File:Princess Board.png|frameless]] || 5%
| |
| |-
| |
| | rowspan="5" | '''Lobais'''<br> Rages after 20 minutes. <br> [[File:Lobais.png|frameless|250px]] || rowspan="5" | 130 || rowspan="5" | Sacrarium || rowspan="5" | (L-8) || rowspan="5" | 3-5 hours or 0-2 hours after restart|| '''Imati''' <br> [[File:Imati.png|frameless]] || 3%
| |
| |-
| |
| | '''Imati +1''' <br> [[File:Imati +1.png|frameless]] || 0.3%
| |
| |-
| |
| | '''Beitetsu Parcel''' [[File:Beitetsu Parcel.png|frameless]] || 10%
| |
| |-
| |
| | '''Empress Board''' [[File:Empress Board.png|frameless]] || 5%
| |
| |-
| |
| |'''Princess Board''' [[File:Princess Board.png|frameless]] || 5%
| |
| |-
| |
| | rowspan="5" | '''Luaith''' <br> Rages after 20 minutes.<br> [[File:Luaith.png|frameless|250px]] || rowspan="5" | 130 || rowspan="5" | Sacrarium || rowspan="5" | (L-8) || rowspan="5" | 3-5 hours or 0-2 hours after restart||'''Triska Scythe''' [[File:Triska Scythe.png|frameless]] || 3%
| |
| |-
| |
| | '''Triska Scythe +1''' [[File:Triska Scythe +1.png|frameless]] || 0.3%
| |
| |-
| |
| |'''Beitetsu Parcel''' [[File:Beitetsu Parcel.png|frameless]] || 10%
| |
| |-
| |
| | '''Empress Board''' [[File:Empress Board.png|frameless]] || 5%
| |
| |-
| |
| | '''Princess Board''' [[File:Princess Board.png|frameless]] || 5%
| |
| |-
| |
| | rowspan="5" | '''Indich'''<br> Rages after 20 minutes. <br> [[File:Indich.png|frameless|250px]] || rowspan="5" | 130 || rowspan="5" | Sacrarium || rowspan="5" | (L-8) || rowspan="5" | 3-5 hours or 0-2 hours after restart|| '''Perun''' <br> [[File:Perun.png|frameless]] || 3%
| |
| |-
| |
| | '''Perun +1''' <br> [[File:Perun +1.png|frameless]] || 0.3%
| |
| |-
| |
| | '''Beitetsu Parcel'''[[File:Beitetsu Parcel.png|frameless]] || 10%
| |
| |-
| |
| |'''Empress Board''' [[File:Empress Board.png|frameless]] || 5%
| |
| |-
| |
| |'''Princess Board''' [[File:Princess Board.png|frameless]] || 5%
| |
| |-
| |
| | rowspan="5" | '''Elel'''<br> Rages after 20 minutes. <br> [[File:Elel.png|frameless|250px]] || rowspan="5" | 130 || rowspan="5" | Sacrarium || rowspan="5" | (L-8) || rowspan="5" | 3-5 hours or 0-2 hours after restart|| '''Flyssa''' <br> [[File:Flyssa.png|frameless]] || 3%
| |
| |-
| |
| |'''Flyssa +1''' [[File:Flyssa +1.png|frameless]] || 0.3%
| |
| |-
| |
| |'''Beitetsu Parcel''' [[File:Beitetsu Parcel.png|frameless]] || 10%
| |
| |-
| |
| | '''Empress Board'''[[File:Empress Board.png|frameless]] || 5%
| |
| |-
| |
| | '''Princess Board'''[[File:Princess Board.png|frameless]] || 5%
| |
| |-
| |
| | rowspan="5" | '''Keremet'''<br> Rages after 20 minutes. <br> [[File:Keremet.png|frameless|250px]] || rowspan="5" | 130 || rowspan="5" | Sacrarium || rowspan="5" | (L-8) || rowspan="5" | 3-5 hours or 0-2 hours after restart || '''Ababinili''' <br> [[File:Ababinili.png|frameless]] || 3%
| |
| |-
| |
| | '''Ababinili +1''' [[File:Ababinili +1.png|frameless]] || 0.3%
| |
| |-
| |
| |'''Beitetsu Parcel''' [[File:Beitetsu Parcel.png|frameless]] || 10%
| |
| |-
| |
| | '''Empress Board'''[[File:Empress Board.png|frameless]] || 5%
| |
| |-
| |
| | '''Princess Board'''[[File:Princess Board.png|frameless]] || 5%
| |
| |-
| |
| | rowspan="4" | '''Taxim'''<br> Rages after 20 minutes. <br> [[File:Taxim.png|frameless|250px]] || rowspan="4" | 130 || rowspan="4" | Gustav Tunnel || rowspan="4" | Map 2 (G-8) || rowspan="4" | 3-5 hour or 0-2 hours after restart || '''Hretha Earring'''[[File:hretha earring.png|frameless]] || 5%
| |
| |-
| |
| | '''Bishop's Sash'''[[File:Bishop's Sash.png|frameless]] || 35%
| |
| |-
| |
| | '''Ran Earring'''[[File:ran earring.png|frameless]] || 5%
| |
| |-
| |
| |'''Boulder Case''' [[File:Boulder Case.png|frameless]] || 25%
| |
| |-
| |
| | rowspan="4" | '''Ah Puch'''<br> Rages after 20 minutes. <br> [[File:Ah Puch.png|frameless|250px]] || rowspan="4" | 130 || rowspan="4" | Outer Horutoto Ruins || rowspan="4" | Map 5 (G-8) || rowspan="4" | 3-5 hour or 0-2 hours after restart || '''Foresti Earring'''[[File:foresti earring.png|frameless]] || 5%
| |
| |-
| |
| | '''Casso Sash'''[[File:Casso Sash.png|frameless]] || 35%
| |
| |-
| |
| |'''Hermodr Earring''' [[File:hermodr earring.png|frameless]] || 5%
| |
| |-
| |
| |'''Boulder Case''' [[File:Boulder Case.png|frameless]] || 25%
| |
| |-
| |
| | rowspan="4" | '''Oupire'''<br> Rages after 20 minutes. <br> [[File:Oupire.png|frameless|250px]] || rowspan="4" | 130 || rowspan="4" | Alzadaal Undersea Ruins || rowspan="4" | Map 1 (I-10) || rowspan="4" | 3-5 hour or 0-2 hours after restart || '''Saxnot Earring'''[[File:saxnot earring.png|frameless]] || 5%
| |
| |-
| |
| |'''Cimmerian Sash''' [[File:Cimmerian Sash.png|frameless]] || 35%
| |
| |-
| |
| | '''Mimir Earring'''[[File:mimir earring.png|frameless]] || 5%
| |
| |-
| |
| | '''Boulder Case'''[[File:Boulder Case.png|frameless]] || 25%
| |
| |-
| |
| | rowspan="4" | '''Wounded Wurfel'''<br> Rages after 20 minutes. <br> [[File:Wounded Wurfel.png|frameless|250px]] || rowspan="4" | 130 || rowspan="4" | Gusgen Mines || rowspan="4" | Map 4 (H-6) || rowspan="4" | 3-5 hour or 0-2 hours after restart || '''Vor Earring'''[[File:Vor earring.png|frameless]] || 5%
| |
| |-
| |
| |'''Harfner's Sash''' [[File:Harfner's Sash.png|frameless]] || 35%
| |
| |-
| |
| | '''Ilmr Earring'''[[File:ilmr earring.png|frameless]] || 5%
| |
| |-
| |
| | '''Boulder Case'''[[File:Boulder Case.png|frameless]] || 25%
| |
| |-
| |
| | rowspan="4" | '''Smothered Schmidt'''<br> Rages after 20 minutes. <br> [[File:Smothered Schmidt.png|frameless|250px]] || rowspan="4" | 130 || rowspan="4" | Gusgen Mines || rowspan="4" | Map 1 (J-7) || rowspan="4" | 3-5 hour or 0-2 hours after restart ||'''Mani Earring''' [[File:mani earring.png|frameless]] || 5%
| |
| |-
| |
| |'''Accursed Belt''' [[File:Accursed Belt.png|frameless]] || 35%
| |
| |-
| |
| | '''Lodurr Earring'''[[File:lodurr earring.png|frameless]] || 5%
| |
| |-
| |
| |'''Boulder Case''' [[File:Boulder Case.png|frameless]] || 25%
| |
| |-
| |
| | rowspan="4" | '''Aynu-kaysey'''<br> Rages after 20 minutes. <br> [[File:Aynu-kaysey.png|frameless|250px]] || rowspan="4" | 130 || rowspan="4" | Caedarva Mire || rowspan="4" | Map 2 (H-8) || rowspan="4" | 3-5 hour or 0-2 hours after restart || '''Boulder Case'''[[File:Boulder Case.png|frameless]] || 25%
| |
| |-
| |
| | '''Olympus Sash'''[[File:Olympus Sash.png|frameless]] || 35%
| |
| |-
| |
| |'''Choleric Earring'''[[File:Choleric Earring.png|frameless]] || 5%
| |
| |-
| |
| |'''Njordr Earring'''[[File:Njordr Earring.png|frameless]] || 5%
| |
| |-
| |
| | rowspan="4" | '''Hellion'''<br> Rages after 20 minutes. <br> [[File:Hellion.png|frameless|250px]] || rowspan="4" | 130 || rowspan="4" | Labyrinth of Onzozo || rowspan="4" | (J-6) || rowspan="4" | 3-5 hour or 0-2 hours after restart || '''Bragi Earring'''[[File:Bragi Earring.png|frameless]] || 5%
| |
| |-
| |
| | '''Glassblower's Belt'''[[File:Glassblower's Belt.png|frameless]] || 35%
| |
| |-
| |
| | '''Dellingr Earring'''[[File:Dellingr earring.png|frameless]] || 5%
| |
| |-
| |
| |'''Boulder Case''' [[File:Boulder Case.png|frameless]] || 25%
| |
| |-
| |
| | rowspan="4" | '''Ereshkigal'''<br> Rages after 20 minutes. <br> [[File:Ereshkigal.png|frameless|250px]] || rowspan="4" | 130 || rowspan="4" | Xarcabard || rowspan="4" | (F-7) || rowspan="4" | 3-5 hour or 0-2 hours after restart ||'''Gna Earring''' [[File:Gna Earring.png|frameless]] || 5%
| |
| |-
| |
| |'''Field Rope''' [[File:Field Rope.png|frameless]] || 35%
| |
| |-
| |
| | '''Fulla Earring'''[[File:Fulla Earring.png|frameless]] || 5%
| |
| |-
| |
| | '''Boulder Case'''[[File:Boulder Case.png|frameless]] || 25%
| |
| |-
| |
| | rowspan="4" | '''Mahishasura'''<br> Rages after 20 minutes. <br> [[File:Mahishasura.png|frameless|250px]] || rowspan="4" | 130 || rowspan="4" | Bhaflau Thickets || rowspan="4" | (G-8) || rowspan="4" | 3-5 hour or 0-2 hours after restart || '''Gersemi Earring'''[[File:Gersemi earring.png|frameless]] || 5%
| |
| |-
| |
| |'''Emphatikos Rope''' [[File:Emphatikos Rope.png|frameless]] || 35%
| |
| |-
| |
| | '''Hnoss Earring'''[[File:hnoss earring.png|frameless]] || 5%
| |
| |-
| |
| | '''Boulder Case'''[[File:Boulder Case.png|frameless]] || 25%
| |
| |} | | |} |
|
| |
|
| == DNANM's == | | == DNANMs == |
|
| |
|
| * '''These NMs are level 140-150 and carry considerably more valuable rewards than lesser ANMs.''' | | * '''These NMs are level 140-150 and carry considerably more valuable rewards than lesser ANMs.''' |
|
| |
|
| {| class="wikitable" style="text-align: center; | | {| class="wikitable mw-collapsible mw-collapsed" style="text-align: center"; width="1280px;" |
| | scope="row" colspan="7" | '''DNANM's'''
| | ! scope="row" colspan="7" style="text-align: left" | DNANMs |
| |- | | |- |
| | scope="row" colspan="1" | [[Lehko Habhoka]] <br> [[File:Lehko Habhoka.png|frameless|120px|link=[[Lehko Habhoka]]]] || ! scope="row" colspan="1" | [[Selh'teus]] <br> [[File:selhteus.png|frameless|120px|link=[[Selh'teus]]]] || ! scope="row" colspan="1" | [[Tom Tit Tat]] <br> [[File:Tom Tit Tat.png|frameless|110px|link=[[Tom Tit Tat]]]] || ! scope="row" colspan="1" | [[Vidhula the Wrathborn]] <br> [[File:Vidhula the Wrathborn.png|frameless|120px|link=[[Vidhula the Wrathborn]]]] || ! scope="row" colspan="1" | [[Calcabrina]] <br> [[File:Calcabrina.PNG|frameless|120px|link=[[Calcabrina]]]] || ! scope="row" colspan="1" | [[Hippomaritimus]] <br> [[File:Hippomaritimus.png|frameless|120px|link=[[Hippomaritimus]]]] || ! scope="row" colspan="1" | [[Jolly Green]] <br> [[File:Jolly Green.png|frameless|120px|link=[[Jolly Green]]]] | | | '''[[Lehko Habhoka]]''' || '''[[Selh'teus]]''' || '''[[Tom Tit Tat]]''' || '''[[Vidhuwa the Wrathborn]]''' || '''[[Calcabrina]]''' || '''[[Hippomaritimus]]''' |
| |- | | |- |
| | | style="width: 200px;" | [[File:Lehko Habhoka.png|frameless|center|200px|link=[[Lehko Habhoka]]]] || style="width: 200px;" | [[File:Selh'teus.png|frameless|center|200px|link=[[Selh'teus]]]] || style="width: 200px;" | [[File:Tom Tit Tat.png|frameless|center|200px|link=[[Tom Tit Tat]]]] || style="width: 200px;" | [[File:Vidhuwa the Wrathborn.png|frameless|center|200px|link=[[Vidhuwa the Wrathborn]]]] || style="width: 200px;" | [[File:Calcabrina.png|frameless|center|200px|link=[[Calcabrina]]]] || style="width: 200px;" | [[File:Hippomaritimus.png|frameless|center|200px|link=[[Hippomaritimus]]]] |
| | |- |
| | | '''[[Jolly Green]]''' || || || || || |
| | |- |
| | | style="width: 200px;" | [[File:Jolly Green.png|frameless|center|200px|link=[[Jolly Green]]]] || style="width: 200px;" | || style="width: 200px;" | || style="width: 200px;" | || style="width: 200px;" | || style="width: 200px;" | |
| |} | | |} |
|
| |
|
| {| class="wikitable" style="text-align: center; | | {| class="wikitable mw-collapsible mw-collapsed" style="text-align: center"; width="1280px;" |
| | scope="row" colspan="3" | '''Sandworm System'''
| | ! scope="row" colspan="7" style="text-align: left" | Sandworm System |
| |-
| |
| | scope="row" colspan="3" | [[Sandworm]] <br> [[File:Sandworm.png|frameless|120px|link=[[Sandworm]]]]
| |
| |- | | |- |
| | scope="row" colspan="1" | [[King Arthro]] <br> [[File:King Arthro.png|frameless|120px|link=[[King Arthro]]]] | | | '''[[Sandworm]]''' || '''[[King Arthro]]''' || '''[[Serket (Sandworm) | Serket]]''' || '''[[Guivre]]''' || || |
| ! scope="row" colspan="1" | [[Serket]] <br> [[File:Serket.png|frameless|120px|link=[[Serket]]]]
| |
| ! scope="row" colspan="1" | [[Guivre]] <br> [[File:Guivre.png|frameless|120px|link=[[Guivre]]]]
| |
| |- | | |- |
| | | style="width: 200px;" | [[File:Sandworm.png|frameless|center|200px|link=[[Sandworm]]]] || style="width: 200px;" | [[File:King Arthro.png|frameless|center|200px|link=[[King Arthro]]]] || style="width: 200px;" | [[File:Serket.png|frameless|center|200px|link=[[Serket (Sandworm)]]]] || style="width: 200px;" | [[File:Guivre.png|frameless|center|200px|link=[[Guivre]]]] || style="width: 200px;" | || style="width: 200px;" | |
| |} | | |} |