Escha - Zi'tah: Difference between revisions
Jump to navigation
Jump to search
mNo edit summary |
No edit summary |
||
| (17 intermediate revisions by 3 users not shown) | |||
| Line 1: | Line 1: | ||
Escha - Zi'Tah is the next step after [[ | Escha - Zi'Tah is the next step after High Tier Mission [[Battlefields]] and the Beastman Tribal leader [[HNM]]. The zone holds NM's in three tiers ranging from level 130 to 140. <br> | ||
== Entry Requirements == | |||
Be present for at least one kill on: | |||
* [[Kirin]] | |||
* [[Jailer of Love]] | |||
* All 5 Ark Angel fights (individually or Divine Might) | |||
* Gear tier for this zone should be 119+ | |||
== Map == | |||
[[File:Map of Escha - Zi'Tah.png|frameless|700px]] <br> | [[File:Map of Escha - Zi'Tah.png|frameless|700px]] <br> | ||
== NPCs == | |||
[[File:Affi.png|100px|frameless|link=[[Affi]]]] | [[File:Affi.png|100px|frameless|link=[[Affi]]]] | ||
[[Affi]] handles the pop items for T1 and T2 Geas Fete items. | [[Affi]] handles the pop items for T1 and T2 Geas Fete items. | ||
== Notorious Monsters == | |||
{| class="wikitable" style="text-align: center; | {| class="wikitable" style="text-align: center; | ||
! scope="row" colspan="4" | [[Fleetstalker]] <br> [[File:Fleetstalker.png|frameless|120px|link=[[Fleetstalker]]]] || scope="row" colspan="4" | [[Shockmaw]] <br> [[File:Shockmaw. | ! scope="row" colspan="4" | [[Fleetstalker]] <br> [[File:Fleetstalker.png|frameless|120px|link=[[Fleetstalker]]]] || scope="row" colspan="4" | [[Shockmaw]] <br> [[File:Shockmaw.jpg|frameless|120px|link=[[Shockmaw]]]] || scope="row" colspan="4" | [[Urmahlullu]] <br> [[File:Urmahlullu.png|frameless|120px|link=[[Urmahlullu]]]] | ||
|- | |- | ||
| scope="row" colspan="2" | [[ | | scope="row" colspan="2" | [[Sensual Sandy]] <br> [[File:Sensual Sandy.jpg|frameless|120px|link=[[Sensual Sandy]]]] || scope="row" colspan="2" | [[Ionos]] <br> [[File:Ionos.jpg|frameless|120px|link=[[Ionos]]]] || scope="row" colspan="2" | [[Brittlis]] <br> [[File:Brittlis.jpg|frameless|120px|link=[[Brittlis]]]] || scope="row" colspan="2" | [[Nosoi]] <br> [[File:Nosoi.jpg|frameless|120px|link=[[Nosoi]]]] || scope="row" colspan="2" | [[Umdhlebi]] <br> [[File:Umdhlebi.jpg|frameless|120px|link=[[Umdhlebi]]]] || scope="row" colspan="2" | [[Kamohoalii]] <br> [[File:Kamohoalii.jpg|frameless|120px|link=[[Kamohoalii]]]] | ||
|- | |- | ||
| [[Wepwawet]] <br> [[File:Wepwawet.png|frameless|120px|link=[[Wepwawet]]]] || [[Lustful Lydia]] <br> [[File:Lustful Lydia.png|frameless|120px|link=[[Lustful Lydia]]]] || [[Aglaophotis]] <br> [[File:Aglaophotis.png|frameless| | | [[Wepwawet]] <br> [[File:Wepwawet.png|frameless|120px|link=[[Wepwawet]]]] || [[Lustful Lydia]] <br> [[File:Lustful Lydia.png|frameless|120px|link=[[Lustful Lydia]]]] || [[Aglaophotis]] <br> [[File:Aglaophotis.png|frameless|110px|link=[[Aglaophotis]]]] || [[Tangata Manu]] <br> [[File:Tangata Manu.png|frameless|120px|link=[[Tangata Manu]]]] || [[Angrboda]] <br> [[File:Angrboda.png|frameless|110px|link=[[Angrboda]]]] || [[Revetaur]] <br> [[File:Revetaur.png|frameless|100px|link=[[Revetaur]]]] || [[Vidala]] <br> [[File:Vidala.png|frameless|110px|link=[[Vidala]]]] || [[Gestalt]] <br> [[File:Gestalt.png|frameless|100px|link=[[Gestalt]]]] || [[Cunnast]] <br> [[File:Cunnast.png|frameless|130px|link=[[Cunnast]]]] || [[Ferrodon]] <br> [[File:Ferrodon.png|frameless|125px|link=[[Ferrodon]]]] || [[Gulltop]] <br> [[File:Gulltop.png|frameless|115px|link=[[Gulltop]]]] || [[Vyala]] <br> [[File:Vyala.png|frameless|115px|link=[[Vyala]]]] | ||
|} | |} | ||
Latest revision as of 11:51, 14 August 2025
Escha - Zi'Tah is the next step after High Tier Mission Battlefields and the Beastman Tribal leader HNM. The zone holds NM's in three tiers ranging from level 130 to 140.
Entry Requirements
Be present for at least one kill on:
- Kirin
- Jailer of Love
- All 5 Ark Angel fights (individually or Divine Might)
- Gear tier for this zone should be 119+
Map

NPCs
 Affi handles the pop items for T1 and T2 Geas Fete items.
Notorious Monsters
Fleetstalker 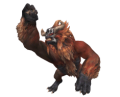 |
Shockmaw 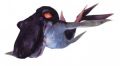 |
Urmahlullu 
| |||||||||
|---|---|---|---|---|---|---|---|---|---|---|---|
Sensual Sandy  |
Ionos 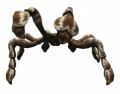 |
Brittlis  |
Nosoi  |
Umdhlebi  |
Kamohoalii 
| ||||||
Wepwawet  |
Lustful Lydia  |
Aglaophotis  |
Tangata Manu  |
Angrboda  |
Revetaur  |
Vidala  |
Gestalt  |
Cunnast  |
Ferrodon  |
Gulltop  |
Vyala 
|