Battlefields: Difference between revisions
mNo edit summary |
mNo edit summary |
||
| (192 intermediate revisions by 8 users not shown) | |||
| Line 1: | Line 1: | ||
== '''Notes''' == | |||
''' Trusts are allowed in battlefields. If you wish to use trusts in battlefields, you must call them after you enter the BCNM.''' | |||
== KSNM == | == KSNM == | ||
=== Low 5 ([[Shami|Clotho Orb]]) === | |||
*Maximum party size: 6 | |||
{| class="wikitable" | {| class="wikitable" | ||
! scope="row" colspan="1" | [[Legion XI]] || scope="row" colspan="1" | [[Wild Wild Whiskers]] || scope="row" colspan="1" | [[Prehistoric Pigeons]] || scope="row" colspan="1" | [[Double Draconian]] || scope="row" colspan="1" | [[Let Sleeping Dogs Lie]] | |||
! scope="row" colspan="1" | [[ | |||
|- | |- | ||
| [[File: | | [[File:Legion XI.jpg|frameless|center|120px|link=[[Legion XI]]]] || [[File:Wild Wild Whiskers.jpg|frameless|center|120px|link=[[Wild Wild Whiskers]]]] || [[File:Prehistoric Pigeons.jpg|frameless|center|120px|link=[[Prehistoric Pigeons]]]] || [[File:Double Dragonian.jpg|frameless|center|120px|link=[[Double Draconian]]]] || [[File:Hound.jpg|frameless|center|120px|link=[[Let Sleeping Dogs Lie]]]] | ||
|- | |- | ||
|} | |} | ||
=== High 5 ([[Shami|Lachesis Orb]]) === | |||
*Maximum party size: 6 | |||
{| class="wikitable" | {| class="wikitable" | ||
! scope="row" colspan="1" | [[Royal Succession]] || scope="row" colspan="1" | [[Eye of the Storm]] || scope="row" colspan="1" | [[Brothers Du'Arphe]] || scope="row" colspan="1" | [[Operation Desert Swarm]] || scope="row" colspan="1" | [[Eye of the Tiger]] | |||
! scope="row" colspan="1" | [[Royal Succession]] | |||
|- | |- | ||
| [[File:Royal Succession.png|frameless|center| | | [[File:Royal Succession.png|frameless|center|50px|link=[[Royal Succession]]]] || [[File:Eye of the Storm.jpg|frameless|center|120px|link=[[Eye of the Storm]]]] || [[File:Brothers D'Aurphe.jpg|frameless|center|120px|link=[[Brothers Du'Arphe]]]] || [[File:Operation Desert Swarm.jpg|frameless|center|120px|link=[[Operation Desert Swarm]]]] || [[File:Eye of the Tiger.jpg|frameless|center|120px|link=[[Eye of the Tiger]]]] | ||
|- | |- | ||
|} | |} | ||
=== Rogue 4 ([[Shami|Atropos Orb]]) === | |||
*Maximum party size: 3 | |||
{| class="wikitable" | |||
! scope="row" colspan="1" | [[Contaminated Colosseum]] || scope="row" colspan="1" | [[Infernal Swarm]] || scope="row" colspan="1" | [[Moa Constrictors]] || scope="row" colspan="1" | [[The Scarlet King]] | |||
|- | |||
| [[File:Contaminated Colosseum.PNG|frameless|center|200px|link=[[Contaminated Colosseum]]]] || [[File:Infernal Swarm.PNG|frameless|center|200px|link=[[Infernal Swarm]]]] || [[File:Moa Constrictors.PNG|frameless|center|200px|link=[[Moa Constrictors]]]] || [[File:The Scarlet King.PNG|frameless|center|200px|link=[[The Scarlet King]]]] | |||
|- | |||
|} | |||
=== Big 3 ([[Shami|Themis Orb]]) === | |||
*Maximum alliance size: 18 | |||
{| class="wikitable" | {| class="wikitable" | ||
! scope="row" colspan="1" | [[Early Bird Catches the Wyrm]] || scope="row" colspan="1" | [[Horns of War]] || scope="row" colspan="1" | [[Hills are Alive]] | |||
! scope="row" colspan="1" | [[Early Bird Catches the Wyrm]] | |||
|- | |- | ||
| [[File:Early Bird Catches the Wyrm.png|frameless|center| | | [[File:Early Bird Catches the Wyrm.png|frameless|center|200px|link=[[Early Bird Catches the Wyrm]]]] || [[File:Horns of War.png|frameless|center|200px|link=[[Horns of War]]]] || [[File:Hills are Alive.png|frameless|center|200px|link=[[Hills are Alive]]]] | ||
|- | |- | ||
|} | |} | ||
== Avatar Fights == | == Avatar Fights == | ||
=== Base Primals (Tuning Forks) === | |||
*Maximum party size: 6 | |||
{| class="wikitable" | |||
! scope="row" colspan="1" | [[Trial by Wind]] || scope="row" colspan="1" | [[Trial by Lightning]] || scope="row" colspan="1" | [[Trial by Ice]] | |||
|- | |||
| [[File:Trial By Wind.jpg|frameless|center|200px|link=[[Trial by Wind]]]] || [[File:Trial by Lightning.jpg|frameless|center|200px|link=[[Trial by Lightning]]]] || [[File:Trial by Ice.jpg|frameless|center|200px|link=[[Trial by Ice]]]] | |||
|- | |||
! scope="row" colspan="1" | [[Trial by Fire]] || scope="row" colspan="1" | [[Trial by Earth]] || scope="row" colspan="1" | [[Trial by Water]] | |||
|- | |||
| [[File:Trial by Fire.jpg|frameless|center|200px|link=[[Trial by Fire]]]] || [[File:Trial by Earth.jpg|frameless|center|200px|link=[[Trial by Earth]]]] || [[File:Trial by Water.jpg|frameless|center|200px|link=[[Trial by Water]]]] | |||
|- | |||
|} | |||
'''NOTES:''' <br> | |||
* The base 6 Prime Avatars require 7 fame to get their respective tuning forks. | |||
** Use the !capfame command to bypass the fame building process. | |||
** Alternatively, all methods for building fame available in BGWiki's [https://www.bg-wiki.com/ffxi/Fame#Quickest_Claim_To_Fame Quick Claim to Fame] guide should be functioning. | |||
* Once you kill an avatar, return to the quest giver to complete the quest. | |||
* On turn in of the quest, you are given a [[H-P Bayld|H-P Bayld Box]] as a reward in exchange for the Whisper key item. | |||
* Each avatar battlefield can be completed once per day, refreshing at JP midnight (10 AM MDT/11 AM MST). | |||
** '''The countdown to the next available Tuning Fork (JP midnight) only triggers ''after'' turning the quest in.'''<br> | |||
[https://www.bg-wiki.com/ffxi/Trial_by_Wind Trial by Wind Quest Info] <br> | |||
[https://www.bg-wiki.com/ffxi/Trial_by_Lightning Trial by Lightning Quest Info] <br> | |||
[https://www.bg-wiki.com/ffxi/Trial_by_Ice Trial by Ice Quest Info] <br> | |||
[https://www.bg-wiki.com/ffxi/Trial_by_Fire Trial by Fire Quest Info] <br> | |||
[https://www.bg-wiki.com/ffxi/Trial_by_Earth Trial by Earth Quest Info] <br> | |||
[https://www.bg-wiki.com/ffxi/Trial_by_Water Trial by Water Quest Info] | |||
=== Advanced Primals === | |||
*Maximum party size: 6 | |||
{| class="wikitable" | |||
! scope="row" colspan="1" | [[The Moonlit Path]] || scope="row" colspan="1" | [[Waking the Beast]] || scope="row" colspan="1" | [[Waking Dreams]] | |||
|- | |||
| [[File:The Moonlit Path.jpg|frameless|center|200px|link=[[The Moonlit Path]]]] || [[File:Waking the Beast.jpg|frameless|center|120px|link=[[Waking the Beast]]]] || [[File:Waking Dreams.jpg|frameless|center|250px|link=[[Waking Dreams]]]] | |||
|- | |||
|} | |||
=== Avatar Kings === | |||
*Maximum party size: 6 | |||
'''NOTE:''' Walk of Echoes can be accessed via Veridical Conflux in Selbina | |||
{| class="wikitable" | {| class="wikitable" | ||
! scope="row" colspan="1" | [[A Forbidden Reunion]] <br> || scope="row" colspan="1" | [[A Stygian Pact]] || scope="row" colspan="1" | [[Champion of the Dawn]] <br> | |||
! scope="row" colspan="1" | [[ | |- | ||
| [[File:Divine Interference.jpg|frameless|center|250px|link=[[Divine Interference]]]] || [[File:A Stygian Pact.jpg|frameless|center|250px|link=[[A Stygian Pact]]]] || [[File:Champion of the Dawn.jpg|frameless|center|250px|link=[[Champion of the Dawn]]]] | |||
|- | |- | ||
| [[ | ! scope="row" colspan="1" | [[The Wyrmking Descends]] || scope="row" colspan="1" | [[Maiden of the Dusk]] || scope="row" colspan="1" | [[Project Shantottofication]] | ||
|- | |||
| [[File:The Wyrmking Descends.png|frameless|center|250px|link=[[The Wyrmking Descends]]]] || [[File:Maiden of the dusk.png|frameless|center|250px|link=[[Maiden of the Dusk]]]] || [[File:Shantotto.png|frameless|center|200px|link=[[Project: Shantottofication]]]] | |||
|- | |- | ||
|} | |} | ||
== High Tier ([[Sagheera|Phantom Gems]]) == | |||
=== Ark Angels === | |||
*Maximum party size: 6 | |||
{| class="wikitable" | {| class="wikitable" | ||
! scope="row" colspan="1" | [[Ark Angel Mithra]] || scope="row" colspan="1" | [[Ark Angel Hume]] || scope="row" colspan="1" | [[Ark Angel Elvaan]] || scope="row" colspan="1" | [[Ark Angel Taru Taru]] || scope="row" colspan="1" | [[Ark Angel Galka]] | |||
! scope="row" colspan="1" | [[ | |||
|- | |- | ||
| [[File: | | [[File:Ark_Angel_Mithra.png|frameless|center|120px|link=[[Ark Angel Mithra]]]] || [[File:Ark_Angel_HM.png|frameless|center|120px|link=[[Ark Angel Hume]]]] || [[File:Ark_Angel_Elvaan.png|frameless|center|120px|link=[[Ark Angel Elvaan]]]] || [[File:Ark_Angel_Taru_Taru.png|frameless|center|120px|link=[[Ark Angel Taru Taru]]]] || [[File:Ark_Angel_Galka.png|frameless|center|120px|link=[[Ark Angel Galka]]]] | ||
|- | |- | ||
! scope="row" colspan="5" | [[Divine Might]] 119+ Alliance Content(Currently down for maintenance) | |||
|- | |||
| scope="row" colspan="5" | [[File:Divine Might.jpg|frameless|center|300px|link=[[Divine Might]]]] | |||
|} | |} | ||
=== Missions === | |||
*Maximum party size: 6 | |||
{| class="wikitable" | |||
! scope="row" colspan="1" | [[Return to Delkfutt's Tower]] || ! scope="row" colspan="1" | [[Shadow Lord]] || ! scope="row" colspan="1" | [[One to be Feared]] | |||
|- | |||
| [[File:Return to Delkfutt's Tower.jpg|frameless|center|180px|link=[[Return to Delkfutt's Tower]]]] || [[File:Shadow Lord.jpg|frameless|center|120px|link=[[Shadow Lord]]]] || [[File:One to be Feared.jpg|frameless|center|180px|link=[[One to be Feared]]]] | |||
|- | |||
! scope="row" colspan="1" | [[The Celestial Nexus]] <br> '''(•ˋ _ ˊ•) Closed for Maintenance (•ˋ _ ˊ•)''' || ! scope="row" colspan="1" | [[The Savage]] || ! scope="row" colspan="1" | [[The Warrior's Path]] | |||
|- | |||
| [[File:The Celestial Nexus.jpg|frameless|center|180px|link=[[The Celestial Nexus]]]] || [[File:The Savage 2.jpg|frameless|center|120px|link=[[The Savage]]]] || [[File:The Warrior's Path.png|frameless|center|180px|link=[[The Warrior's Path]]]] | |||
|- | |||
! scope="row" colspan="1" | [[Head Wind]] || ! scope="row" colspan="1" | [[Puppet in Peril]] || ! scope="row" colspan="1" | [[Legacy of the Lost]] <br> (Currently Unavailable) | |||
|- | |||
| [[File:Head Wind.jpg|frameless|center|200px|link=[[Head Wind]]]] || [[File:Puppet in Peril.jpg|frameless|center|200px|link=[[Puppet in Peril]]]] || [[File:Legacy of the Lost.jpg|frameless|center|200px|link=[[Legacy of the Lost]]]] | |||
|- | |||
! scope="row" colspan="3" | [[Dawn]] <br> (Currently Unavailable) | |||
|- | |||
| scope="row" colspan="3" | [[File:Dawn.jpg|frameless|center|300px|link=[[Dawn]]]] | |||
|} | |||
== ISNMs == | |||
*Maximum party size: 6 | |||
{| class="wikitable" | |||
! scope="row" rowspan="2" colspan="1" | Tier 1 || ! scope="row" colspan="1" | [[Call to Arms]] || ! scope="row" colspan="1" | [[Tough Nut to Crack]] || ! scope="row" colspan="1" | [[Making a Mockery]] | |||
|- | |||
| [[File:Call to Arms.PNG|frameless|center|180px|link=[[Call to Arms]]]] || [[File:Tough Nut to Crack.PNG|frameless|center|120px|link=[[Tough Nut to Crack]]]] || [[File:Making a Mockery.PNG|frameless|center|180px|link=[[Making a Mockery]]]] | |||
|- | |||
|} | |||
{| class="wikitable" | |||
! scope="row" rowspan="2" colspan="1" | Tier 2 || ! scope="row" colspan="1" | [[Compliments to the Chef]] || ! scope="row" colspan="1" | [[Shadows of the Mind]] || ! scope="row" colspan="1" | [[Happy Caster]] | |||
|- | |||
| [[File:Compliments to the Chef.PNG|frameless|center|180px|link=[[Compliments to the Chef]]]] || [[File:Shadows of the Mind.PNG|frameless|center|120px|link=[[Shadows of the Mind]]]] || [[File:Happy Caster.PNG|frameless|center|180px|link=[[Happy Caster]]]] | |||
|- | |||
|} | |||
== Daily Gil Roulette == | |||
Note: These are daily resets you just click the BCNM to run. They reset on entry, so if you lose, better luck tomorrow. | |||
=== Tier 3 === | |||
NOTE: Must have all Tier 2 Escha - Zi'Tah kill counters. | |||
{| class="wikitable" | |||
! scope="row" colspan="1" | [[Breaking the Bonds of Fate]] <br> EASY - 500,000 gil || ! scope="row" colspan="1" | [[Achieving True Power]] <br> MEDIUM - 600,000 gil || ! scope="row" colspan="1" | [[The Beast Within]] <br> HARD - 700,000 gil | |||
|- | |||
| [[File:Qultada.png|frameless|center|170px|link=[[Breaking the Bonds of Fate]]]] || [[File:Shamarhaan.png|frameless|center|226px|link=[[Achieving True Power]]]] || [[File:Raubahn.png|frameless|center|220px|link=[[The Beast Within]]]] | |||
|- | |||
|} | |||
=== Tier 2 === | |||
NOTE: Must have cleared Kirin and JoL | |||
{| class="wikitable" | |||
! scope="row" colspan="1" | [[Holy Cow]] <br> EASY - 250K || ! scope="row" colspan="1" | [[Bionic Bug]] <br> MEDIUM - 300,000 gil || ! scope="row" colspan="1" | [[Brothers]] <br> HARD - 350,000 gil | |||
|- | |||
| [[File:apis.png|frameless|center|220px|link=[[Holy Cow]]]] || [[File:bugboy.png|frameless|center|235px|link=[[Bionic Bug]]]] || [[File:brothers.png|frameless|center|300px|link=[[Brothers]]]] | |||
|- | |||
|} | |||
=== Tier 1 === | |||
NOTE: Open to all players | |||
{| class="wikitable" | |||
! scope="row" colspan="1" | [[Follow the White Rabbit]] <br> EASY - 100,000 gil || ! scope="row" colspan="1" | [[When Hell Freezes Over]] <br> MEDIUM - 150,000 gil || ! scope="row" colspan="1" | [[Flames for the Dead]] <br> Hard - 200,000 gil | |||
|- | |||
| [[File:Bearclaw_rabbit.png|frameless|center|300px|link=[[Follow the White Rabbit]]]] || [[File:snow_devil.png|frameless|center|220px|link=[[When Hell Freezes Over]]]] || [[File:Snoll_tzar.png|frameless|center|260px|link=[[Flames for the Dead]]]] | |||
|- | |||
|} | |||
== Sinister Reign == | |||
NOTE : Key items for entry is obtained by speaking to Malobra in RaKaznar Inner Courts after obtaining 10k bayld from Rala Waterways.<br> | |||
NOTE : These are set up over top of Rank 2 mission battlefields, so ignore the cutscenes. | |||
{| class="wikitable" | {| class="wikitable" | ||
! scope="row" colspan="1" | [[Sinister Reign: Balga's Dais]] | |||
! scope="row" colspan="1" | [[ | |||
|- | |- | ||
| [[File: | | [[File:Sinister Reign Balgas Dais.png|frameless|center|1066px|link=[[:Sinister Reign: Balga's Dais]]]] | ||
|- | |- | ||
|} | |} | ||
{| class="wikitable" | {| class="wikitable" | ||
! scope="row" colspan="1" | [[Sinister Reign: Horlais Peak]] | |||
! scope="row" colspan="1" | [[ | |||
|- | |- | ||
| [[File: | | [[File:Sinister Reign Horlais Peak.png|frameless|center|1066px|link=[[Sinister Reign: Horlais Peak]]]] | ||
|- | |- | ||
|} | |} | ||
{| class="wikitable" | {| class="wikitable" | ||
! scope="row" colspan="1" | [[Sinister Reign: Waughroon Shrine]] | |||
! scope="row" colspan="1" | [[ | |||
|- | |- | ||
| [[File: | | [[File:Sinister Reign Waughroon Shrine.png|frameless|center|1066px|link=[[Sinister Reign: Waughroon Shrine]]]] | ||
|- | |- | ||
|} | |} | ||
Latest revision as of 06:38, 22 October 2026
Notes
Trusts are allowed in battlefields. If you wish to use trusts in battlefields, you must call them after you enter the BCNM.
KSNM
Low 5 (Clotho Orb)
- Maximum party size: 6
| Legion XI | Wild Wild Whiskers | Prehistoric Pigeons | Double Draconian | Let Sleeping Dogs Lie |
|---|---|---|---|---|
 |
 |
 |
 |
 |
High 5 (Lachesis Orb)
- Maximum party size: 6
| Royal Succession | Eye of the Storm | Brothers Du'Arphe | Operation Desert Swarm | Eye of the Tiger |
|---|---|---|---|---|
 |
 |
 |
 |
 |
Rogue 4 (Atropos Orb)
- Maximum party size: 3
| Contaminated Colosseum | Infernal Swarm | Moa Constrictors | The Scarlet King |
|---|---|---|---|
 |
 |
 |
 |
Big 3 (Themis Orb)
- Maximum alliance size: 18
| Early Bird Catches the Wyrm | Horns of War | Hills are Alive |
|---|---|---|
 |
 |
 |
Avatar Fights
Base Primals (Tuning Forks)
- Maximum party size: 6
| Trial by Wind | Trial by Lightning | Trial by Ice |
|---|---|---|
 |
 |
 |
| Trial by Fire | Trial by Earth | Trial by Water |
 |
 |
 |
NOTES:
- The base 6 Prime Avatars require 7 fame to get their respective tuning forks.
- Use the !capfame command to bypass the fame building process.
- Alternatively, all methods for building fame available in BGWiki's Quick Claim to Fame guide should be functioning.
- Once you kill an avatar, return to the quest giver to complete the quest.
- On turn in of the quest, you are given a H-P Bayld Box as a reward in exchange for the Whisper key item.
- Each avatar battlefield can be completed once per day, refreshing at JP midnight (10 AM MDT/11 AM MST).
- The countdown to the next available Tuning Fork (JP midnight) only triggers after turning the quest in.
- The countdown to the next available Tuning Fork (JP midnight) only triggers after turning the quest in.
Trial by Wind Quest Info
Trial by Lightning Quest Info
Trial by Ice Quest Info
Trial by Fire Quest Info
Trial by Earth Quest Info
Trial by Water Quest Info
Advanced Primals
- Maximum party size: 6
| The Moonlit Path | Waking the Beast | Waking Dreams |
|---|---|---|
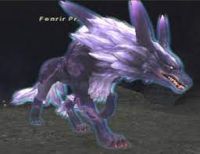 |
 |
 |
Avatar Kings
- Maximum party size: 6
NOTE: Walk of Echoes can be accessed via Veridical Conflux in Selbina
| A Forbidden Reunion |
A Stygian Pact | Champion of the Dawn |
|---|---|---|
 |
 |
 |
| The Wyrmking Descends | Maiden of the Dusk | Project Shantottofication |
 |
 |
 |
High Tier (Phantom Gems)
Ark Angels
- Maximum party size: 6
| Ark Angel Mithra | Ark Angel Hume | Ark Angel Elvaan | Ark Angel Taru Taru | Ark Angel Galka |
|---|---|---|---|---|
 |
 |
 |
 |
 |
| Divine Might 119+ Alliance Content(Currently down for maintenance) | ||||
 | ||||
Missions
- Maximum party size: 6
| Return to Delkfutt's Tower | Shadow Lord | One to be Feared |
|---|---|---|
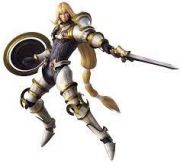 |
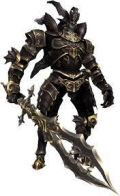 |
 |
| The Celestial Nexus (•ˋ _ ˊ•) Closed for Maintenance (•ˋ _ ˊ•) |
The Savage | The Warrior's Path |
 |
 |
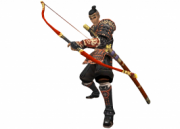 |
| Head Wind | Puppet in Peril | Legacy of the Lost (Currently Unavailable) |
 |
 |
 |
| Dawn (Currently Unavailable) | ||
 | ||
ISNMs
- Maximum party size: 6
| Tier 1 | Call to Arms | Tough Nut to Crack | Making a Mockery |
|---|---|---|---|
 |
 |
 |
| Tier 2 | Compliments to the Chef | Shadows of the Mind | Happy Caster |
|---|---|---|---|
 |
 |
 |
Daily Gil Roulette
Note: These are daily resets you just click the BCNM to run. They reset on entry, so if you lose, better luck tomorrow.
Tier 3
NOTE: Must have all Tier 2 Escha - Zi'Tah kill counters.
| Breaking the Bonds of Fate EASY - 500,000 gil |
Achieving True Power MEDIUM - 600,000 gil |
The Beast Within HARD - 700,000 gil |
|---|---|---|
 |
 |
 |
Tier 2
NOTE: Must have cleared Kirin and JoL
| Holy Cow EASY - 250K |
Bionic Bug MEDIUM - 300,000 gil |
Brothers HARD - 350,000 gil |
|---|---|---|
 |
 |
 |
Tier 1
NOTE: Open to all players
| Follow the White Rabbit EASY - 100,000 gil |
When Hell Freezes Over MEDIUM - 150,000 gil |
Flames for the Dead Hard - 200,000 gil |
|---|---|---|
 |
 |
 |
Sinister Reign
NOTE : Key items for entry is obtained by speaking to Malobra in RaKaznar Inner Courts after obtaining 10k bayld from Rala Waterways.
NOTE : These are set up over top of Rank 2 mission battlefields, so ignore the cutscenes.
| Sinister Reign: Balga's Dais |
|---|
 |
| Sinister Reign: Horlais Peak |
|---|
 |
| Sinister Reign: Waughroon Shrine |
|---|
 |